How to Make Yummy Grilled Cheese on Gluten Free Bread (and Tomato Soup)

I’m pretty new to eating gluten free, but the longer I maintain this diet, the easier it gets and the better I feel. I have more energy, I feel healthier, and I make better food choices, especially when it comes to snacks.

IMG_1320

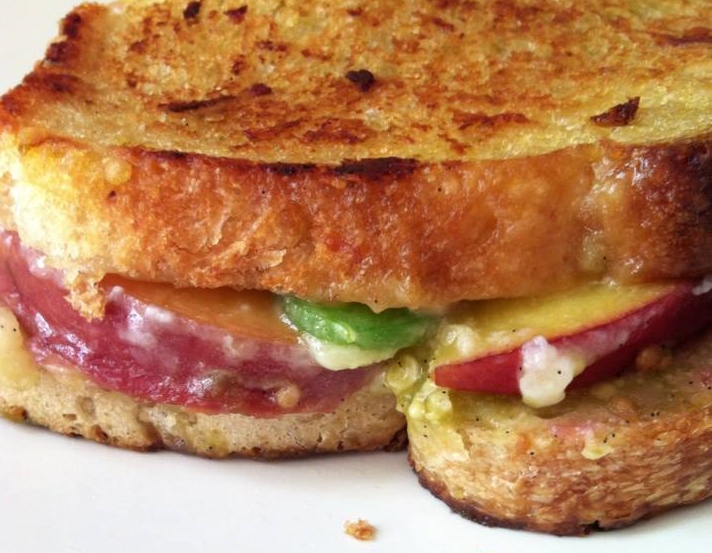
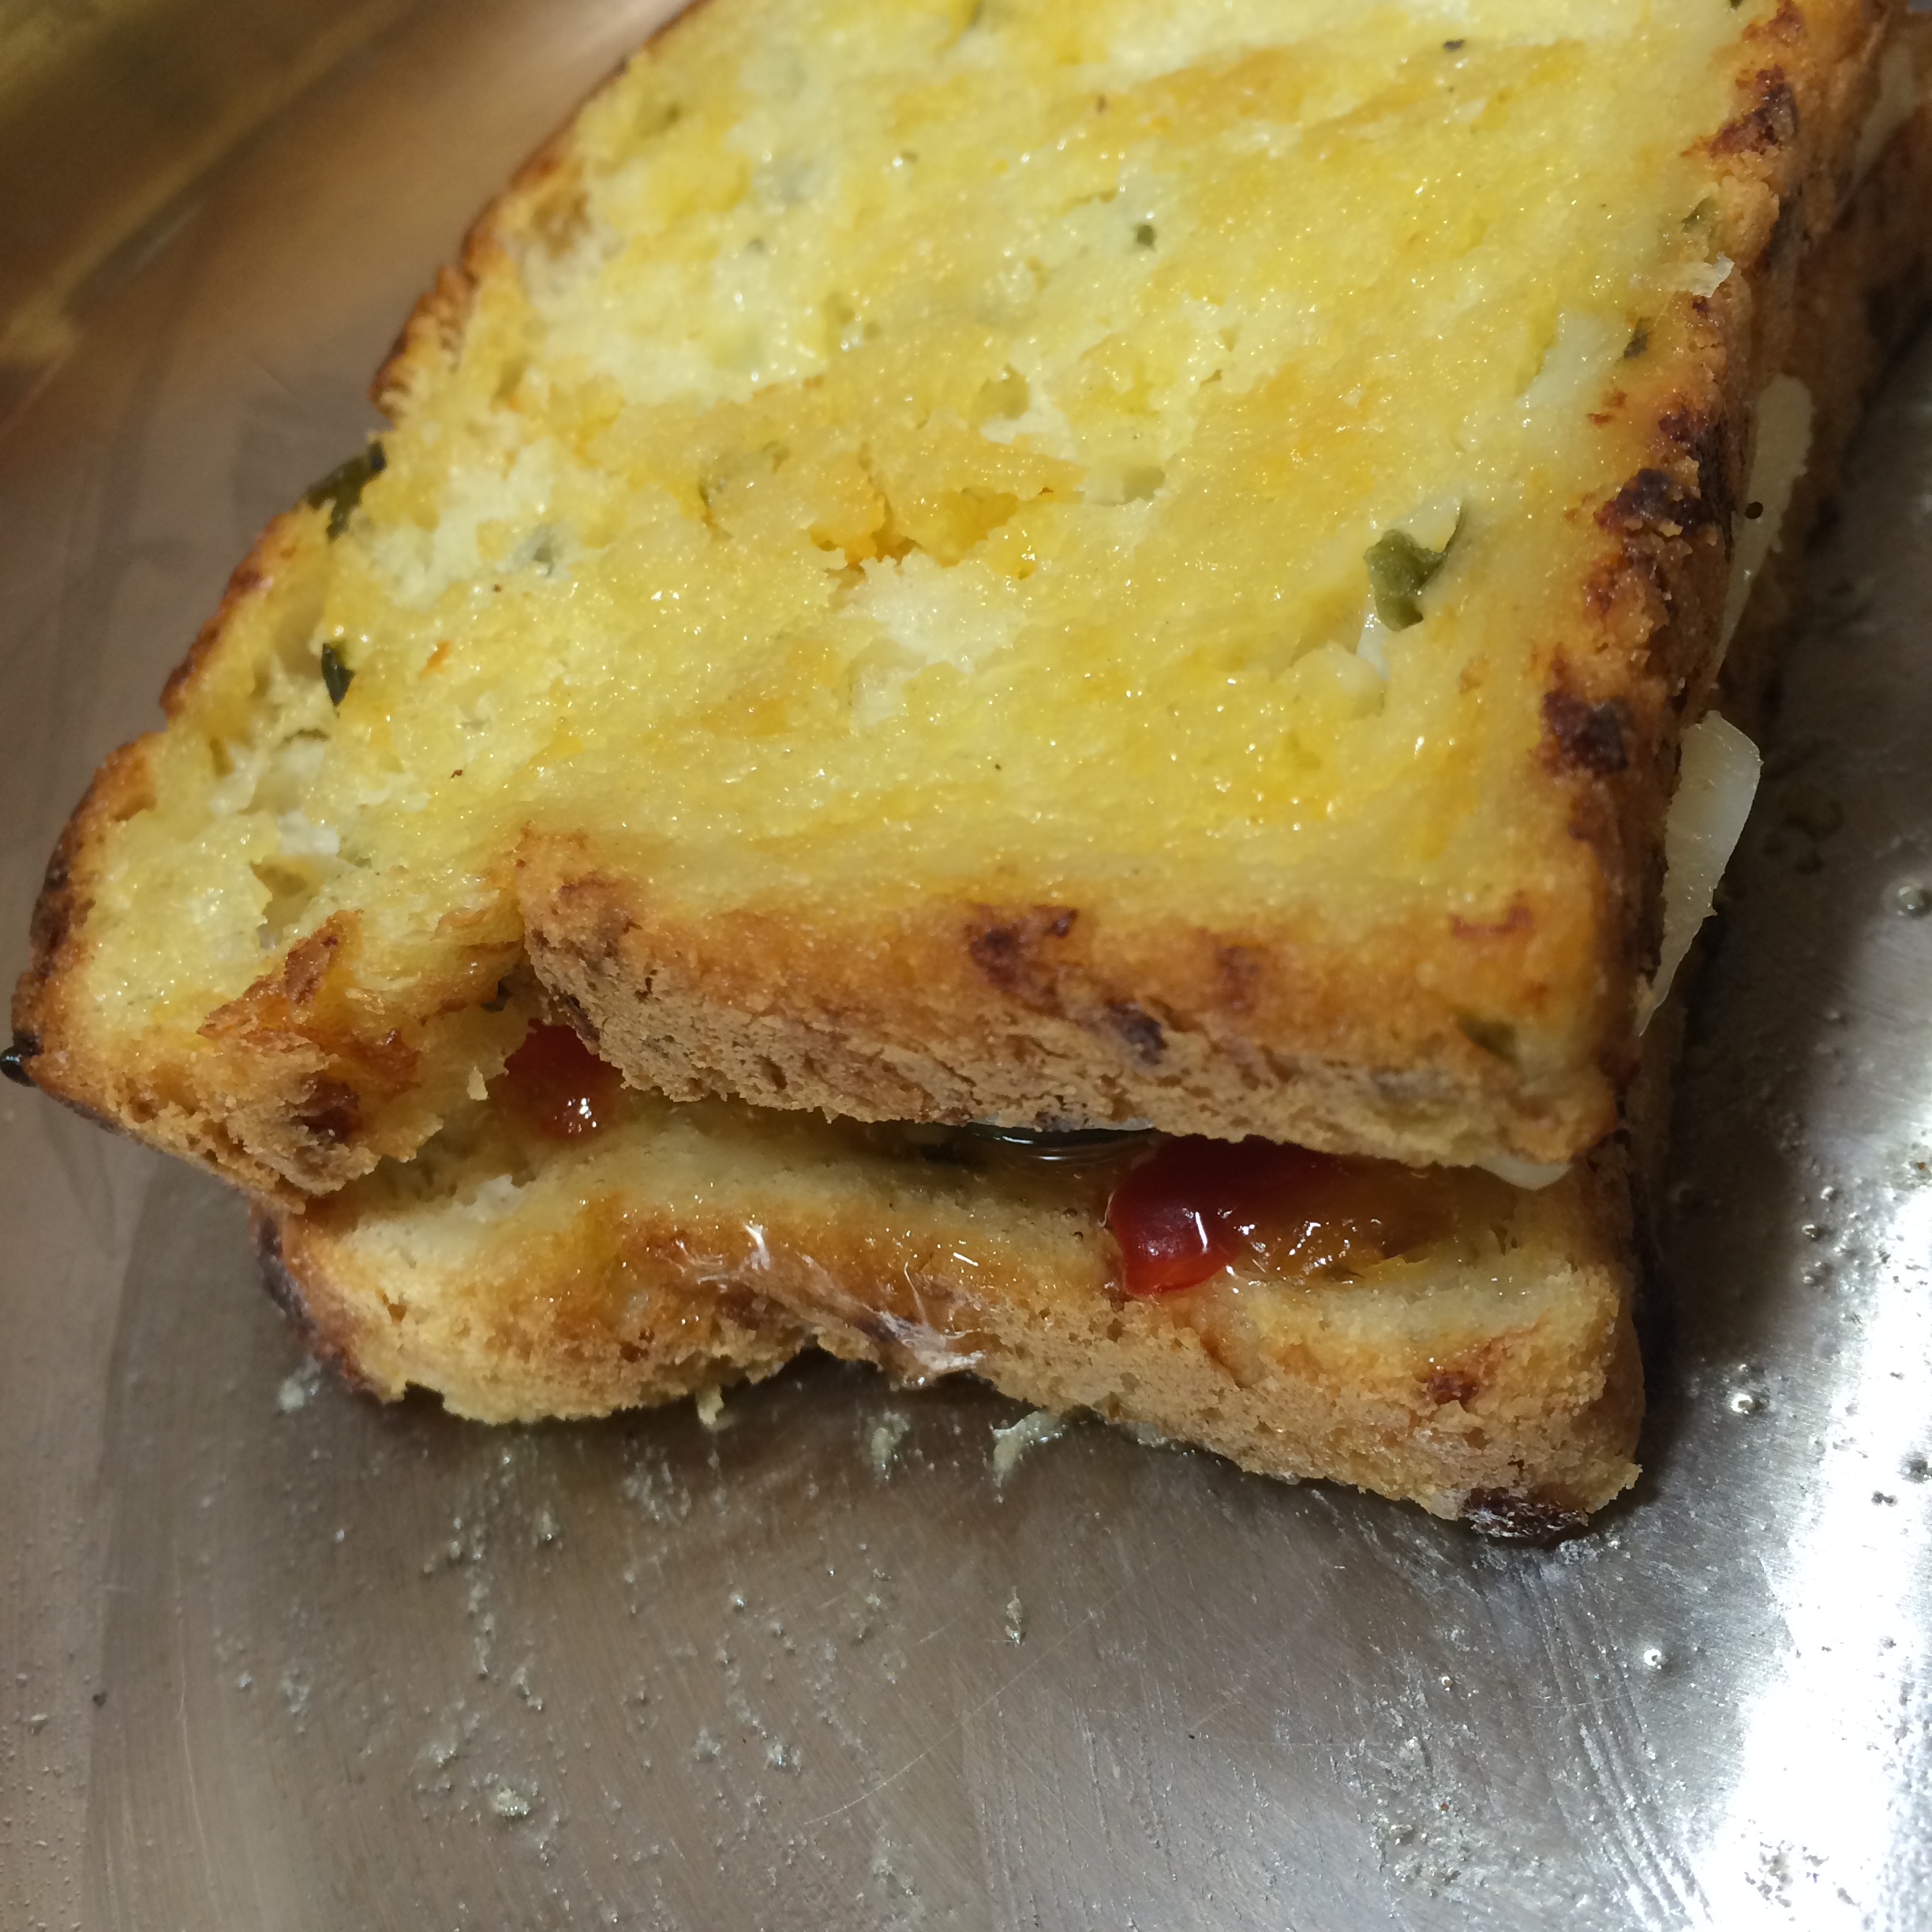
But as anyone who has eaten gluten free bread knows, it’s not quite the same. It doesn’t hold together as well, and it doesn’t toast the same way as regular bread. But it still makes a decent grilled cheese. I served it with this delicious tomato soup.

I’m sharing this recipe because I’ve decided this is the best way to make a grilled cheese on gluten free bread. Putting the cheese on both sides of the bread really seemed to help keep it all together. And the cheese kind of oozed out of the bread and toasted onto the outside, which ended up being just marvelous. Plus, the tomato soup is amazing. So there’s that.

What You Need for the Grilled Cheese:

  • 2 slices regular or gluten free bread
  • Enough butter, softened, to cover one side of each slice of bread
  • 10 thin slices of your favorite cheddar cheese
  • 2 slices tomato
  • 2-3 avocado slices, mashed into a spread
  • 1/4 tsp crushed red pepper flakes

IMG_1319

What You Need for the Tomato Soup:

  • 12 plum tomatoes
  • 4 cloves garlic, peeled and roughly chopped
  • 1/2 large yellow onion, sliced
  • 1 tsp dried thyme leaves
  • 1 tsp ground sage

What You Do to Make the Grilled Cheese:

Heat a medium skillet on low-medium.

Butter the bread sides and prepare cheese slices, tomato and avocado before placing the bottom slice in the pan.

Place cheese sliced on the bread in one single layer that covers the bread surface.

Place the tomato slices on the cheese.

Next, spread the mashed avocado and sprinkle the crushed red pepper on top so it sticks.

Press down another layer of cheese slices on top of the avocado and cover with the top bread slice.

Slowly cook, flipping often because the bread will stick easily to the pan. Add more butter if necessary. Remove from heat when the sandwich is lightly toasted and the cheese is melted (mine didn’t fully melt but I couldn’t keep the bread on the stove any longer).

IMG_1317

What You Do to Make the Tomato Soup:

Preheat oven to 400F

Halve the plum tomatoes and layer them in a large baking dish.

Add onion slices and garlic between each layer of tomatoes and over the top.

Cover and bake for 45-60 minutes, or until the tomatoes are soft and pinched with the skin broken, and the juices bubbling.

Place everything in a food processor and pulse until it is roughly blended and thick.

Pour into a large bowl and stir in the thyme and sage. Serve alongside the grilled cheese and enjoy!


Advertisement

Gourmet Beet and Black Bean Burgers

I feel like it’s tough to be a person who loves beets.

Burger (3)

When I decide to open up about my feelings, people typically take the opportunity to let me know that they couldn’t disagree more.

“They taste like dirt,” I’m told.

Well I guess I must like eating dirt. Because I canNOT get enough of beets and their stain-red goodness.

Because this is a cooking blog and you probably wouldn’t get much enjoyment out of a post about me eating beets and goat cheese in front of the TV, I realized I had to up my beet game.

Beet Burgers (1)

So this isn’t a beet smoothie recipe, and it’s not a how-to guide for eating cooked beets topped with goat cheese on a cracker while watching How I Met Your Mother.

No, this recipe is a fabulous mix of black beans, goat cheese, oatmeal and spices that is so tasty even my husband (who wasted no time letting me know his less-than-favorable feelings about beets) is eating them.

What You Need:

  • 2 large beets peeled and grated (about 2 cups total)
  • 1 cup steel-cut oatmeal (gluten free if you wish)
  • 1 12oz can black beans drained and rinsed
  • 1/2 red onion, finely chopped
  • 1 small shallot, finely chopped
  • 1 clove garlic, minced
  • 1/2 jalapeno, sliced (optional)
  • 4oz creamy goat cheese
  • 1 tsp paprika
  • 1 tsp cayenne pepper
  • 1 tsp ground basil leaves or fresh basil finely chopped
  • 1 tbsp olive oil

What You Do:

Place the oatmeal, black beans, onion, shallot, garlic, jalapeno and spices in a food processor and pulse until just mixed. You don’t want to puree it but make sure all ingredients are combined and it has a good texture.

In a large bowl, knead the mixture (with a spoon or your hands), gradually adding in the goat cheese and beets.

Keep mixing until everything is combined.

At this point, it should have a thick consistency and stick together very well.

In a large skillet, heat your oil on medium.

Form the beet mixture into burger-shaped patties (about 3/4-inch thick) and place into the oil. They should sizzle when placed in the pan.

Let the patties cook about 1.5 minutes on each side, or until they get crispy on the outside. Add a bit more oil if they stick at all to the pan.

I served my beet burgers on lightly toasted Ciabatta with a slice of tomato, 2 thin avocado slices and a bed of lettuce.

Beet Burgers (9)     Beet Burgers (8)

Of course, no burger is complete without a succulent sauce to pour on top. It took me a bit to come up with a good sauce option that would pair well with beets, but I actually came up with a few (below). If you don’t want to spend extra time making a sauce, go into your fridge. BBQ sauce works great, as does salad dressing – I recommend a roasted red pepper, Italian or balsamic dressing.

  • Plain Greek Yogurt with Dill: Simply take a half cup of yogurt, dice about a tablespoon of fresh dill, and mix. Dollop onto burgers before serving.
  • Herbed Goat Cheese Sauce: Mash 4oz creamy goat cheese in a bowl (you might have leftover cheese from the burger recipe). Bring 1 cup milk, 1 tsp ground basil, 1 tsp garlic and a dash of salt and pepper to a boil in a small saucepan. Pour milk mixture over mashed cheese and stir until combined. Re-boil the entire sauce, stirring until thickened. Pour about a tablespoon over burger and toppings.
  • Ginger Chili Crema: (Alert: This takes a long time). Heat (but don’t boil) 1 cup heavy cream in a small saucepan. Pour into a glass jar with a tightly-fitting lid and add 1 tbsp buttermilk. Let sit for up to 24 hours until cream thickens. Stir in 1 tsp ground ginger and 2 tbsp diced chilies. Reseal the lid and refrigerate for 24 hours. Stir well before dolloping on your burger.

Burger (2)

Crock Pot BBQ Pulled Chicken

In New England, there’s a funny thing that happens to everyone when summer fades, the fall leaves all hit the ground and winter’s unmistakable bite is in the air.

Everyone gets upset.

“Ugh, it’s going to SNOW soon.”

“Not looking forward to snow, that’s for sure.”

“I can’t get used to this. What happened to summer?!?”

Well I’ll tell you what happened to summer. The seasons changed, just like they do every year, and now it’s winter.

It’s because of the general unhappiness about this well-known tradition in weather patterns that most people think I’m nuts for not regarding it with the same disdain.

But honestly all I can think about is winter cooking. It’s kind of like rediscovering your sweater collection after a summer of wearing dresses and shorts. It feels new and exciting and full of possibilities (I really like sweaters).

Squash Chicken (10)

Out comes the crock pot. Slow cooking delicious veggies and meats all day long is one of the absolute best things about winter. Especially after a long, cold day hiking or snowshoeing, it’s all I can think about.

This pulled chicken dish was inspired by my recent trip to Syracuse, NY for a race. While there, my running travel buddy Kate and I went to Dinosaur Bar-B-Que, which is well-known for its authentic BBQ – and for good reason. It was a truly amazing meal.

Squash Chicken (6)

I actually found Dinosaur BBQ bottled sauce at our local grocery store (that’s how famous it is), so even though it’s not pulled pork, this dish is still slathered in mouth-watering, lip-smackingly sweet and savory sauce that you’ll dream about when it’s gone.

What You Need:

  • One whole chicken. Size doesn’t matter too much, as long as it’ll fit in your crock pot
  • 1 yellow onion (or half a yellow and half a red, like I did)
  • 1 1/2 cups vegetable broth
  • 1 1/2 tsp fresh ground black pepper
  • 1 jar of your favorite BBQ sauce – look for Dinosaur BBQ!

What You Do:

Slice the onion and lay the slices on the bottom of the crock pot, creating a bed on which the chicken will lie. This helps insulate the heat and keep the chicken from over cooking in one area over another.

So I skinned the chicken (messy business) and trimmed off some of the fat before I put it in the crock pot. If you like the skin, that’s up to you. It’ll save some time to leave it on, for sure. Just make sure to empty the insides. If you’ve ever made a Thanksgiving turkey, it’s the same deal.

Squash Chicken (1)                    Squash Chicken (2)

Place the whole chicken over the bed of onions. Pour the vegetable broth over the whole thing, and then sprinkle with pepper.

Place the lid on there and set on high for 4 hours, or low for 6.

A good way to test if the chicken is “pulled chicken-ready” is to try pulling off a leg or something. If it pulls right off the bone, you’re good to go.

Using two large wooden spoons, lift the chicken out of the crock pot and place on a large cutting board. VERY CAREFULLY pull the meat apart, separating it into a large bowl. Pull out any and all bones you find. Some will be big and obvious, but there are a multitude of smaller, more hidden bones and/or hard cartilage parts that will make a giant mouthful of pulled chicken sandwich suddenly more of an ordeal than it should be.

Squash Chicken (3)

Once you have separated the meat from the bones and pulled out all the bones you can find, use a fork to break it up further. I then used my hand to sift through the pulled chicken to double-check all the bones and hard part had been removed. This is a critical step so be extra careful.

Then, add your BBQ sauce! Be liberal and mix it around well with your fork.

Serve on two pieces of toasted bread and, of course, add more BBQ sauce if the mood strikes you!


Pro-Tip: Don’t mash too hard with the fork. Pulled chicken is pulled chicken, not chicken salad! 🙂

Squash Chicken (13)

Greek Yogurt Chicken Salad Lettuce Wraps

Yogurt Chicken (14)

I love guilt-free dinners more than probably anything. It justifies me eating more of it than is likely acceptable, and topping off that meal with a hefty portion of Ben & Jerry’s Late Night Snack. If you haven’t tried that kind, but have a potential affinity for chocolate-covered potato chips enveloped in vanilla ice cream and creamy caramel, then go pick a pint up right now. I’m not kidding.

Anyways, back to the food.

Yogurt Chicken (8)

This is super good. And if you don’t want to eat your sandwich fillings between crispy lettuce leaves, just use bread and put the lettuce on as a topping. BUT IT’S NOT AS FUN! 🙂

Yogurt Chicken (11)

What You Need:

  • 6-8 large, full Romaine lettuce leaves
  • 6-8 thin boneless chicken breasts
  • 1/4 cup chopped pecans
  • 1/2 cup chopped dried cranberries
  • 1 cup chopped celery
  • 1/2 cup chopped scallions
  • 1 1/2 tbsp chopped fresh tarragon
  • 1 1/2 cups plain Greek yogurt
  • 1/2 tsp salt
  • 1 tsp fresh ground black pepper

What You Do:

Cook the chicken in a medium pan with a tbsp of olive oil, covered, flipping after 5 minutes. Remove when cooked through and while it’s still moist – we don’t want dry chicken!

Slice and chop the chicken into tiny pieces. Put in a large bowl. Yogurt Chicken (7)

In a small saucepan on low heat, slowly toast the pecans, stirring in the pan frequently to keep them moving and keep them from burning. They’ll start to smell pretty pungent when they’re almost done. Be careful not to burn them.

Add the pecans, chopped cranberries, celery, scallions, salt and pepper to the chicken and mix thoroughly.

Add Greek yogurt and mix well.

Add the tarragon and mix well.

Place on lettuce leaves and wrap, and enjoy!


Pro Tip: Add a dab of honey mustard before wrapping these babies up for a little zing.


Grilled Cheese with Green Tomato Ginger Vanilla Jam, Brie and Peach Slices

Grilled Cheese

The whole thing started with this BuzzFeed article titled “40 Amazing Grilled Cheese Sandwich Recipes.” I clicked on it at work at something like 10:22am, knowing full well what I was getting into. Breakfast had faded to a distant memory at that point, but lunch was just out of reach – that is if I was going to exercise reasonable food consumption that day, which was my (original) intention.

The first grilled cheese on the list is Grilled Mac N Cheese with BBQ Pulled Pork, accompanied by a mouth-watering photo. The second is Bartlett Pear Grilled Cheese, and the equally crave-inducing photo shows melty cheese clinging to bread and slices of pear. The third featured jalapeno slices and cream cheese.

That did it. I suddenly became acutely aware of the depth of hunger I was feeling. I started scrolling through the remaining 37 (37!) grilled cheese recipes with a fervor that would only have been appropriate if my computer was going to self-destruct in a matter of seconds. The photos of oozy cheesy goodness filled the screen. Apple Cinnamon Swirl Grilled Cheese. Garlic Confit and Baby Arugula Grilled Cheese (What is confit?! I don’t care!). Grilled Beer and Cheese Sandwich. Grilled Cheese and Fried Egg.

“Beer?!” I whispered at my computer, incredulous. Then, “Fried egg?! Wow.”

Needless to say, I went home  inspired (and starving). I raided my fridge, determined to make my own grilled cheese masterpiece.

The green tomato jam I used was (luckily)  lying in wait in my freezer. Making it from scratch is a tiny bit involved and it’s best with 24 hours of refrigeration time before use. I put the recipe below because it really is tasty, but I do think you could swap it out for another jam of your choice. If you do experiment, tell me what you did and if it worked!

60603_10100433534285721_467589289_n

Green Tomato Jam Ingredients

  • 4 cups diced green tomatoes
  • 1 vanilla bean, sliced down the middle
  • 2” piece of fresh ginger, peeled and minced
  • 2 tbsp fresh lemon juice
  • 1 1/2 cups sugar

In a medium pot, cook all ingredients on medium-high heat until the tomatoes begin to look translucent.  Then slowly bring to a boil for 2-3 minutes or until the mixture thickens. Remove from heat and jar in mason or jelly jars.  Refrigerate for 24 hours before use.

Green Tomato Jam, Peach and Brie Grilled Cheese Ingredients

  • 2 slices of bread (I used a honey wheat sourdough)
  • Slices of brie (amount of cheese is at your discretion)
  • Thin slices of peach (I kept the skin on)
  • Green Tomato Vanilla Bean Ginger Jam
  • Jalapeno slices (optional)

Spread one side of each slice of bread with butter. Spread a generous layer of jam on one slice of bread. Top with peach slices, jalapeno slices, and brie, in that order. In a small pan, grill SLOWLY (it’s worth the wait!) flipping over every 3 minutes or so until golden brown and melty cheesy.

Pro-tip: Dip the corners of any and all grilled cheeses in a tiny bit of spicy dijon mustard with each bite.