Zesty Honey-Lime Cauliflower Rice

Admittedly, I’m still on a not-so-silent crusade to get a cat.

IMG_2106

A large part of my job is to poke around the Internet for cat and dog videos, memes and stories, and occasionally I come across the right cat video to make me swoon. Then I promptly text Mike to once again ask if we can get a cat, at which time he promptly says absolutely not.

IMG_2103

I’m wearing him down slowly, I can feel it. Madison will be a whole other story, because she has no love for cats and thinks they’re all squirrels she can torture. That would certainly make for some good videos though.

#catsmakeeverythingbetter.

I may not have a cat, but I have this cauliflower rice dish, which is going to be just enough, for now.

IMG_2096

What You Need:

  • 1 medium head cauliflower, florets and stems chopped off
  • 1 tbsp olive oil
  • 2 small garlic cloves, minced
  • 1/4 cup scallions, chopped
  • 2 tbsp lime juice
  • 1/4 cup freshly chopped cilantro
  • 1/4 cup very finely chopped pistachios
  • 1/2 tbsp honey
  • 2 scallions, whole

What You Do:

IMG_2101

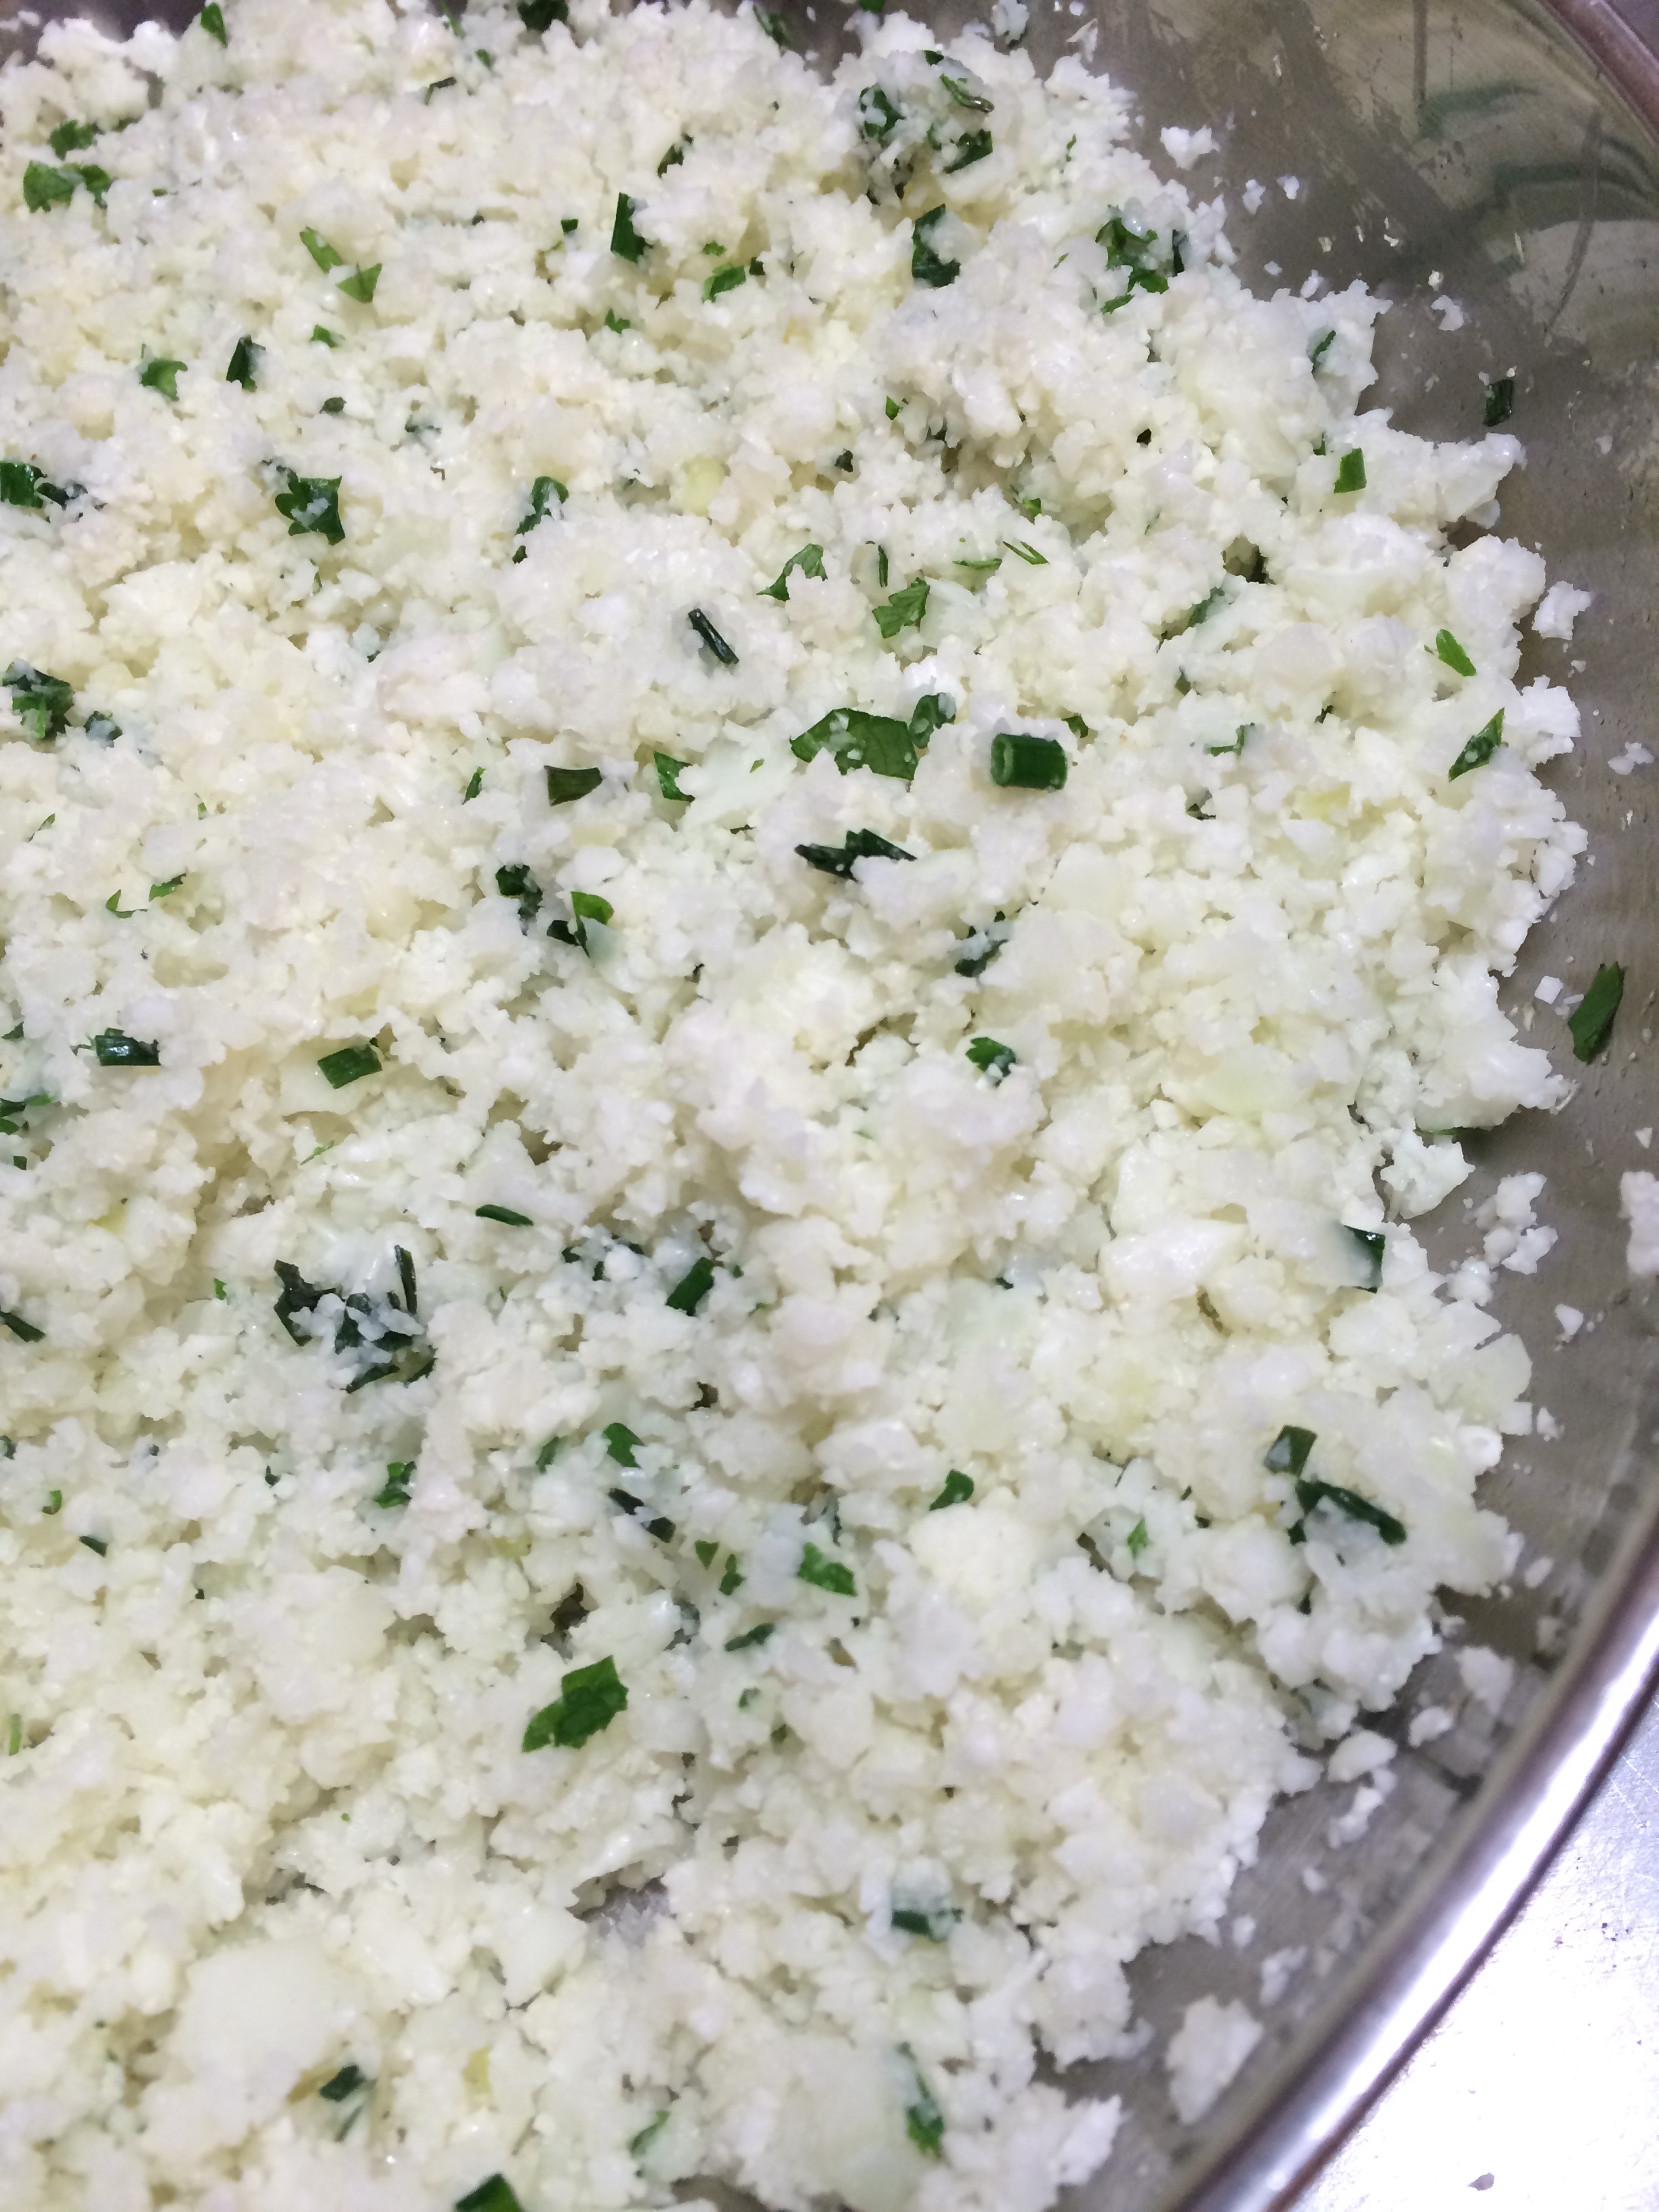
Put the cauliflower into a food processor and pulse until the cauliflower becomes a rice-like texture.

In a large bowl, combine the rice, olive oil, minced garlic, scallions, lime juice, cilantro and pistachios, stirring well to fully combine.

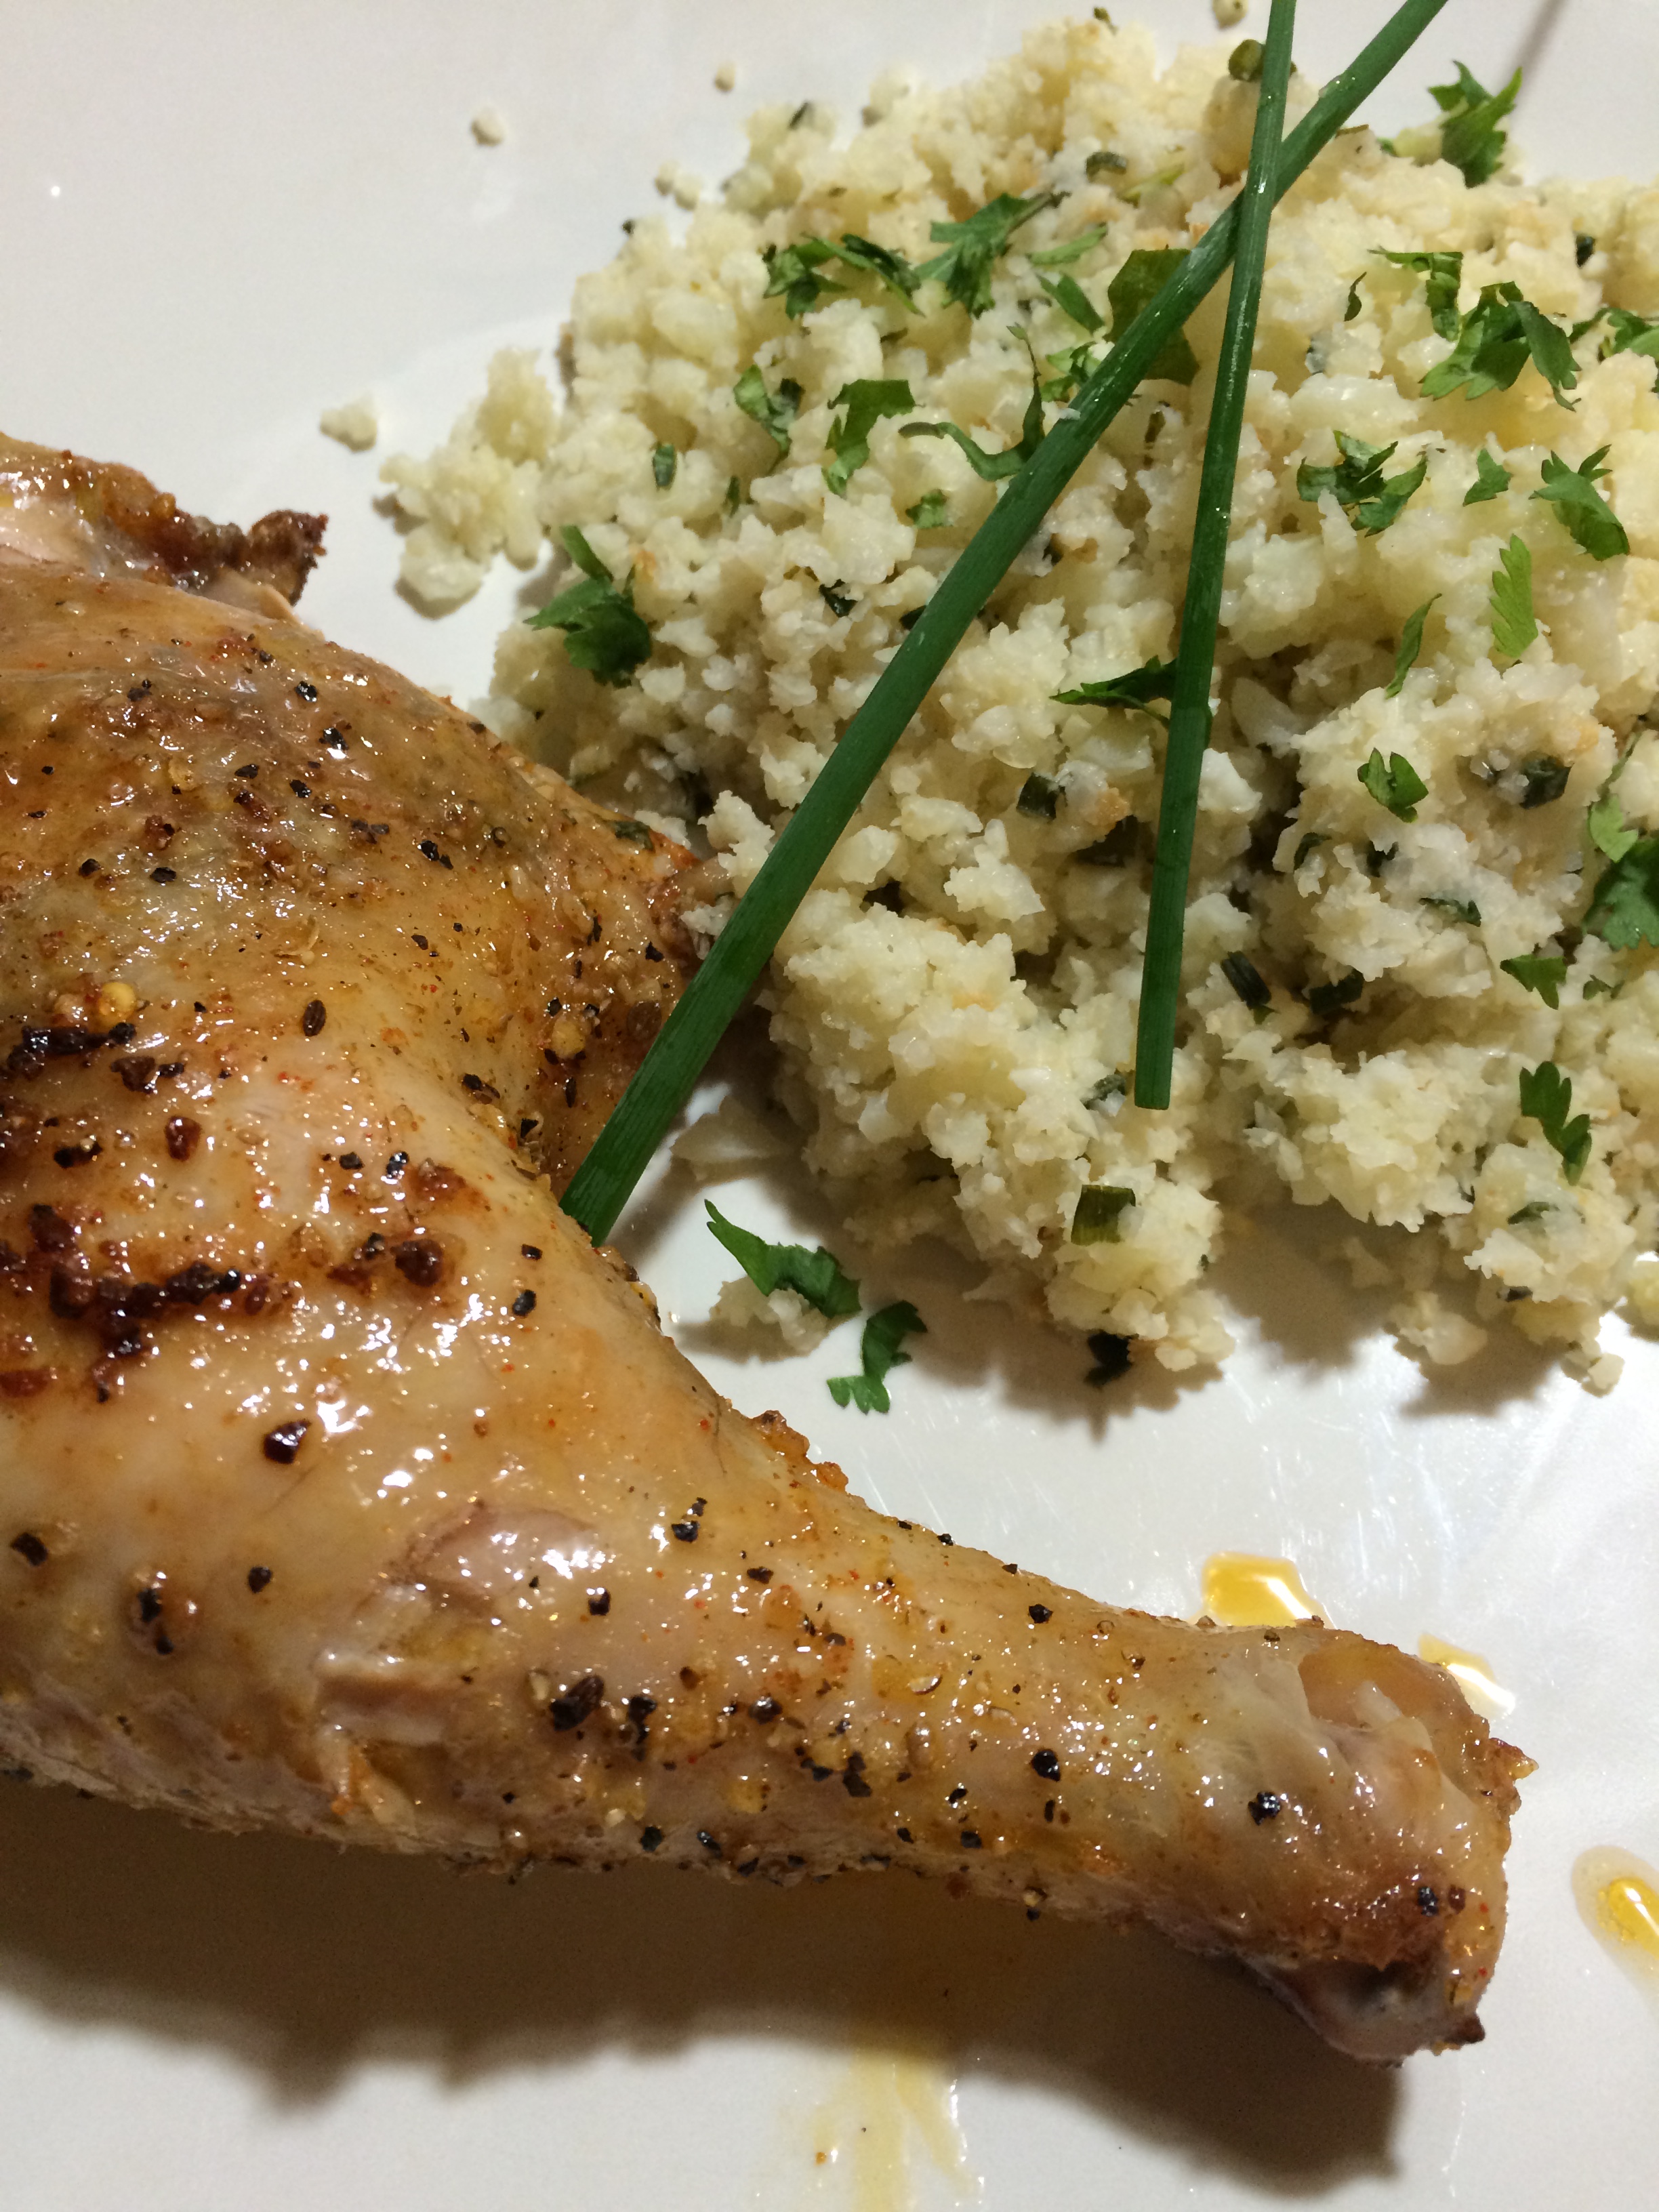
Chill in the refrigerator or heat in an oven or microwave depending on your desired temperature for serving. I served mine warm with a piece of seasoned chicken.

Drizzle very lightly with the honey.

Top with the scallions for garnish, and a lime wedge on the side if desired! Delish!

IMG_2105

Advertisement

Cauliflower Pizza Crust

My kitchen hasn’t been calling to me lately. It’s a weird feeling, and it’s a constant struggle to open the fridge and realize I’m going to be piecing together a lunch of crackers, cheese and tomato slices.

IMG_1836

Finally, I jumped on this cauliflower pizza crust bandwagon to end the home-cooked meal drought.

IMG_1820

It was tasty! And the gluten-free part is pretty awesome. It’s not every day you can shove multiple slices of pizza into your mouth and be eating mostly vegetables. Well, and cheese, but there’s nothing wrong with cheese.

IMG_1825

Needless to say, this pizza didn’t last long at all. I would highly recommend doubling this recipe if you’re feeding more humans than just yourself and/or if any of you have even an inkling of an appetite.

IMG_1832

What You Need:

  • One head cauliflower, florets chopped off
  • 1 egg, beaten
  • 4 oz. goat cheese
  • 1 tsp. dried oregano
  • 1/2 tsp. cayenne pepper
  • 1/2 tsp. garlic salt
  • 1 tsp. dried basil

What You Do:

Preheat oven to 400F

In a food processor, lightly “pulse” the cauliflower florets to create cauliflower “rice”. It’s best to add the florests one batch at a time to ensure they all get chopped up.

Now it’s time to cook the “rice.” In a medium saucepot, boil about 3 cups water and add the rice. Cover the pot, and let cook about 5 minutes.

IMG_1824

Drain thoroughly using a fine mesh strainer.

Transfer the drained cauliflower rice to a clean dish towel or several paper towels and pat well to dry.

In a large mixing bowl, combine the rice, egg, cheese and spices and mix thoroughly, kneeding with your hands until it forms a dough.

Now it’s ready to be made into a crust!

Sprinkle cornmeal onto the surface of a pizza stone and lay the dough ball on top. (If you don’t have a pizza stone, still use cornmeal and see below for alternate baking times).

Smooth the dough ball out with your hands, flattening to make a crust about 1/4 of an inch thick.

IMG_1819

Bake for about 20 minutes if using a pizza stone, 30-40 if using a baking sheet.

Remove from oven and cover with your favorite toppings. I used sliced zucchini, minced garlic, jalapeno slices, tomato slices and cheddar cheese.

Then, bake for another 5 minutes for a pizza stone, or 10 minutes for a baking sheet.

Slice it up, and serve!

IMG_1834

Honey Lemon Quinoa and Brussels Sprouts

I’m on a not-so-silent crusade to get a cat.

IMG_1741

We have a dog – Madison, who is wonderful and fun. Also, she is super cute. BUT. I really want to get a cat.

IMG_1737

I used to have mixed feelings about cats, but part of my day job entails looking at cat photos online for hours at a time, so it’s kind of hard to resist falling in love with those funny little fluff balls.

IMG_1743

There’s only one small problem, which is that Mike absolutely refuses. He will not budge on this one, which gives me no choice but to quietly plot the adoption of a cat while he is at work, or in the shower or something. I figure once the cat is in our home, there’s nothing he can do. I get a cat, he gets yummy meals. It’s a win-win right?

What You Need:

IMG_1736

  • 1 lb. Brussels Sprouts, stems cut off and sliced into quarters
  • 1 red bell pepper, finely chopped
  • 1 green bell pepper, finely chopped
  • 1 shallot, chopped
  • 1/2 c. water
  • 1 cup dry quinoa, cooked according to package directions
  • 1/2 cup chopped dried cranberries
  • 2 tbsp + 1 tsp lemon juice
  • 1 1/2 tbsp honey
  • 1 tsp thyme leaves
  • 1/2 tsp black pepper
  • 1/4 cup extra virgin olive oil
  • 1/4 cup crumbled feta cheese

What You Do:

Preheat oven to 350F

IMG_1739

Combine the Brussels Sprouts, red and green bell peppers and shallot in a large baking dish.

Pour water over the vegetables, cover with foil and bake for 30-40 minutes or until veggies are fully cooked.

In a small bowl, combine the lemon juice, honey, thyme leaves, black pepper and olive oil and whisk until well mixed.

When vegetables are done cooking, pour into a large serving dish and mix thoroughly with cooked quinoa and cranberries.

Pour the lemon-honey sauce over the entire dish and mix well.

Top with crumbled feta and you’re good to go!

IMG_1740


Italian Chickpea “Meatballs” with Herbed Tomato Sauce

IT’S MARCH MADNESS BABY!!!!

IMG_1355

I’ve gone completely off the deep end. Mike doesn’t even know how to handle my new-found love of all things basketball. But tell me there’s $100 at stake, and I take shit seriously.

IMG_1311

I joined the NCAA pool at work, and in my determined fervor to not lose, I spent (no joke) 3 hours cramming college basketball knowledge into my previously sports-neutral brain. I studied stats. I read player analysis and game predictions from various sports writers. I compared different brackets online and looked into why a team was chosen over another and whether it was the best choice.

IMG_1334

What this experience teaches us is that I am highly motivated by prize money. I won’t say how my bracket is doing, because I’ve also developed a bit of a serious superstition problem, but I will say I’m going through withdrawals at the moment since the games don’t continue until Thursday. Like I said, Mike is wondering who I am and what I’ve done with the real Jen.

IMG_1347

But really – she cooks AND she likes basketball? He’s not complaining.

What You Need:

  •  1 spaghetti squash, halved and seeded
  • IMG_135315 plum tomatoes, quartered
  • 1 medium eggplant cut into cubes (about 2 cups)
  • 1 medium yellow onion, sliced
  • 2 cloves garlic, roughly chopped
  • 1 jalapeno pepper
  • 1 can chickpeas
  • 1 egg
  • 1 tbsp oregano
  • 1 tbsp parsley
  • 1/2 tsp garlic powder
  • 1 tsp dried basil leaves
  • 1/2 tsp ground sage
  • 1/2 tsp ground thyme
  • 1/4 tsp salt
  • 1/2 tsp ground black pepper
  • 1 tbsp cornmeal
  • 1/4 cup Parmesan cheese

IMG_1348

What You Do:

Preheat oven to 400F

Combine the tomatoes, eggplant, onion and garlic in a large dutch oven or baking dish and bake, covered, for about 45-60 minutes. It’s done when the veggies are soft and cooked through with their juices at the bottom of the dish.

In a food processor, combine the chickpeas, egg, all the spices and the cornmealand blend until well-combined. This is your “meat”ball dough.

Scoop the dough out of the food processor and form into small round balls. Set aside.

IMG_1344

Once the tomato and eggplant mixture is done baking, scoop out the veggies using a slotted spoon to separate them from the juices.

In the food processor, blend the tomato and eggplant mixture until it becomes a chunky sauce.

Pour the sauce into a slow cooker and add the chickpea balls.

Cook on low for 1-2 hours (I cooked for 2 hours and kept on warm for another hour while I was at work).

Serve over baked spaghetti squash and top with a sprinkle of Parmesan cheese.

And I will say that some of the “meat”balls did break apart in the crock pot (just a bit) but all that happens is the tomato sauce turns into a delicious “meat”sauce. YUM.

IMG_1360

Acorn Squash and Brussels Sprouts Casserole

I’m a sucker for advertising.

IMG_1423

It’s funny to me because I work in marketing, so I’m not a stranger to the ways in which brands sell to consumers. But I’m still a sucker. Banana Republic, in particular, has really tapped into the best way to get me into their store. Just send me an email that says, “Hey, you haven’t been here in awhile and we miss you! Come back!”

IMG_1381

Well, ok! I’d love to! And suddenly I’m scrapping my plans for an afternoon run (wholesome, healthy, FREE) and driving to the store. They miss me! I have to go!

IMG_1385

Everyone wins though, because I’ll stop off at the grocery store too, and get food for our dinner. Along with something I saw a commercial for that I now most definitely need to have.

What You Need:

IMG_1386

  • 3 cups Brussels sprouts, stems chopped off and sliced into quarters
  • 1 acorn squash, halved with seeds removed
  • 1 cup dry wild rice
  • 1/2 cup chopped walnuts
  • 1/2 cup chopped dried cranberries
  • 2 tbsp dijon mustard
  • 1/4 cup coconut oil, melted
  • 1/4 cup apple cider vinegar
  • 2 cloves garlic, minced
  • 1/2 tsp ground cinnamon
  • 1/4 tsp ground nutmeg
  • 1/2 tsp crushed red pepper

What You Do:

Preheat oven to 375F

Place the acorn squash halves face down on a baking sheet lined with foil and bake for about 30 minutes or until the skins begin to brown and pucker.

IMG_1383

Simultaneously, cook the wild rice according to package directions. It usually takes about 45 minutes so it’s good to start it early so it can cook while you prepare the rest of the meal.

While the squash and rice cook, place the Brussels sprouts, walnuts and cranberries in a large dutch oven or casserole dish, mixing well.

In a small mixing bowl, whisk together the remaining ingredients (mustard through crushed red pepper) and set aside.

When the squash is done, gently remove the skins by peeling them off (you may find it easier to flip the squash right side up and scoop out the flesh).

Fold the squash into the Brussels sprouts mixture.

Pour the mustard sauce over the entire dish and bake, covered, for 20-30 minutes or until the Brussels sprouts are soft. Some may have leaves that dry out or slightly blacken – this just means they’re done.

Serve over the rice and enjoy!

IMG_1424


Heavenly Slow Cooker Meals: Sweet Pepper, Corn and Potato Stew

You know what’s really great? Frozen vegetables.

IMG_1069

Everything outside has been noticeably dead since mid-January when the temperatures plummeted and sucked the life out of everything. I’m skeptical about where my tomatoes are coming from at a time like this, because I’m pretty sure it’s not the farm upstate.

So frozen veggies! What an idea! For these slow cooker meals, it’s a great solution. Not least of all because I’m usually only making a slow cooker meal in the first place because I am trying to save time. So if I don’t have to slice up a vegetable, that’s a big win.

IMG_1076

One quick note about this dish – if you don’t eat dairy or you hate the idea of buttermilk, leave that ingredient out of the recipe. Another option is to top the dish with a dollop of sour cream or Greek yogurt.

IMG_1184

What You Need:

  • 5 small red potatoes, scrubbed and cut into cubes
  • 1 medium yellow onion, sliced
  • 1 10oz bag frozen sweet corn
  • 2 cups chopped bell peppers (I used red, yellow and orange for some summertime color)
  • 5 small cloves garlic, minced
  • 1 jalapeno, chopped (seeded if desired to reduce spiciness)
  • 1 tbsp parsley
  • 1 tbsp oregano
  • 1 tsp ground cayenne pepper
  • 1 tsp paprika
  • 1 tbsp chili powder
  • 1 cup vegetable broth
  • 1 cup buttermilk
  • 1/2 cup freshly shredded cheddar

What You Do:

Put everything except the buttermilk into the slow cooker and cook on low heat for 8 hours, or high heat for 4.

When it’s done, add the buttermilk and stir well. Top with cheddar cheese.

IMG_1075


Mexican Potato Tacos

Even for New England, this winter was pretty terrible. But the tides are turning, as they say.

IMG_1216

We can all feel it – it’s the feeling that leads you to believe wearing flats to work instead of boots is a great idea, until you go out for lunch and realize you’re severely under-dressed because – duh – it’s still winter and 21 degrees actually isn’t that warm after all…it’s just warmer than 10.

IMG_1218

The feeling of spring around the corner also comes from a renewed interest in my favorite activity – running. Suddenly, races are back on the table. Training has begun. I am starting to think of the weekends as good days for long runs instead of a good opportunity to catch up on my favorite TV shows.

IMG_1213

And of course with a renewed interest in running comes a renewed interest in my diet. Pulling myself out of hibernation and the excess of Popchips, cookies, wine and beer that kept me warm all winter is quite liberating. And it starts with these potato corn tacos, inspired by one of my favorite bloggers, Emerging Adult Eats.

IMG_1214

What You Need:

  • 1 lb (about 2 cups) fingerling potatoes, quartered
  • 1 red pepper, seeded and sliced into quarter-inch long strips
  • 1 green pepper, seeded and sliced into quarter-inch long strips
  • 1/2 red onion, sliced
  • 1 tsp red pepper flakes
  • 1 tsp garlic powder
  • 1/2 tsp cayenne powder
  • 1/2 tsp paprika
  • 1 small can chopped green chilies
  • 1/2 cup shredded red cabbage
  • Corn tortillas (I used Mission)
  • Your favorite salsa (I used Newman’s Own hot salsa)
  • 1 avocado, pitted and sliced into strips

What You Do:

In a large pot filled with boiling water, boil the potatoes uncovered for about 20 minutes or until a fork easily pokes through. Run one or two under cold water and taste-test to be sure they’re done.

Drain potatoes and set aside.

IMG_1215

While the potatoes are cooking: In a large skillet, heat a tablespoon of olive oil on medium. Add the onions and saute, stirring often, for about 3 minutes or until they begin to get soft.

Add the peppers and saute, stirring often, for about 5 minutes or until soft.

Add the red pepper flakes, garlic powder, cayenne, paprika and green chilies and combine.

Remove from heat.

Combine the potatoes and pepper/spice mixture. Stir well.

Lightly toast the corn tortillas in a non-greased, nonstick frying pan over low heat. They only take a few seconds on each side to toast, and the tortilla will begin to wrinkle and smoke when it gets too hot.

Lay out each tortilla and top generously with the potato filling. Garnish with a drop of salsa, some shredded cabbage and the avocado, and they’re ready to eat!

IMG_1217


Brown Sugar Glazed Pistachio Baked Carrots

I like getting my nails done.

Pistacio Carrots (1)

Mind you, this is not an activity I nor anyone who knows me would have guessed I would enjoy. I have always been a tomboy-type – an outdoor-loving, dirt-under-the-fingernails kind of girl. I don’t wear makeup and don’t plan on starting anytime soon, and I own exactly two pairs of heels that gather dust until a specific social event forces me to put them on.

Pistacio Carrots (9)

Somehow, though, my nails have always been the exception. I like to take one night each month and labor over all 20 of them, filing and buffering, gently brushing on smooth coats of deep reds, purples and bright pinks. And then, because I can’t just stop there, I apply some pretty little stickers to my thumbs and big toes and seal them over with a clear topcoat.

Pistacio Carrots (5)

What do manicures have to do with cooking, you ask? Nothing. Except that eating carrots is supposed to make your nails grow stronger and look better, so that is what I was hoping for when I devoured this dish.

What You Need:

  • 3 lbs carrots, washed and peeled with greens cut off about 1 inch above carrot tops
  • 3 cups water
  • 1/2 cup shelled pistachios
  • 1/2 cup melted butter
  • 1/3 cup brown sugar

Pistacio Carrots (2)

What You Do:

Preheat oven to 350F

In a large pot, bring the 3 cups water to a boil.

Add the carrots and reduce heat to a simmer and cover. Let simmer for about 10 minutes or until carrots are tender and easily punctured with a fork.

While carrots are cooking, mix butter and brown sugar together until they form a glaze.

Place pistachios in a single layer on a baking sheet and bake for 5-8 minutes or until just toasted.

Drain carrots and move to a serving dish, fanning them out to open space between carrots for the glaze to seep through.

Pour the glaze over the carrots.

Top with toasted pistachios and serve!

Pistacio Carrots (6)

Heavenly Slow Cooker Meals: Swiss Chard and Butternut Squash

Once again, I will repeat: I love the snow.

IMG_1002

There are a few basic, undeniable truths about New England life between November and April.

1. It gets cold.

2. It will probably snow.

3. It will probably snow more than once. And be really windy.

4. It will stay this way for so long, you’ll begin to forget four seasons exist.

IMG_0956

People get really annoyed about the snow and how long this whole season drags on for. Give me a snow day, a glass of wine and a good meal, and I’m good to go. I’m pretty sure winter in New England is why crock pots were invented.  After a long day of shoveling, maneuvering cars that were not built for blizzard conditions through snow banks, and uncomfortably trying to get work done on my slow home computer, nothing beats wandering into the kitchen and discovering that dinner is just…ready. Just like that.

IMG_0958

What You Need: 

IMG_1001

  • 4 cups cubes butternut squash
  • 2 large parsnips, peeled and diced (substitute potatoes here if desired)
  • 1 can chickpeas (15.5 oz)
  • 1 yellow onion, thinly sliced
  • 1 tsp black pepper
  • 1/4 tsp sea salt
  • 1 tsp crushed red pepper flakes
  • 1 tsp ginger
  • 2 tsp oriental seasoning OR 1 tsp each of onion and garlic powder
  • 1/2 cup vegetable broth
  • 1/2 cup coconut milk
  • 4 cups shredded swiss chard (leaves only – remove from stems)

What You Do:

In your crock pot bowl, add the squash through vegetable broth and cook on high for 4 hours.

Once the time is up, keep warm and add the coconut milk, stirring well to combine.

Add swiss chard leaves, stirring well until the leaves become limp and reduced.

Now it’s ready to serve!

IMG_1004


Lemony Shredded Raw Brussels Sprouts

I love Brussels sprouts so much. Just so much. They’re probably the most delicious vegetable out there. I had previously sung their praises in the midst of my Thanksgiving cooking frenzy when I coated them with white wine and honey (right?!?) but this dish is similarly delish and doesn’t require actually cooking the Brussels sprouts, so that’s a win now that we’re off vacation and back at work (read: less time, bigger appetites).

Haddock (6)

It’s so easy and works as a light and healthy side dish to almost any meal.

Beet Burgers (22)

What You Need: 

  • 3 cups Brussels sprouts, with stems chopped off, and halved
  • 2 tbsp olive oil
  • 3 tbsp fresh lemon juice (or lemon juice from the convenient lemon juice container you can buy in the produce aisle…)
  • About 1 tsp salt and 1 tsp pepper

What You Do:

Haddock (10)

Place the Brussels sprouts in a food processor and pulse gently until they are roughly chopped, similar to cabbage in cole slaw.

Place chopped up Brussels sprouts in a large bowl and add oil, lemon juice, salt and pepper, stirring well to mix

Now it’s ready to serve! Enjoy alongside basically any main dish.

Pro Tip: As seen on the right, this light and lemony dish is especially great served alongside any white fish – like haddock, for instance! Need inspiration? Get my recipe for haddock baked in spicy Cajun tomato sauce here.