Andouille Sausage and Vegetable Soup (Whole 30-Friendly)

So…I started the Whole 30. And I have to say, I give a lot of credit to those of you out there who have done this diet.

IMG_1052

And I wasn’t even a terrible eater to begin with. I already consume loads of veggies and fruits and generally stay away from takeout and junk food. But RICE? CRACKERS? HUMMUS? CHEESE? Those foods are my friends. And now I’m standing on the other side of a fence staring longingly as they all throw a party I’m not invited to.

IMG_1044

The Whole 30 website is quick to remind us (repeatedly) that it’s “only 30 days”. I’m on Day 7 and so far a total of 30 still seems a bit insane. But my husband has been as level-headed in his advice to me as you would expect from someone who still gets to drink a beer and have cake. He reminds me that I’ll be unhappy with myself if I cheat or quit early, and the long-term benefit will be worth it.

Well, damn.

IMG_1046

Of course he’s totally right. And I am super glad to have an extra push to make me think about new types of meals and actually do some serious cooking. Our oven may be the size of a shoebox and we may only have two working burners on our stove, but I’m not a quitter.

IMG_1049

Here’s one absolutely to-die-for Whole 30-friendly dish inspired by @briewilly (Instagram) who is my hero for healthy food porn. Mind you, he was able to add beans, which would be SO GOOD in this dish. But I don’t want to talk about it.

What You Need:

  • 2 tsp coconut oil
  • 4 Andouille sausages, sliced into thin rounds (mine came fully cooked but it doesn’t matter either way)
  • 1 large red onion, chopped
  • 5-6 celery stalks, chopped (should be about 1.5 cups)
  • 1 tsp minced garlic
  • 2 cups carrots, peeled and chopped
  • 4 cups fresh spinach
  • 5 cups vegetable broth (I can’t stress it enough that making your own broth is SUPER easy. My fool-proof recipe is here)
  • 2 tsp black pepper
  • 3 tsp garlic and herb spice (or a similar table spice of your choosing)

What You Do:

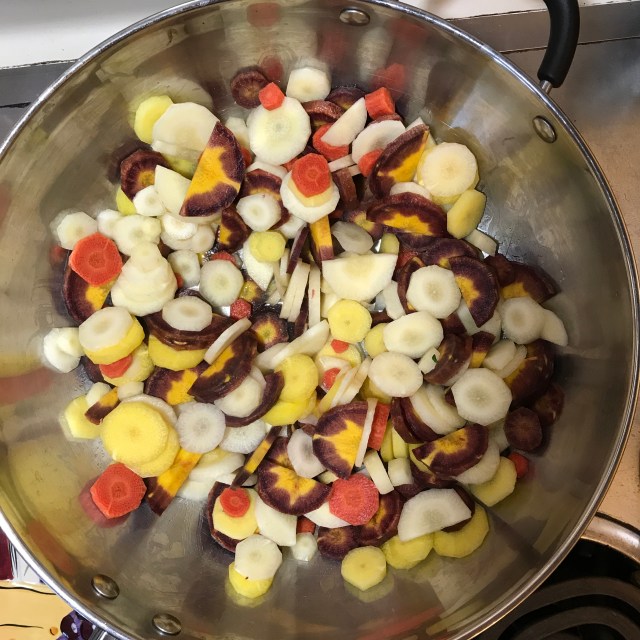
In a large skillet, warm 1 tsp of the coconut oil. Add the onion, garlic, carrots and celery and cover. Let cook, covered, for about 20 minutes or until the carrots can be pierce easily with a fork and the celery and onions are translucent.

While the veggies cook, warm the second tsp coconut oil in another pan and cook the sausage slices, covered.

Once everything is done, add the sausage to the veggie pan (drain any grease first), and mix well. Add your spices (these can be a combo of any you like. I recommend any herbs and spices that you like in a soup or stew.

Add the vegetable broth and stir will.

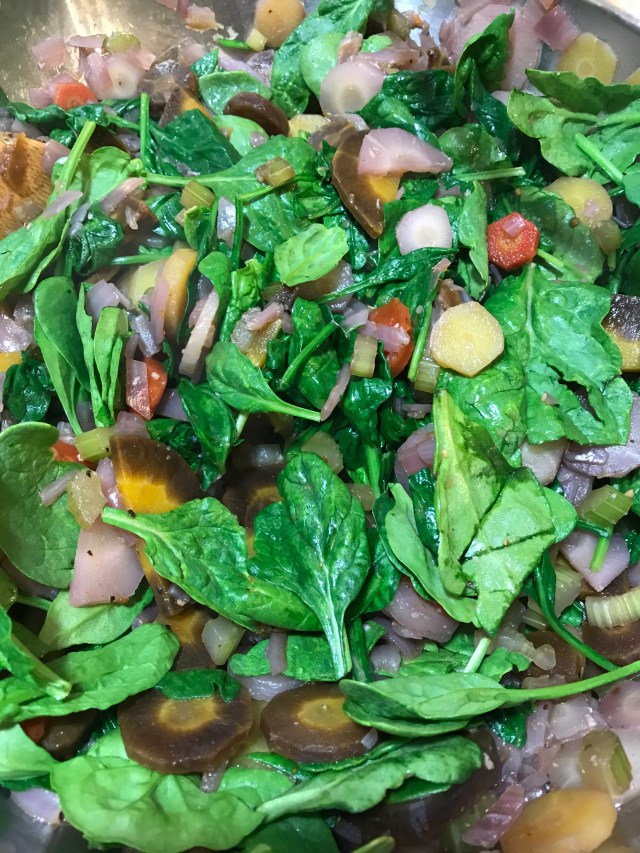
Finally, add the spinach and mix in thoroughly. It should take less than a minute for the spinach to wilt down to soup-quality leaves.

IMG_1047


Advertisement

Spicy Chorizo Tacos

It’s officially that time of year again when summer is no longer a pipe dream. It feels just around the corner, and I’m already remembering little gems from last year, like these juicy tomatoes. Come onnnn.

IMG_2624

We’ve already got the wood planks set aside for a third raised bed, and I’m itching to get out and make it happen. Time to break out the summery recipes, sweep off the back porch, fill up that wine glass and enjoy.

IMG_2618

Tacos are good whatever the season, and despite the popularity of Taco Tuesday, I’ll eat them any day of the week. Especially with chorizo because, chorizo.

IMG_2626

What You Need:

  • 1 tbsp olive oil
  • 1/2 pound of chorizo
  • 1 tbsp chili pepper, finely chopped
  • 1 small yellow onion, diced into tiny bits
  • 1 clove garlic, minced
  • 1 tsp. chili powder
  • 1 tsp. freshly ground black pepper
  • 1 tsp. ground paprika
  • 1 cup fresh tomatoes, diced
  • 1 cup shredded havarti cheese
  • 1 cup salsa
  • 8-10 taco shells

IMG_2625What You Do:

Get two separate skillets and heat each over low-medium with a 1/2 tbsp of oil.

In one, cook the chorizo until browned and fully cooked.

In the other, cook the chili pepper, onion and garlic, covered, until the onion is soft and translucent.

Combine the chorizo and onion mixture, and combine well. Add the spices and stir to combine.

Heat your taco shells in the oven according to package directions.

Stuff tacos with chorizo filling and top with freshly chopped tomatoes, cheese and salsa.

Pro Tip: Put the cheese into the warm taco shell first so it melts underneath the other toppings. YUM.

IMG_2620          IMG_2628

Zesty Honey-Lime Cauliflower Rice

Admittedly, I’m still on a not-so-silent crusade to get a cat.

IMG_2106

A large part of my job is to poke around the Internet for cat and dog videos, memes and stories, and occasionally I come across the right cat video to make me swoon. Then I promptly text Mike to once again ask if we can get a cat, at which time he promptly says absolutely not.

IMG_2103

I’m wearing him down slowly, I can feel it. Madison will be a whole other story, because she has no love for cats and thinks they’re all squirrels she can torture. That would certainly make for some good videos though.

#catsmakeeverythingbetter.

I may not have a cat, but I have this cauliflower rice dish, which is going to be just enough, for now.

IMG_2096

What You Need:

  • 1 medium head cauliflower, florets and stems chopped off
  • 1 tbsp olive oil
  • 2 small garlic cloves, minced
  • 1/4 cup scallions, chopped
  • 2 tbsp lime juice
  • 1/4 cup freshly chopped cilantro
  • 1/4 cup very finely chopped pistachios
  • 1/2 tbsp honey
  • 2 scallions, whole

What You Do:

IMG_2101

Put the cauliflower into a food processor and pulse until the cauliflower becomes a rice-like texture.

In a large bowl, combine the rice, olive oil, minced garlic, scallions, lime juice, cilantro and pistachios, stirring well to fully combine.

Chill in the refrigerator or heat in an oven or microwave depending on your desired temperature for serving. I served mine warm with a piece of seasoned chicken.

Drizzle very lightly with the honey.

Top with the scallions for garnish, and a lime wedge on the side if desired! Delish!

IMG_2105

On-The-Go Omelet Muffins

I have a coworker who’s always thinking up really good ideas for new products. The problem is, they already exist.

IMG_2050 (2)

So far, she’s wanted to invent a dog collar that has a bow tie on it, and wipes that can be used in place of a shower after a run.

It’s fine though – she’s learning new things about the world every day. I feel a little bit of the same way with these omelet muffins. I know they’ve been a “thing” for awhile. I do. But I just discovered them and I’m not going to lie – it blew my mind a little.

IMG_2053 (2)

How could breakfast be this easy? These things even trump oatmeal for simplicity.

Mind. Blown.

Apparently it doesn’t take much.

What You Need:

  • 6-8 eggs, cracked into a large bowl
  • 1/2 cup diced red onion
  • 1/4 sliced scallions
  • 1 cup diced fresh tomato
  • 1 cup chopped fresh spinach
  • 1/4 cup chopped jalapenos (optional)
  • 1/2 tbsp black pepper
  • 1 tsp salt

IMG_1990 (2)

What You Do:

Preheat oven to 350F

Literally just crack the eggs and mix them with all the other stuff, pour into a muffin tin and bake for about 20 minutes or until they begin to brown and crisp on top.

Serve with ketchup or hot sauce or whatever.

Easy!

IMG_2051 (2)


Squash Stuffed with Sausage and Wine-Soaked Onions

Mike and I installed a doggie door this summer for Madison.

IMG_2475          IMG_2474

I think she has finally achieved her ultimate goal in life – to come and go as she pleases.

All I’m saying is that it was a little TOO easy to train her to use this door.

She’ll always come back in for food, though.

IMG_2425

What You Need:

  • One large summer squash (about 10′ long and fairly thick)
  • 1 cup diced onions
  • 2 tbsp water
  • 1 cup chopped green pepper
  • 1 chopped jalapeno
  • 1 pint cherry tomatoes
  • 1/2 cup garlic scapes, chopped
  • 1/2 cup white wine
  • 1/2 tbsp coconut oil
  • 1 lb. hot Italian (or your favorite) sausage, sliced into 1″ pieces
  • 3 cups tomato sauce, either your favorite jar sauce, or homemade this way

IMG_2421

What You Do:

IMG_2418

Preheat oven to 325F

Halve the squash lengthwise from stem to end and scoop out the inside seeds so you’re left with a hollow “bowl”.

Place face-down on parchment paper and bake for about 40 minutes.

While the squash is baking, take a large skillet and partially caramelize the onions by cooking them with the water on medium heat, covered, for about 10 minutes or until they soften and become fragrant.

Add the green pepper, jalapeno, cherry tomatoes, garlic scape and wine, and continue to cook, covered, for about 15-20 minutes or until all vegetables are soft and cooked through, the cherry tomatoes are puckered and split, and the wine has cooked off.

Remove from heat, drain and set aside in a large bowl.

IMG_2416

In a separate skillet, heat the coconut oil on low-medium heat, and add the sausage. Cook for about 15 minutes, turning the sausage periodically to prevent burning and to cook through each piece.

When the sausage is done, drain on a paper towel to absorb the grease, and add to the vegetable mixture, stirring thoroughly to combine.

Remove the squash from the oven and flip over so the scooped-out side is facing up.

Scoop the sausage filling into each squash liberally.

Place back in the oven for 10 minutes.

Cover each piece with tomato sauce and serve.

IMG_2423


Spicy Black Bean & Corn Salad with Pecans

I feel a lot of guilt when I don’t post here for awhile.

So let’s not talk about it.

IMG_2073

Instead, let’s focus on summer. The weather is warm. The sun is out. My garden is in full and bountiful bloom. I’ve also made the grand transition from winter squash-based recipes to summer squash-based recipes.

Things are happening, people.

IMG_2471

There is no squash in this recipe. Shocker! But there is deliciousness that tastes like summer! I don’t really ask for more than that.

IMG_2076

What You Need:

IMG_2071

  • 1 can (14 oz.) black beans, drained and rinsed thoroughly
  • 2 cups corn kernals (I used bagged, frozen ones)
  • 4 plum tomatoes, diced
  • 1/2 red onion, finely chopped
  • 1 small jalapeno, chopped (optional)
  • 1/4 cup chopped pecans
  • 1/2 cup fresh cilantro, chopped
  • 2 tbsp lime juice
  • 2 tbsp olive oil
  • 1 tbsp balsamic vinegar
  • 1/2 tbsp cumin
  • 1/4 tbsp ground black pepper
  • 1/2 tsp salt
  • 1/2 cup fresh feta cheese crumbles

What You Do:

Mix the beans through the salt in a large bowl, making sure to thoroughly combine so the lime juice and olive oil are well integrated.

Chill for about 30 minutes in the refrigerator before serving.

Scoop into bowls and top with crumbled feta. I served mine with a hot Italian sausage. Delish.

IMG_2075


Coconut Curry Chicken with Basil Rice

For an English/Journalism major, I have a staggering number of classics I still need to read.

IMG_2065

Right now, I’m fully engrossed in One Hundred Years of Solitude by Gabriel Garcia Marquez. It is a wonderfully compelling book with such rich, beautiful language it almost inspires me to try and write my own Spanish novel. Almost.

IMG_2063

Obviously it didn’t inspire my cooking, because this dish is clearly not Spanish, but regardless of that, if you haven’t read this book I highly recommend it. And if you have any suggestions for classics I need to read, please send them forth.

IMG_2060

What You Need:

  • 2 cups dry Jasmine rice
  • 3 cups water
  • 1/2 cup fresh basil leaves, finely chopped
  • 2 tbsp coconut oil (or regular EVOO) divided
  • 1 tbsp minced garlic
  • 3/4 cup sweet onion, finely chopped
  • 1 can (13.5 oz) coconut milk
  • 4 cups baby spinach leaves
  • 3 large chicken breasts (about 1 pound)
  • 2 heaping tablespoons ground curry spice
  • 1/2 tsp. salt
  • 1/2 tsp. ground black pepper

IMG_2056

What You Do:

IMG_2061

In a medium sauce pot, bring the 3 cups water to a boil, add the 2 cups rice and the basil, cover, and turn down to a simmer for about 10 minutes or until the water is gone. Set aside.

In a large skillet, heat 1 tbsp of the oil on medium until warm. Add minced garlic and sautee for about 30 seconds or until just softened.

Add onion and sautee, stirring continuously, until soft and translucent.

Add the spinach and coconut milk and turn heat to low. Cover and let steam to reduce spinach. The coconut milk will steam off and absorb so keep an eye on the dish to ensure it stays moist and doesn’t burn.

While the spinach is cooking, place chicken breasts in a large skillet with remaining tablespoon of oil and slowly cook on low-medium heat, turning sides every few minutes to cook thoroughly through.

IMG_2057

Once chicken is done, remove from pan and place on a cutting board. Slice the breasts into 1-inch pieces and place into skillet with spinach.

Add the rice to the chicken and spinach and stir well.

Add the curry spice, salt and pepper and stir well.

I served this with a hearty slice of garlic Naan bread (which is amazing). Enjoy!

IMG_2067

1200 Calories

Absolutely had to share this amazing and insightful post by Sophieologie. It seems bonkers that messages like “toned means muscle”, “don’t skip meals”, and “eating well and being healthy is about more than calorie intake” aren’t the messages women get from the media, etc. but I agree, the misinformation has to stop! Love this whole post. Pass it along!

How to Make a Worm Compost Bin at Home in 8 Easy Steps

I’ve mentioned before that I use my food scraps to feed squirmy little worms that live in a plastic bin in my backyard.

IMG_1789

I have a special little affinity for these guys. I talk to them, and I care about their diet. If I feel like I’m giving them too many onion-heavy feedings, I change up dinner for a few weeks to try out some new foods. (I do like onions, and although the worms don’t really have brains, I feel like they know it).

Anyways, you too can have little worm friends in your backyard! Or wherever you want to keep them. Here’s how you make a worm bin, or vermicycle compost bin for yourself!

Step 1: Get yourself some red worms. It’s SO important you don’t try to start a worm bin by using regular worms you might dig up while gardening. Red worms, or “red wigglers”, are earthworms that thrive in decomposing organic matter like the stuff you’ll be giving them.

IMG_1785

Step 2: Find a large Rubbermaid-type bin with a secure lid. This one’s from Wal-Mart. Drill four to six large holes on the underside of the bin, and additional holes around the top as shown below. This is to allow air flow and drainage because as the worms consume the food and create waste, liquid will also be created and need to drain out to keep the bin environment healthy.

IMG_1784

Step 3: Find a second, larger bin that can house the compost bin. You’ll need to fit the compost bin inside this larger bin, and elevate the compost bin so the liquid created and drain out and collect in the bottom of the larger bin. I used upside-down plastic flower pots to support my compost bin.

IMG_1787

Step 4: Now it’s time to start filling your compost bin to make a home for the worms! First, collect newspapers and tear them into strips. Be careful not to use any colored images – just use black and white prints because the color print can be toxic to the worms. Once you have strips of black and white newsprint, dampen them and line the bottom of the compost bin.

IMG_1779

Step 5: Sprinkle a layer of coffee grounds over the damp newsprint. Coffee grounds are an amazing addition to your compost bin because they are high in nitrogen and considered “green” material. In a compost bin, it’s critical to balance the amount of “green” nitrogen-rich material (food scraps) and “brown” carbon-rich material (paper).

I pickup up a bucket of used coffee grounds from my local coffee shop, which they filled to capacity in under an hour. It’s a great way to recycle and do some good for the environment! Plus, it lasts forEVER.

IMG_1780

Step 6: Add the food scraps. First of all, NEVER feed your worms citrus, dairy (although egg shells are OK), meat, candy, or alcoholic beverages (that one I feel is a given).

I like to grind everything up in a food processor first because that makes it so much easier for the worms to consume and digest. Since I cook a lot, it’s nice that they can go through the scraps so quickly so I avoid having food scraps pile up while I wait to be able to feed them again.

IMG_1781

IMG_1830

Step 7: Finally, on top of the food scraps you want to add a layer of damp brown paper strips. I just use the brown paper from grocery store bags or from that wine I bought at the liquor store. Like the newsprint, make sure the brown paper doesn’t have any colored writing or anything on it.

In the image below, I just laid the brown paper strips out on the ground and sprayed them with a hose to dampen.

IMG_1782

The layer of brown paper gives the worms a “roof” for their home that they can nestle underneath to feel protected. These worms hate sunlight so they will burrow very quickly when exposed.

Step 8: Add the worms! Like I said, they’ll burrow right under the brown paper as soon as you put them in.

IMG_1786

Cover the worms, place on top of the flower pots and keep in a cool, shaded area. I keep mine in my backyard, but you can also keep it in your garage, or mudroom, or wherever makes you happy (with exceptions of course. They’re not bed mates).

To keep these worms alive, you should check on them once each week. Here are some important bullet points to keep in mind:

  • Always make sure the balance in the bin is even between “greens” and “browns”. It’s fairly easy to do this – just don’t overfeed them. Feed the worms about once each week, especially if you’re grinding up the food as they will go through that faster. Don’t add more food if there is still a substantial amount left in the bin. As they create more organic matter (soil) you’ll need to add additional strips of paper to keep the balance equal.
  • If the bin appears dry, you’ll need to water the worms. Yes, like plants. You’ll have to poke around to judge the dryness or dampness of the bin, but the worms don’t bite and if you go so far as to have a worm bin in the first place, you probably don’t mind poking around inside one.
  • It’s normal, if you keep your bin outside, for other bugs to join your worms. Especially flies. After all, you’re basically putting trash outside. But it’s ok – the bugs help stimulate the environment and won’t bother the worms. If you see anything out of whack, though, feel free to message me. I’ve seen a lot of weird things since I started this worm bin a few years back, so I can help!
  • Sometimes plants will grow in your worm bin! Seeds from vegetables will thrive in this nutrient-rich environment, so don’t be surprised if you see some growth.
  • You can use the nutrient-rich liquid the worms create to water your garden or potted plants. It’s like a delicious meal for plants.
  • It’s worth it to invest in an odor-free compost bucket. I keep mine under the kitchen sink and add to it every night when I cook. No smell, and super easy to collect your scraps before it’s time to feed the worms again.

IMG_1831

Happy worm-binning!

Cauliflower Pizza Crust

My kitchen hasn’t been calling to me lately. It’s a weird feeling, and it’s a constant struggle to open the fridge and realize I’m going to be piecing together a lunch of crackers, cheese and tomato slices.

IMG_1836

Finally, I jumped on this cauliflower pizza crust bandwagon to end the home-cooked meal drought.

IMG_1820

It was tasty! And the gluten-free part is pretty awesome. It’s not every day you can shove multiple slices of pizza into your mouth and be eating mostly vegetables. Well, and cheese, but there’s nothing wrong with cheese.

IMG_1825

Needless to say, this pizza didn’t last long at all. I would highly recommend doubling this recipe if you’re feeding more humans than just yourself and/or if any of you have even an inkling of an appetite.

IMG_1832

What You Need:

  • One head cauliflower, florets chopped off
  • 1 egg, beaten
  • 4 oz. goat cheese
  • 1 tsp. dried oregano
  • 1/2 tsp. cayenne pepper
  • 1/2 tsp. garlic salt
  • 1 tsp. dried basil

What You Do:

Preheat oven to 400F

In a food processor, lightly “pulse” the cauliflower florets to create cauliflower “rice”. It’s best to add the florests one batch at a time to ensure they all get chopped up.

Now it’s time to cook the “rice.” In a medium saucepot, boil about 3 cups water and add the rice. Cover the pot, and let cook about 5 minutes.

IMG_1824

Drain thoroughly using a fine mesh strainer.

Transfer the drained cauliflower rice to a clean dish towel or several paper towels and pat well to dry.

In a large mixing bowl, combine the rice, egg, cheese and spices and mix thoroughly, kneeding with your hands until it forms a dough.

Now it’s ready to be made into a crust!

Sprinkle cornmeal onto the surface of a pizza stone and lay the dough ball on top. (If you don’t have a pizza stone, still use cornmeal and see below for alternate baking times).

Smooth the dough ball out with your hands, flattening to make a crust about 1/4 of an inch thick.

IMG_1819

Bake for about 20 minutes if using a pizza stone, 30-40 if using a baking sheet.

Remove from oven and cover with your favorite toppings. I used sliced zucchini, minced garlic, jalapeno slices, tomato slices and cheddar cheese.

Then, bake for another 5 minutes for a pizza stone, or 10 minutes for a baking sheet.

Slice it up, and serve!

IMG_1834