Five Days of Farmer’s Market Meals

The summer farmer’s market is like a once-a-week holiday to me.

ecd185e2-7891-4055-b731-c3632f5076c5

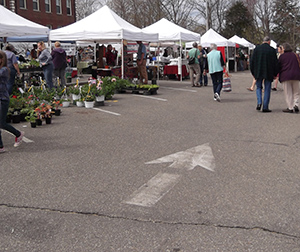
It’s one of my top favorite days along with Halloween and my birthday. I start preparing days ahead of time – mentally mapping out my weekend schedule to make sure I can get there in time to get eggs before they’re sold out, and secretly planning to “forget” to eat breakfast so I can order the made-on-the-spot egg, sausage and cheese croissant sandwich from one of the local farms.

The first time I ever went to our farmer’s market, about 6 or 7 years ago, I was drastically underprepared. I had ridden my bike there, and ended up riding home clutching to my handlebars a plastic bag containing my sole purchase – a carton of fresh eggs. I tried so hard to avoid all the bumps in the road.

Now I have a large and in charge straw bag that fits an almost embarrassing amount of veggies and other market goodies. Sometimes I accidentally hit people with it because my turning radius is so much wider than normal.

Straw Bag

It’s quite the adventure.

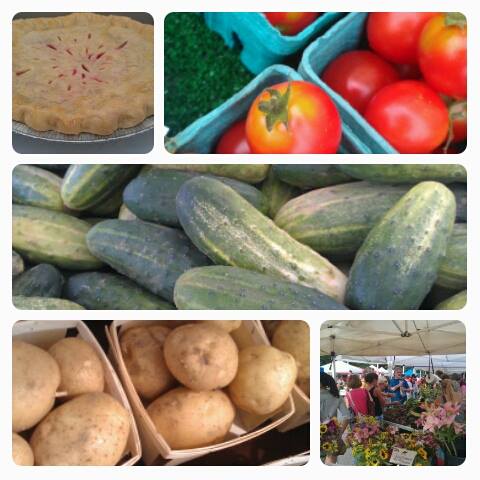
However, the real adventure begins at home in my kitchen, surrounded by mostly green, leafy foods that have more uses than I can wrap my brain around.

So, I decided I would turn it into a fun blog topic! For the next five days, I’m going to be posting recipes I’ve made from items purchased at our local farmer’s market! Other ingredients will be involved, but main ingredients and inspiration for the meal comes from the market.

Hope you enjoy the short journey and I hope this inspires some new ideas too! And let me know of any unique summer farmer’s market veggies you’ve discovered and used!

10553377_788058897892996_7616799741100874942_n

Credit: Seacoast Grower’s Association


Advertisement

Breakfast of Champions: Rice Cakes, Mashed Avocado and Cayenne

I never eat breakfast at home anymore, except on Tuesdays and Thursday when I get up at 4:50am for a boot camp class. Those days are egg sandwich days and I love them.

The rest of the time, I get up too late and spend what could be quality breakfast time doing other things like picking out an outfit or trying to find my keys. (My pre-bedtime prep for the coming morning is not a rock-solid operation).

So I keep a pretty hefty supply of food stuffs at my desk to mitigate the temptation to get a bagel and cream cheese from the bakery RIGHT DOWNSTAIRS. On non-egg days when I am underprepared, my stash of rice cakes (organic and non-GMO), almond butter, bananas and avocados are the perfect saving grace to get me through until lunch.

IMG_3885

There isn’t really a recipe required here. I take 2 rice cakes, cut open a ripe avocado (it needs to be soft enough that it can easily be mashed and spread) and scoop out 1/2 of the avocado, bagging the other half as air-tight as possible for the next day.

I cut the remaining portion in half again, and put one avocado part (piece?) on each rice cake. Then I just sort of spread it around, trying not to demolish the rice cake in the process.

Then – the magic ingredient! Sprinkle cayenne pepper on top (lightly if you’re not into the spicy thing).

Happy Breakfasting!

Pro Tip: Every other day (or when I run out of my avocado supply) I use almond butter and sliced banana with a touch of honey on the rice cakes instead. It’s all very yummy and easy to do!

IMG_3882


Gluten Free and Vegetarian Polenta Pizza

It’s apparently polenta week! Maybe I’m feeling inspired by corn? More realistically, I accidentally bought a brand new bag of cornmeal, not realizing I had not one, but two, already at home.

So bring on the cornmeal recipes!

Don’t worry, I won’t bombard you. But I’m pretty excited to experiment with it because I’ve only ever used it for sprinkling beneath a pizza crust so it won’t stick to the pan.

Speaking of pizza…

photo 5


What You Need to Make the Crust:

  • 1 cup cornmeal plus a little extra to line the pan
  • 1 1/2 cups water
  • 3/4 cup milk (I used almond – any kind of dairy-free milk would work too)
  • 1 tbsp olive oil

What You Need for Toppings:

So obviously you can use whatever you want for toppings, and I definitely plan to make this again and switch out the spinach for basil – yum!

  • Thinly sliced tomato
  • Spinach leaves
  • Thinly sliced summer and zucchini squash
  • Mozzarella cheese (grated or sliced)
  • 1 cup balsamic vinegar

What You Do:

Preheat your oven to 375F

Boil the water and milk in a medium pot. When it begins to boil, slowly add the cornmeal while simultaneously (as much as possible anyways) turning the heat down to a slow boil.

Stir well to avoid clumping. If it clumps try to just break them apart. Then cover and let simmer for about 15 minutes until it becomes thicker.

photo 1 (2)Add olive oil. Stir until thickened. I had to add a bit more cornmeal to make the polenta more of a pizza dough consistency.

While this is going on, sprinkle some cornmeal on your pizza stone or pan.

Once the polenta starts moving in a pizza-dough-type ball, remove from the pot. Spread slowly and evenly over the pizza stone or pan until 1/4 inch thick with no rips or holes.

I put the whole thing in the fridge for about half an hour to help it solidify more, but I have a hunch you could skip this step.

After I took it out of the fridge, I put it in the oven, topping-free, for about 15 minutes to burn off any excess water.

Then, it was time for the toppings! Pile them on, then bake for 12-15 minutes!

While it’s baking, make your balsamic reduction by slow boiling the balsamic vinegar. This takes 15-20 minutes. It will become syrupy, and you can test the progress by letting it drip off a spoon. Watch it closely once the level gets low because it will burn if you don’t remove it from the heat as soon as it fully reduces and becomes syrupy.

Drizzle it over the finished pizza and you’re done!

photo 3

Pro Tip: Unlike real pizza, this one doesn’t taste too awesome straight out of the fridge the day after. Heat this up in a toaster oven or conventional oven if you can! Microwaving would probably be ok too!


Potato, Leek and Kale Soup

So Mike has bronchitis. He’s not thrilled, for obvious reasons, but also because he’s been sick straight through some of the nicest days we’ve had in months.

The sun is out, the temperatures are steadily warming up, and there are legitimate flowers growing in our yard. It’s amazing! And on nights like we’ve been having, I naturally gravitate toward the grill. Except when my husband is sick. On nights like THAT, I gravitate toward soup.

Leek Soup (8)

There’s been a leek in our fridge for more than a week, and unlike my interaction with most vegetables, I was kind of stumped on how to use it, and had forgotten why I bought it in the first place.

I know when people are sick, chicken noodle soup is the natural go-to, but I decided to switch it up and make a creamy potato leek soup – completely vegetarian, and completely daily and gluten free.

Leek Soup (1)

What You Need:

  • One large leek, top layer and leaves removed, sliced
  • 4-5 small to medium yellow potatoes, quartered (you can peel them if you want – I didn’t)
  • 3 cloves garlic, chopped
  • 1/2 yellow onion, roughly chopped
  • 3-4 cups kale, chopped
  • 3 cups vegetable broth (I got mine this way)
  • 1/3 cup almond or soy milk
  • 2 tbsp olive oil
  • 1 tbsp ground black pepper

What You Do: Leek Soup (5)

Fill a large saucepan halfway with water and bring to a boil. Add the potatoes and cook at a slow boil for about 30 minutes or until soft.

Drain the potatoes into a strainer and set aside.

Leek Soup (2) In the same saucepan, heat oil on medium. Add sliced l  leeks, chopped onion and chopped garlic and simmer for  about 20 minutes. Add the chopped kale about halfway  through (after about 10 minutes) and simmer all until soft  and kale has reduced.

Add the potatoes and stir. Then add the vegetable broth  and bring the mixture to a slow boil.

Add the black pepper and stir. Remove from heat.

Pour the mixture into a food processor. If you like your soup chunkier like I do, pulse  until just blended. If you want a smoother soup, blend for longer until creamy.

Add the soup back into the saucepan. Add the almond or soy milk (or any milk of your choice) and stir.

It’s ready to serve!

Leek Soup (10)


Pro Tip: Make this soup a little spicy (you know I did) by adding a hot pepper of your choice into the mixture, or simply sprinkling some crushed red pepper on the soup once it’s ready to serve.

Slow Cooker Pulled Pork with Sweet Potato and Beer

On Sunday I received a text that spoke directly to my heart.

photo

The text came from my friend Mary, and to be fair, we had finished a 17 mile run just hours earlier. But if I’m going to be honest here, I will admit that I usually feel like I want to eat everything, regardless of how far I’ve run or even whether I’ve run at all.

I have a lot of cravings that tend to dictate what Mike and I eat for dinner.

IMG_3699

As you probably guessed, On Sunday like my friend Mary, I too felt like eating everything. To handle this feeling in the most mature and self-controlled way possible, I ate a handful of sour jelly beans and drove to the supermarket to buy ingredients for one of my favorite comfort food meals – slow cooker pulled pork. I felt like I needed comfort food – who doesn’t?!?

Knowing Mike and I couldn’t eat it until Monday night practically drove me insane, but it was well worth the wait. Absolutely delish! And I got kudos for making pork (Mike’s all-time fav meat dish that I rarely make).

IMG_3667

Seasoned Pork ready to start slow cooking.

IMG_3661

Spice Rub!

What You Need:

  • A boneless pork shoulder (also commonly called pork butt) between 3 and 5 pounds
  • One large sweet potato, grated or shredded (I used my food processor)
  • One large yellow onion, thinly sliced
  • 3 garlic cloves, minced
  • 3-4 scallions, chopped
  • 1 1/4 cup beer (I used a brown ale. If you don’t want to use beer, the same amount of vegetable or chicken broth works too)
  • 1 tbsp brown sugar
  • 1 tbsp chili powder
  • 1 tbsp salt
  • 1 tbsp ground red pepper (cayenne)
  • 1/2 tsp ground cumin
  • 1/4 tsp ground cinnamon
  • 2 cups of your favorite BBQ sauce (I used Thicker Style Hot Bone Suckin’ Sauce)

IMG_3645What You Do:

Line the bottom of the crock pot dish with the graded or shredded sweet potato, the thinly sliced onion, minced garlic and chopped scallions.

Pour the beer over the mixture. Drink the rest!

In a small bowl, mix together the brown sugar, chili powder, salt, cayenne, cumin and cinnamon.

Prepare your pork. I sliced it into large chunks and cut off as much fat as I could.

Rub the spice mixture over the pork pieces and place the pork over the onion mixture in the crock pot dish.

Set the crock pot on High for 6-8 hours OR on Low for 8-10 hours.

When it’s ready, spoon the pork out of the crock pot onto a separate plate.

Drain the liquid left in the crock pot through a strainer and INTO A POT so it doesn’t go down the drain. (This is only important to do if you do not wish to use BBQ sauce. If that’s the case, see below for the Pro Tip).

Return the onion mixture that was captured in the strainer to the crock pot. Return the pork to the crock pot and with a fork, begin pulling it apart until it is all looking like goodness.

Add your BBQ sauce and it’s ready to serve!

Pro Tip: If you do not wish to use BBQ sauce, pour the strained liquid back into the pulled pork mixture slowly until the pork is moistened (you may not need all of it!)

Pro Tip #2: Select a gluten-free BBQ sauce for a totally GF meal!

Pro Tip #3: Take advantage of the fact that this recipe allows you to say “pork butt” multiple times in conversation.

Smuttynose Old Brown Dog

Smuttynose Old Brown Dog – a perfect beer for this recipe!

Ready for Anything Homemade Vegetable Broth

Do you ever feel a little bad about all the vegetable scraps that pile up while you’re preparing a meal? Onion peels (are they called peels?), the tops/stems of peppers, tomatoes, eggplants, broccoli and squashes – it’s a crazy amount of food in the end that you aren’t using in the actual recipe!

I did eventually start a vermicycle compost bin, which is a HUGE help, but one thing I love to do with these veggie scraps is use them again for my own personal mealtime gain before feeding them to the compost worms.

This vegetable broth recipe is a super simple solution to that problem that basically produces an entirely new meal AND will help you feel less wasteful. A win-win!

photo 1 (3)

Store all of your vegetable scraps in the freezer in a gallon-size bag and simply continue adding to it each time you cook. Then, whenever you need vegetable broth for cooking, all you need to do is follow these easy steps and you’ll have at-the-ready homemade broth.

                photo 2 (3)                                                    photo 3 (1)

What You Do:

  1. Boil a large pot of water
  2. Put a good amount of the frozen veggies directly into the boiling water
  3. Boil down until the veggies are soft and the water is visibly broth-like. Add salt or pepper if desired.
  4. Drain the water through a strainer directly into another large pot and it’s ready!

Pro Tip: Eliminate a step and make your dinner prep easier by making the broth ahead of time and freezing it. Then you can just defrost and use! (This photo is not great but this is a half-gallon container and I filled two with just one pot. Win!)

photo 4 (1)