Spanish Rice Baked Stuffed Heirloom Tomatoes

Stuffed Tomatoes (6)

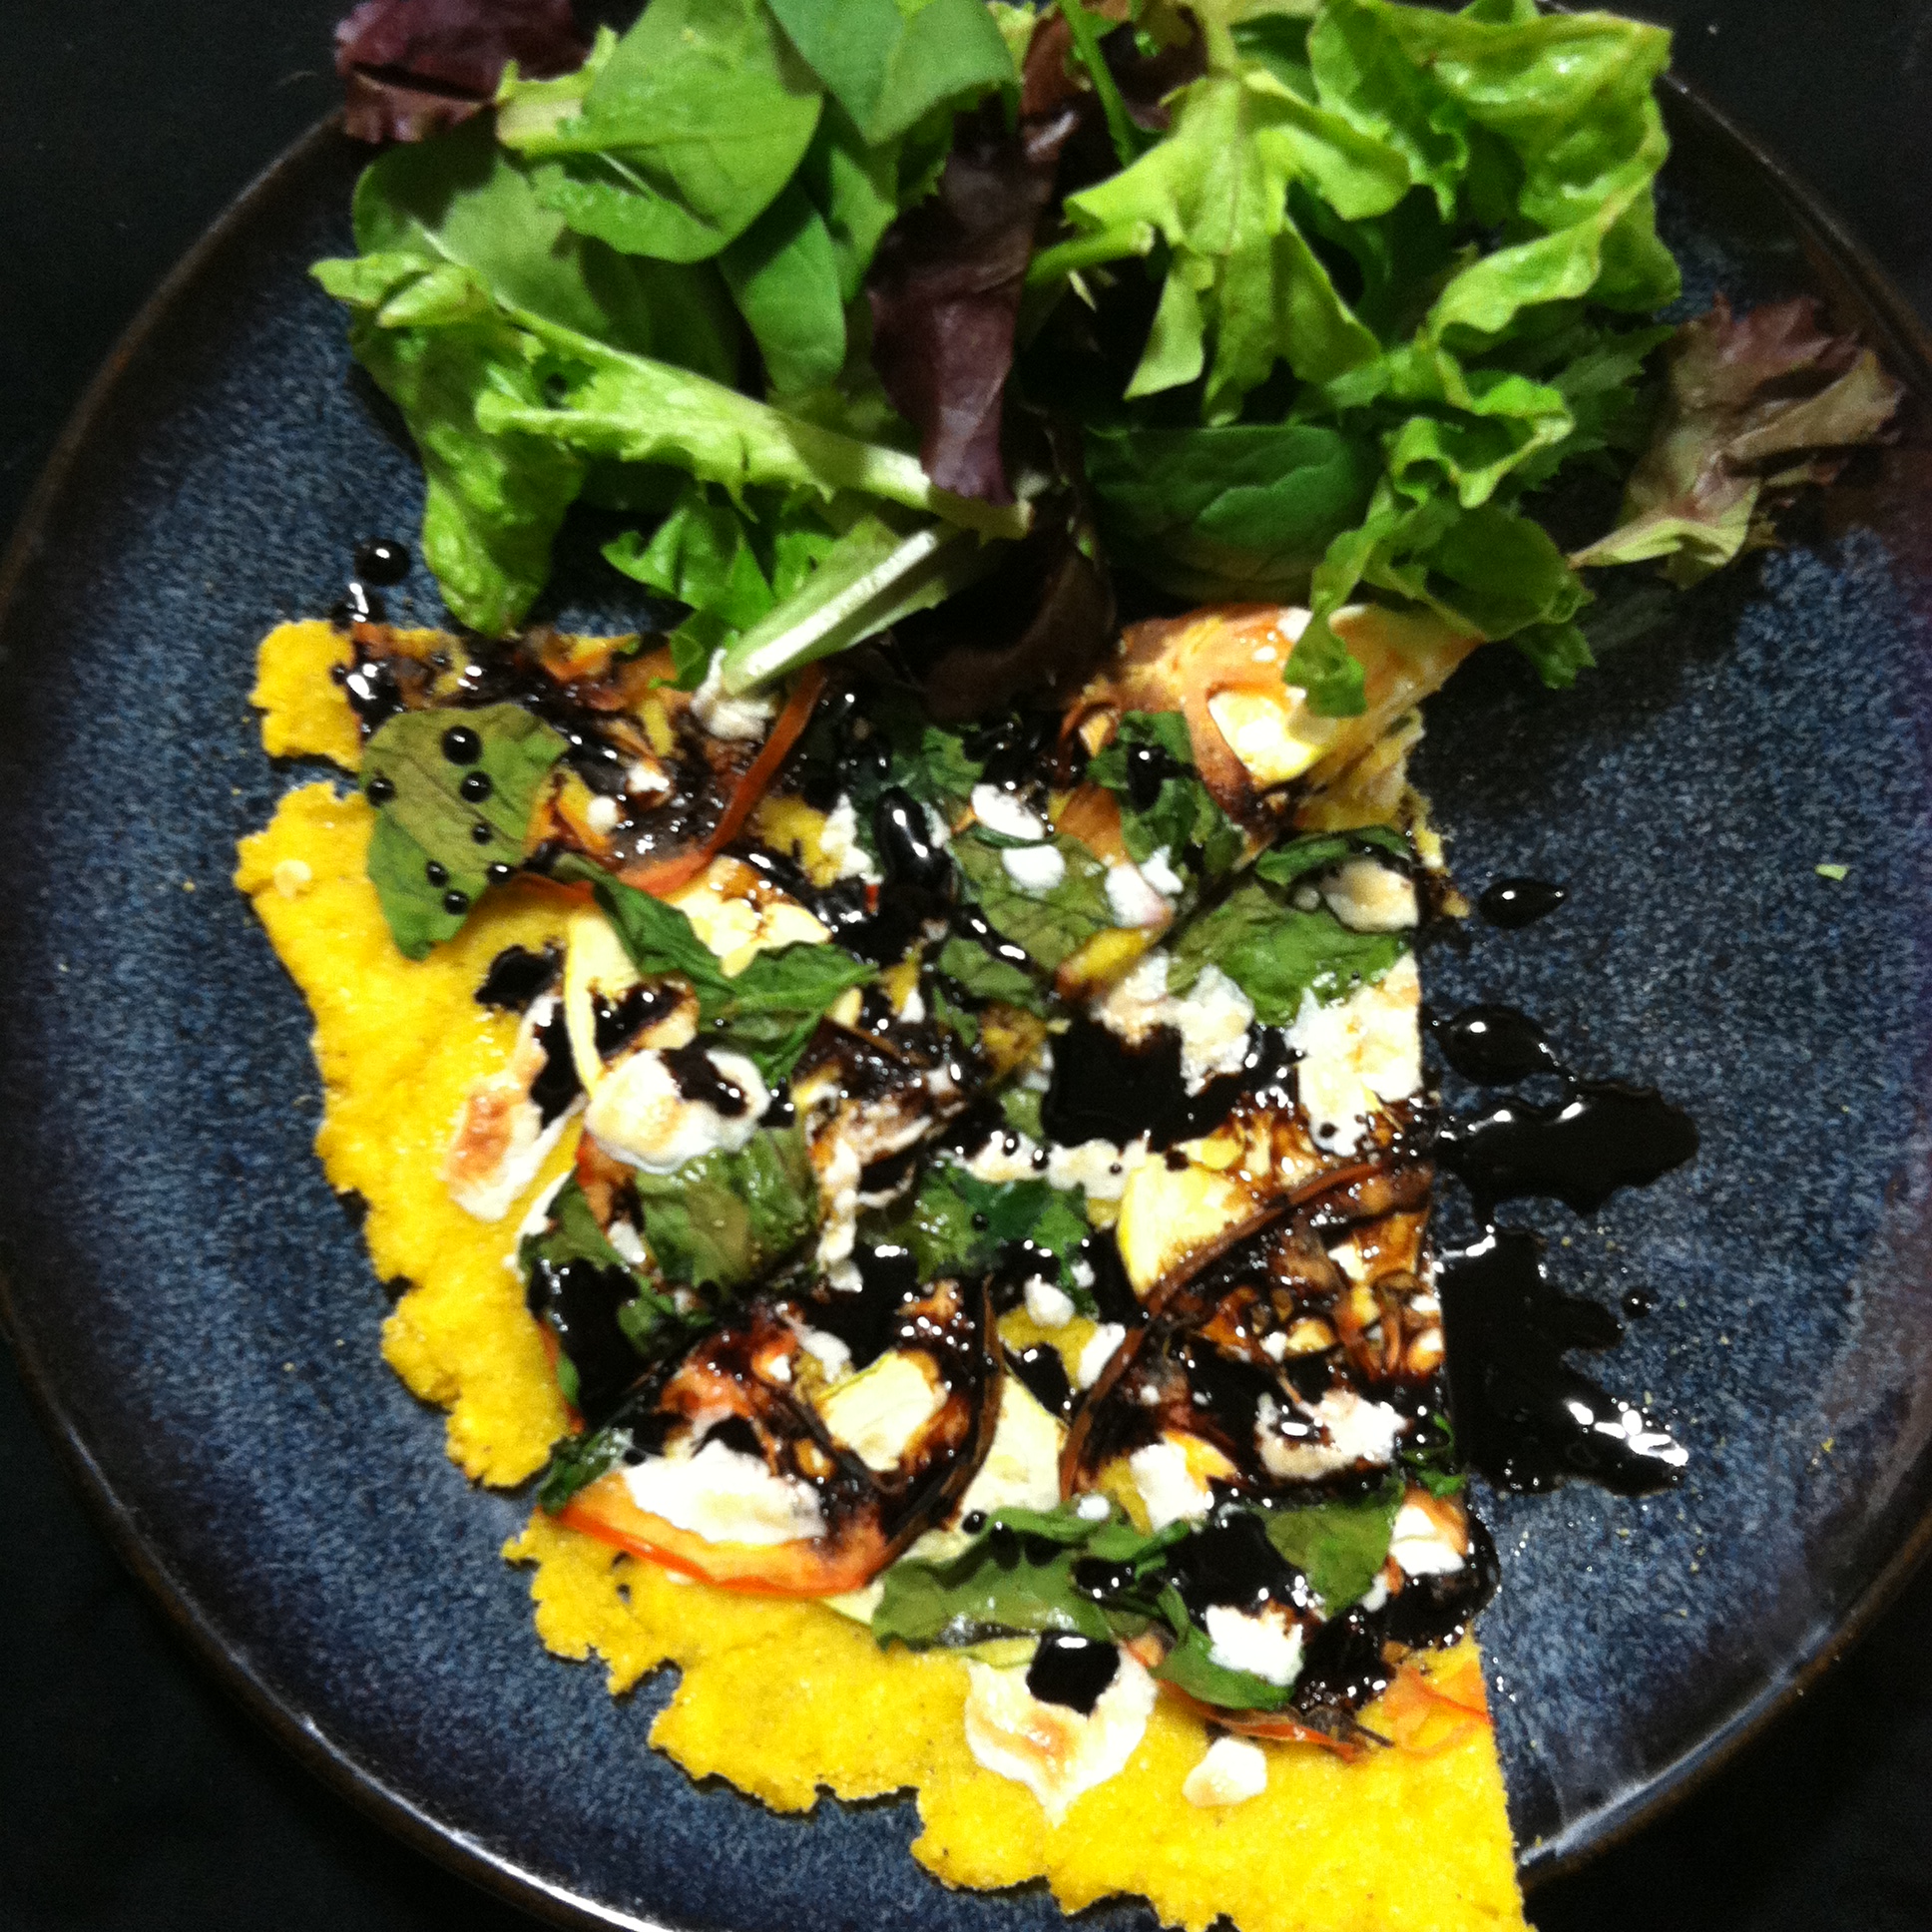
Do you KNOW how many recipes there are in the world for stuffed tomatoes where the stuffing is nothing more than breadcrumbs and some salt and pepper? I’m sure it’s delicious, really. You could put bread product in basically any food and I’d eat it for days. But I feel like I couldn’t quite get away with serving mostly breadcrumbs to Mike for dinner.

Stuffed Tomatoes (13)

Besides – there are so many awesome ways to stuff a tomato, right? I was going to do quinoa and kale for this recipe, but got to thinking about other grains and other dishes and remembered suddenly how much I loved Spanish Rice when my mother would make it when I was a kid. (If my mother is reading this, I want to be candid that I do realize I could be remembering this incorrectly and perhaps I did not love it as a kid, but I certainly consider it a food that I recall eating as a kid and enjoy eating today. So same thing, right?)

I also wanted to share this adorable farm stand that I discovered while running to work one day. (These are the perks of not driving – I tend to pay more attention to what’s going on around me). Check this out:


Stuffed Tomatoes (14)

This person keeps a little bucket near the veggies for your money and it’s completely an honors-system operation. I love it. So I got a few of the tomatoes for this meal from this little stop on my way home.

Stuffed Tomatoes (18)

This dish is super yummy and has the added benefit of providing probably all the lycopenes a person needs for a successful week! The rice you use is completely up to you. I used Jasmine because as I have mentioned it is by far my favorite type of rice, but I imagine a wild or brown rice would also be spectacular in this dish.

What You Need:

  • 5-7 medium red tomatoes or heirloom tomatoes if you can get your hands on them
  • 1 small onion, chopped OR 1/2 of a medium-large onion, chopped
  • 2 small garlic cloves, chopped
  • 1 jalapeno pepper, chopped (optional)
  • 1 small or 1/2 of a large red or green bell pepper, chopped
  • 2 cups vegetable broth
  • 1 cup rice
  • 1-8oz can diced tomatoes in their juices
  • 1/2 tsp salt
  • 1 tsp ground pepper
  • 1 tsp cilantro (finely chopped fresh or ground)
  • 1/4 cup panko breadcrumbs
  • 1/8 cup shredded Parmesan cheese

What You Do:

Preheat your oven to 350F.

Bring the vegetable broth to boiling in a medium saucepan. Reduce heat to a simmer and add the rice. Cover and let simmer for 10-15 minutes or until liquid is gone and rice is cooked.

While the rice is cooking, heat a 2 tsp olive oil in a medium skillet and add the chopped onion, garlic, jalapeno (if using) and bell peppers. Stuffed Tomatoes (2)

Let simmer, stirring frequently, until softened and cooked through. Remove from heat and set aside.

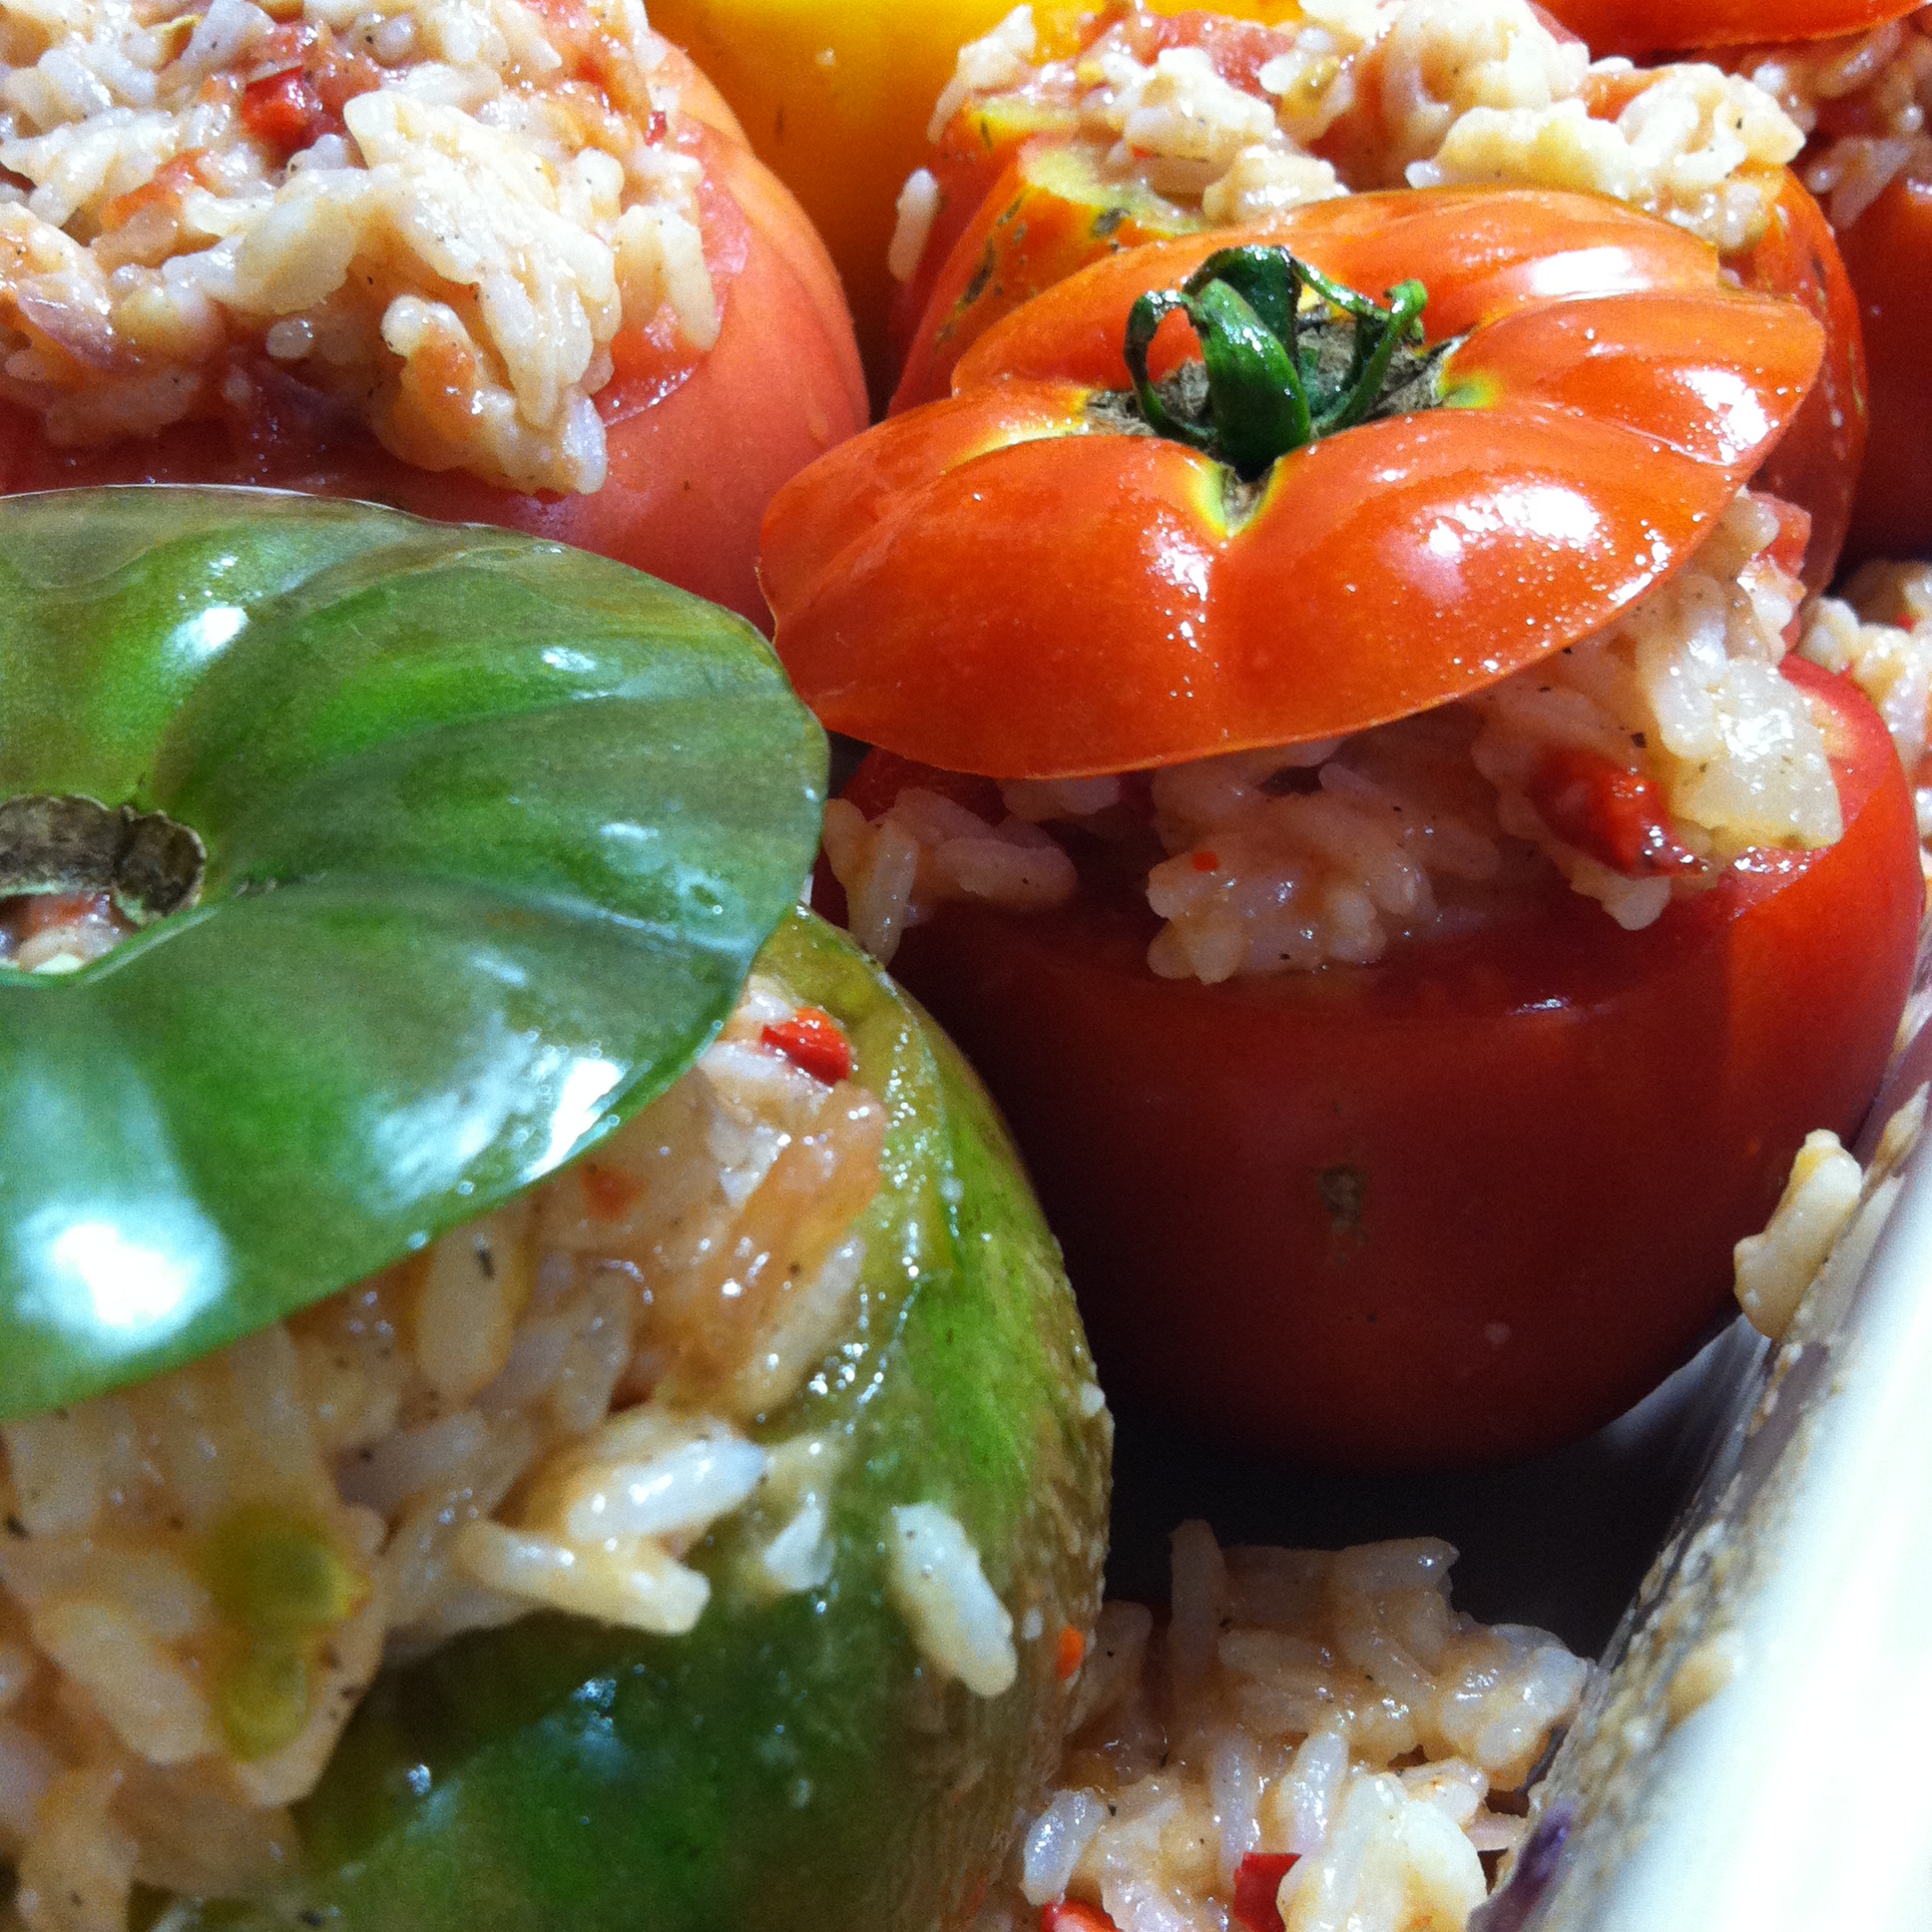
Take your tomatoes and using a small paring knife, slice off just the very top to remove the stem area.

Cut in a circle around the perimeter of the inside of the tomato, basically hulling out the middle stem part and goopy insides, being careful not to slice into the body of the tomato or through the bottom.

Using a spoon, scoop out the insides and carefully clean around the inside to open up a nice space for filling, still being careful not to cut into or damage the body of the tomato.

Arrange the hollowed-out tomatoes in a large baking dish with a small amount (1/4 cup) of water in the bottom.

        Stuffed Tomatoes (3)          Stuffed Tomatoes (9)

Combine the onion mixture with the rice mixture, and add the diced tomatoes and chopped cilantro, and stir up well to make the stuffing. Add salt and pepper and mix again.

Using a tablespoon, scoop the stuffing into the hollowed-out insides of each tomato, packing it down and letting extra stuffing flow out the top of the tomatoes.

Combing the panko breadcrumbs and shredded Parmesan cheese and sprinkle over each tomato.

Bake for about 45 minutes or until the tomatoes are pinched and the breadcrumbs begin to brown.

Add more water to the bottom of the baking dish if necessary after about 20 minutes.

Enjoy!!

Stuffed Tomatoes (12)

Pro Tip: As noted above, I think this would be marvelous with another rice such as wild or brown! Also, in a pinch you can use salsa instead of diced tomatoes and just add less garlic and probably nix the cilantro.

Advertisement

Greek Yogurt Chicken Salad Lettuce Wraps

Yogurt Chicken (14)

I love guilt-free dinners more than probably anything. It justifies me eating more of it than is likely acceptable, and topping off that meal with a hefty portion of Ben & Jerry’s Late Night Snack. If you haven’t tried that kind, but have a potential affinity for chocolate-covered potato chips enveloped in vanilla ice cream and creamy caramel, then go pick a pint up right now. I’m not kidding.

Anyways, back to the food.

Yogurt Chicken (8)

This is super good. And if you don’t want to eat your sandwich fillings between crispy lettuce leaves, just use bread and put the lettuce on as a topping. BUT IT’S NOT AS FUN! 🙂

Yogurt Chicken (11)

What You Need:

  • 6-8 large, full Romaine lettuce leaves
  • 6-8 thin boneless chicken breasts
  • 1/4 cup chopped pecans
  • 1/2 cup chopped dried cranberries
  • 1 cup chopped celery
  • 1/2 cup chopped scallions
  • 1 1/2 tbsp chopped fresh tarragon
  • 1 1/2 cups plain Greek yogurt
  • 1/2 tsp salt
  • 1 tsp fresh ground black pepper

What You Do:

Cook the chicken in a medium pan with a tbsp of olive oil, covered, flipping after 5 minutes. Remove when cooked through and while it’s still moist – we don’t want dry chicken!

Slice and chop the chicken into tiny pieces. Put in a large bowl. Yogurt Chicken (7)

In a small saucepan on low heat, slowly toast the pecans, stirring in the pan frequently to keep them moving and keep them from burning. They’ll start to smell pretty pungent when they’re almost done. Be careful not to burn them.

Add the pecans, chopped cranberries, celery, scallions, salt and pepper to the chicken and mix thoroughly.

Add Greek yogurt and mix well.

Add the tarragon and mix well.

Place on lettuce leaves and wrap, and enjoy!


Pro Tip: Add a dab of honey mustard before wrapping these babies up for a little zing.


Thai Peanut Tofu Stirfry with Kale

IMG_4090

For the FIFTH (but let’s face it, certainly not final) day of Five Days of Farmer’s Market Meals, I give you a ridiculously easy but totally delish vegetable explosion in a pan.

For the fact that I have this crazy amount of kale in my backyard, I realize I haven’t made nearly enough kale-involved recipes this week. So I’m making up for it right now.

Zukes (10)    Zukes (6)    IMG_4096

I have a not-so-secret addiction to Thai food – particularly Tofu Pad Thai. But a long time ago I decided it was silly to keep buying it when the ingredients are really so super simple. However, I’ve never been able to give my tofu that golden crispiness, probably because I cook them in oil and not in a fry-o-lator 🙂

This dish is a farmer’s market-friendly spin on Pad Thai, with homemade everything. Sometimes I make these meals to ensure I will have a lunch in the fridge at work the next day that I truly look forward to eating. No shame in that!

The Farmer’s Market ingredients used in this recipe are:

  • Kale (from my garden)
  • Garlic scapes
  • Red and green peppers
  • Bean sprouts
  • Scallions

IMG_4089

What You Need for the Stir Fry

  • 1 bunch kale (about 15 leaves) hand shredded
  • 1 package firm tofu, cut into small squares
  • 2 garlic scapes, chopped into small rounds
  • 1 scallion, sliced
  • 1 red pepper, chopped
  • 1 green pepper, chopped
  • 1 bunch bean sprouts, cut into 1-inch strands

What You Need for the Peanut Sauce

  • 1/4 cup honey
  • 1/4 cup peanut butter
  • 3 tbsp soy sauce
  • 3 tbsp olive oil
  • 1 tbsp sesame oil
  • 2 tsp minced garlic
  • 1 tbsp fresh ginger root, grated
  • red pepper flakes, to taste (about 1-2 tsp)


What You Do:

To make the peanut sauce, simply combine all ingredients. Easy!

Set aside.

In a medium skillet, heat a tbsp of olive or coconut oil and cook the tofu, covered, stirring often. It will be done when the tofu begins to brown and stick slightly to the pan.

IMG_4093

In a large wok or skillet, heat the olive or coconut oil and add the scallions. Cook, stirring frequently, for about 3 minutes or until soft.

Add garlic scapes, cook for about 2 minutes. Add peppers, stir and cook for about 5 minutes.

Add the tofu and kale. Stir and cook for about 5-8 minutes or until the kale is soft.

Pour the peanut sauce over the tofu stir fry, mix well, and serve topped with bean sprouts, or add the bean sprouts into the mix just before serving.

Pro Tip: Substitute the tofu for chicken, beef or shrimp if desired. Also, you can spice up this dish quite a bit by adding some chopped jalapeno or serrano pepper.

Sesame-Ginger Vegetable Quinoa Salad with Cranberries and Walnuts, Lemon-crusted Haddock and a Side Salad

Egretti (7)

For my third day of Five Days of Farmer’s Market Meals, I made a smorgasbord (kinda) in order to get a better handle on my overflowing crisper drawer.

But I succeeded in using a lot of vegetables, and everything went together pretty nicely in the end! This recipe makes for a delightful little summery meal, and it’s got a couple completely different ingredients in it that really give it a unique flavor.

You likely won’t be able to find the same exact stuff at your market, but I address that in the ingredients list.

The farmer’s market ingredients used in this meal are:

  • Agretti
  • Culinary celery
  • Carrots
  • Spinach
  • Cucumber
  • Scallions
  • Wild-caught local haddock from the fish guy

I’d like you to meet two of my new favorite veggies: Agretti and Culinary Celery

Egretti (1)     Egretti (3)

What is Agretti? Agretti is a Mediterranean water-retaining plant that looks like it should taste like grass but is actually DELICIOUS and can be used in basically anything, including raw in salads, omelets, or sprinkled over pasta (which is how I would have used it had I not just made pasta. Poor planning!)

Culinary Celery will blow your mind if you don’t like celery, but will especially blow your mind if you don’t like parsley. This awesome vegetable creation is a divine marriage of the two that tastes just perfect and doesn’t have that often overwhelming flavor you get with celery and/or parsley.

Agretti can be tough to find unless you know a farmer or market that grows Mediterranean-type veggies, but if you want to try and use something similar, people claim dandelion greens come close-ish.

As for culinary celery, I’ve never seen this before but you might ask around for it. Otherwise, adding a tiny bit of both celery and parsley together would be fine just to get that flavor.

ALSO – NEVER FEAR! This dish is perfect without either of these things! It’s the sesame-ginger sauce that really brings it all together 🙂

Egretti (5)

What You Need for the Quinoa Salad

  • 1 cup quinoa cooked according to package directions
  • 1 cup shredded carrot
  • 1 cup finely chopped culinary celery
  • 1-2 cups roughly chopped agretti
  • 1 cup dried cranberries (I used Craisins)
  • 1 cup chopped walnuts
  • 1 cup finely chopped cucumber

What You Need for the Sesame-Ginger Dressing

  • 1/2 cup extra-virgin olive oil
  • 1/4 cup balsamic vinegar
  • 2 tablespoons soy sauce
  • 2 cloves garlic, chopped
  • 2 tablespoons brown sugar (or substitute with honey)
  • 2 tablespoons fresh ginger, minced
  • 1 teaspoon sesame oil
  • pinch red pepper or chili flakes to taste


What You Need for the Lemon-Crusted Haddock

  • 2 meyer lemons, cut into slices
  • 1/4 cup shredded parm
  • 1/4 cup panko (or your favorite bread ground up in a food processor)
  • Haddock

Egretti (2)

What You Do

Add the shredded veggies and chopped walnuts and whole cranberries to the quinoa in a large bowl and mix thoroughly. Add sesame dressing, mix well, and set aside in the refrigerator to chill for about an hour, if you can wait. This dish is good both hot and cold.

While the quinoa salad is chilling, sprinkle the haddock with fresh lemon.

Mix together the shredded parm and panko, and gently dip the lemon-doused haddock in to lightly cover the fish, or sprinkle the mixture over the fish if picking it up isn’t really an option.

Bake, grill or pan-fry the haddock until cooked. Serve alongside the quinoa salad with a mixed-green salad on the side if desired! I made a quick salad with leftover agretti, spinach leaves and chopped scallions.

Egretti (6)


Black Bean, Chickpea and Zucchini Veggie Burgers with Curried-Honey Glazed Tri-Color Carrots

IMG_4054

There’s nothing better than a summer meal. Like really nothing at all. There’s just something about that wonderful smell wafting from the grill from flame-kissed summer veggies that makes every slow sunset better than the last.

I’m not going to lie, it’s super hard right now for me to do anything after work besides come home, throw on my apron, turn up my Spotify playlist, crack a bottle of wine and get to cooking. It doesn’t always work out that way, but tonight it did (sans the wine – trying to be responsible!)

IMG_4043

My longtime desire to create a veggie burger recipe that actually works on the grill without falling horribly apart has finally been realized, along with my longtime desire to cook tri-color carrots.

I know, small victories.

Anyways, on to the perfect summertime recipe.

IMG_4046What You Need:

For the burgers:

  • 2 cups panko
  • 1 can black beans
  • 1 can chickpeas (garbanzo beans)
  • 1 cup cooked quinoa
  • 1 medium zucchini, chopped
  • 1 egg
  • 2 tsp onion powder
  • 2 tsp pepper
  • 1 tbsp olive oil

For the carrots:

  • 1 bunch tri-colored carrots (I found mine at Trader Joes, but I KNOW they’ll have them at the farmer’s market eventually)
  • 1 tbsp curry powder
  • 3 tbsp honey

What You Do:

Cook the quinoa according to package directions. Set aside 1 cup of the cooked quinoa for this recipe and use the rest for whatever!

Mix the honey and the curry powder and brush over the carrots. Lay the carrots out on a large piece of lightly oiled tin foil. Wrap tightly and place on the top shelf of the grill. They’ll need about 45 minutes to an hour to cook fully, and they will be ready to eat when they’re very soft.

IMG_4050Drain and rinse the black beans and chickpeas.

In a food processor, load in the two cans of beans and the rest of the ingredients.

Pulse gently until the mixture is coarsely ground. If it seems too loose and won’t make burgers that feel fairly solid, add additional panko until the mixture is thicker and forms burgers without trouble and without globbing all over your hands (I have no better way to describe this).

Lay burgers out of a piece of lightly oiled foil and place on the grill. Let the burgers cook about 5 minutes on each side and flip them four times.

Toast your burger rolls of choice or just eat the burgers bun free! I topped them with ketchup and mescalin mix.

Pro Tip: Make these gluten-free by substituting the panko for a gluten-free bread of your choice (just chop it in the food processor ahead of time).

IMG_4055


Tomatillo Pizza

Pizza with tomato sauce? How about pizza with tomatillo sauce?

I’ve only ever used tomatillos to make salsa. That is, until I discovered that when you slice them and heat them in a pan, they reduce to a thick and sweet sauce that pairs perfectly with other veggies and – my favorite – goat cheese.

This sauce puts a fun spin on pizza. It makes it a little sweet but it’s definitely tasty and a really good summer pizza. I busted it out on a hot day for a pre-dinner appetizer and it was a hit!

IMG_3851

Preheat Oven to 350F-375F

What You Need to Make the Pizza Dough:

(Adapted from this recipe from my cooking idol Smitten Kitchen)

  • 1 1/2 cups flour (can replace up to half of this with whole wheat flour)
  • 1 teaspoon table salt
  • 3/4 teaspoon  active dry yeast
  • 1/2 cup lukewarm water (may need up to 1 or 2 tablespoons more)
  • 1 tablespoon olive oil
  • About 1-2 tablespoons whole flax seed. Gives the dough a little crunch and healthy boost!

What You Need to Make the Topping:

  • Pre-made or homemade pizza crust. If you make your own, I highly suggest using this recipe from my cooking idol Smitten Kitchen.
  • 6-8 medium tomatillos, shells peeled off and sliced into quarters
  • 1 medium red onion, sliced
  • 3-4 oz. of goat cheese
  • 1/4-1/2 cup of corn meal (to sprinkle on baking pan to bake the pizza on)

IMG_3853To Make the Pizza Dough:

Stir dry ingredients, including yeast, in a large bowl. Add the water and olive oil and stir until formed into a ball. Knead well and place in a well-greased bowl with a damp towel covering it for 1-2 hours until it has doubled in size.

Knead dough again to eliminate air pockets and place back in the bowl for 20-30 minutes. Roll out the dough and lift onto a pizza stone or pizza pan pre-sprinkled with cornmeal.

To Make the Topping:

Place the tomatillos into an oiled pan heated on medium. Cover and simmer until they reduce and thicken, stirring frequently.

While tomatillos are cooking, place sliced onions in an oiled pan on medium heat, cover and cook until caramelized.

Spread the tomatillo mixture across pizza like a sauce. Top with caramelized onions and goat cheese and bake for 10-12 minutes depending on the thickness of your dough.

Pro Tip: Along with the flax seed, add fresh basil or dill to the pizza dough to give it a little kick and a little more of that summer flavor!

Vegetarian Quesadillas with Beans and Corn

This is truly a quick dinner dish. Perfect for those nights when you’ve worked late and have no desire to cook anything, but have no leftovers in the fridge and no appetite for Annie’s Mac (which is generally my go-to for nights like this).

001

I went straight for the cupboard for this dinner, pulling out a can of corn and a can of pinto beans. Luckily, this is one of those dinners that you can make with pretty much anything you find around your kitchen.

I made one for me and one for Mike because I wanted mine to be super spicy. It took about 40 minutes total and really hit the spot!

Preheat the oven to 350F

006What You Need:

  • Wraps (I used 4 Joseph’s Omega 3 wraps)
  • Freshly grated cheese of your choice (I used cheddar)
  • 1 can of corn
  • 1 can of beans of your choice
  • Chopped jalapeno or serrano pepper (optional)
  • 1 avocado
  • Jar of salsa (I used a spicy corn salsa)
  • Sour Cream (optional)

What You Do:

Drain the corn and beans in a strainer and combine. Add a teaspoon of salt and pepper if desired.

Sprinkle shredded cheese on one half of the wrap OR on one whole side of one wrap. Then sprinkle the corn and bean mixture on top. Add chopped hot pepper if desired.

Sprinkle more shredded cheese on top and fold the wrap over to cover it OR place another wrap over it.

Place in the oven and bake until cheese is melted and the wrap is toasty.

To dress, add salsa and avocado or – to be “fancy”, mash the avocado and blend with some salsa for a quick and easy not-quite-guacamole.

Add a side salad if desired and you’re good to go!003


Pro-Tip: Add chicken if you want! Also, you will probably have leftover corn and beans, so use the mixture to top a salad!


Gluten Free and Vegetarian Polenta Pizza

It’s apparently polenta week! Maybe I’m feeling inspired by corn? More realistically, I accidentally bought a brand new bag of cornmeal, not realizing I had not one, but two, already at home.

So bring on the cornmeal recipes!

Don’t worry, I won’t bombard you. But I’m pretty excited to experiment with it because I’ve only ever used it for sprinkling beneath a pizza crust so it won’t stick to the pan.

Speaking of pizza…

photo 5


What You Need to Make the Crust:

  • 1 cup cornmeal plus a little extra to line the pan
  • 1 1/2 cups water
  • 3/4 cup milk (I used almond – any kind of dairy-free milk would work too)
  • 1 tbsp olive oil

What You Need for Toppings:

So obviously you can use whatever you want for toppings, and I definitely plan to make this again and switch out the spinach for basil – yum!

  • Thinly sliced tomato
  • Spinach leaves
  • Thinly sliced summer and zucchini squash
  • Mozzarella cheese (grated or sliced)
  • 1 cup balsamic vinegar

What You Do:

Preheat your oven to 375F

Boil the water and milk in a medium pot. When it begins to boil, slowly add the cornmeal while simultaneously (as much as possible anyways) turning the heat down to a slow boil.

Stir well to avoid clumping. If it clumps try to just break them apart. Then cover and let simmer for about 15 minutes until it becomes thicker.

photo 1 (2)Add olive oil. Stir until thickened. I had to add a bit more cornmeal to make the polenta more of a pizza dough consistency.

While this is going on, sprinkle some cornmeal on your pizza stone or pan.

Once the polenta starts moving in a pizza-dough-type ball, remove from the pot. Spread slowly and evenly over the pizza stone or pan until 1/4 inch thick with no rips or holes.

I put the whole thing in the fridge for about half an hour to help it solidify more, but I have a hunch you could skip this step.

After I took it out of the fridge, I put it in the oven, topping-free, for about 15 minutes to burn off any excess water.

Then, it was time for the toppings! Pile them on, then bake for 12-15 minutes!

While it’s baking, make your balsamic reduction by slow boiling the balsamic vinegar. This takes 15-20 minutes. It will become syrupy, and you can test the progress by letting it drip off a spoon. Watch it closely once the level gets low because it will burn if you don’t remove it from the heat as soon as it fully reduces and becomes syrupy.

Drizzle it over the finished pizza and you’re done!

photo 3

Pro Tip: Unlike real pizza, this one doesn’t taste too awesome straight out of the fridge the day after. Heat this up in a toaster oven or conventional oven if you can! Microwaving would probably be ok too!


Vegetarian Polenta Stuffed Poblano Peppers

It’s that time of the month where I have to do a serious assessment of what’s in the fridge. I hate nothing more than reaching into the crisper drawer to grab the tomatoes I bought to make sauce and finding that some – or, GASP!, all – of them have gone bad.

My only consolation is being able to feed my rotten food to the worms in my vermicompost bin, but it’s still food I needed for dinner and no longer have!

My stray vegetable roundup this week resulted in this comfort food dish that was fairly quick to make and perfect after a long day at work.

Preheat Oven to 300F

015

What You Need:

  • 5-6 poblano peppers
  • 1 tbsp olive oil
  • Half a small onion
  • 1 tbsp minced garlic
  • 2 cups kale
  • 1 cup cornmeal
  • 2 cups water
  • 3-4 cups tomato sauce

What You Do To Make the Polenta:

Boil 2 cups of water. When it boils, add 1 cup cornmeal and immediately remove from heat as the cornmeal will thicken super quick in the bioling water. Don’t be alarmed, this literally takes a matter of seconds.

Stir until thickened and add additional water if necessary (I usually have to) to make it creamier. Your polenta should be creamy and easy to stir when complete.

What You Do To Make the Filling:

Slice the tops off the poblano peppers leaving as much pepper on as you can. Cut the pepper in half lengthwise and clean out the seeds and veins.

013Lay the peppers out on a baking sheet and bake for about 15 minutes. Flip them about halfway through and take out when the skin starts to pinch.

While the peppers bake, warm olive oil in a large pan on medium heat. Add the onion and garlic and simmer, stirring frequently, until translucent and soft.

Add any other veggies you want. I added 2 chopped serrano peppers for a little kick and the kale, stirring it until it was steamed and reduced.

Add the onion mixture to your polenta, stirring until well mixed.

Place each pepper in a baking dish with sides, and spoon the polenta mixture into each poblano pepper. Top with tomato sauce and goat cheese, and bake until cheese is melted.

Pro Tip: Consider adding cooked sausage or your favorite kind of bean to the polenta mixture for some protein!

012

Potato, Leek and Kale Soup

So Mike has bronchitis. He’s not thrilled, for obvious reasons, but also because he’s been sick straight through some of the nicest days we’ve had in months.

The sun is out, the temperatures are steadily warming up, and there are legitimate flowers growing in our yard. It’s amazing! And on nights like we’ve been having, I naturally gravitate toward the grill. Except when my husband is sick. On nights like THAT, I gravitate toward soup.

Leek Soup (8)

There’s been a leek in our fridge for more than a week, and unlike my interaction with most vegetables, I was kind of stumped on how to use it, and had forgotten why I bought it in the first place.

I know when people are sick, chicken noodle soup is the natural go-to, but I decided to switch it up and make a creamy potato leek soup – completely vegetarian, and completely daily and gluten free.

Leek Soup (1)

What You Need:

  • One large leek, top layer and leaves removed, sliced
  • 4-5 small to medium yellow potatoes, quartered (you can peel them if you want – I didn’t)
  • 3 cloves garlic, chopped
  • 1/2 yellow onion, roughly chopped
  • 3-4 cups kale, chopped
  • 3 cups vegetable broth (I got mine this way)
  • 1/3 cup almond or soy milk
  • 2 tbsp olive oil
  • 1 tbsp ground black pepper

What You Do: Leek Soup (5)

Fill a large saucepan halfway with water and bring to a boil. Add the potatoes and cook at a slow boil for about 30 minutes or until soft.

Drain the potatoes into a strainer and set aside.

Leek Soup (2) In the same saucepan, heat oil on medium. Add sliced l  leeks, chopped onion and chopped garlic and simmer for  about 20 minutes. Add the chopped kale about halfway  through (after about 10 minutes) and simmer all until soft  and kale has reduced.

Add the potatoes and stir. Then add the vegetable broth  and bring the mixture to a slow boil.

Add the black pepper and stir. Remove from heat.

Pour the mixture into a food processor. If you like your soup chunkier like I do, pulse  until just blended. If you want a smoother soup, blend for longer until creamy.

Add the soup back into the saucepan. Add the almond or soy milk (or any milk of your choice) and stir.

It’s ready to serve!

Leek Soup (10)


Pro Tip: Make this soup a little spicy (you know I did) by adding a hot pepper of your choice into the mixture, or simply sprinkling some crushed red pepper on the soup once it’s ready to serve.