Oatmeal Lace Cookies and Nutella Almond Butter Cookies

I find myself watching repeat episodes of the Big Bang Theory all. the. time. In my defense, the repeats are shown on TV all. the. time. It’s funny to me how easily I am influenced to make or eat foods based on what I see on TV. I’m basically a marketer’s dream.

Cookies (12)

Anyways, the other day I was watching the episode where Bernadette is going to be featured in a magazine as one of the top sexiest female scientists to watch, and Amy Farrah Fowler is upset because she feels female scientists shouldn’t have to flaunt their good looks to be recognized for their achievements. Plot line aside, the girls were eating cookies in the opening scene, so I decided to make some.

Cookies (2)

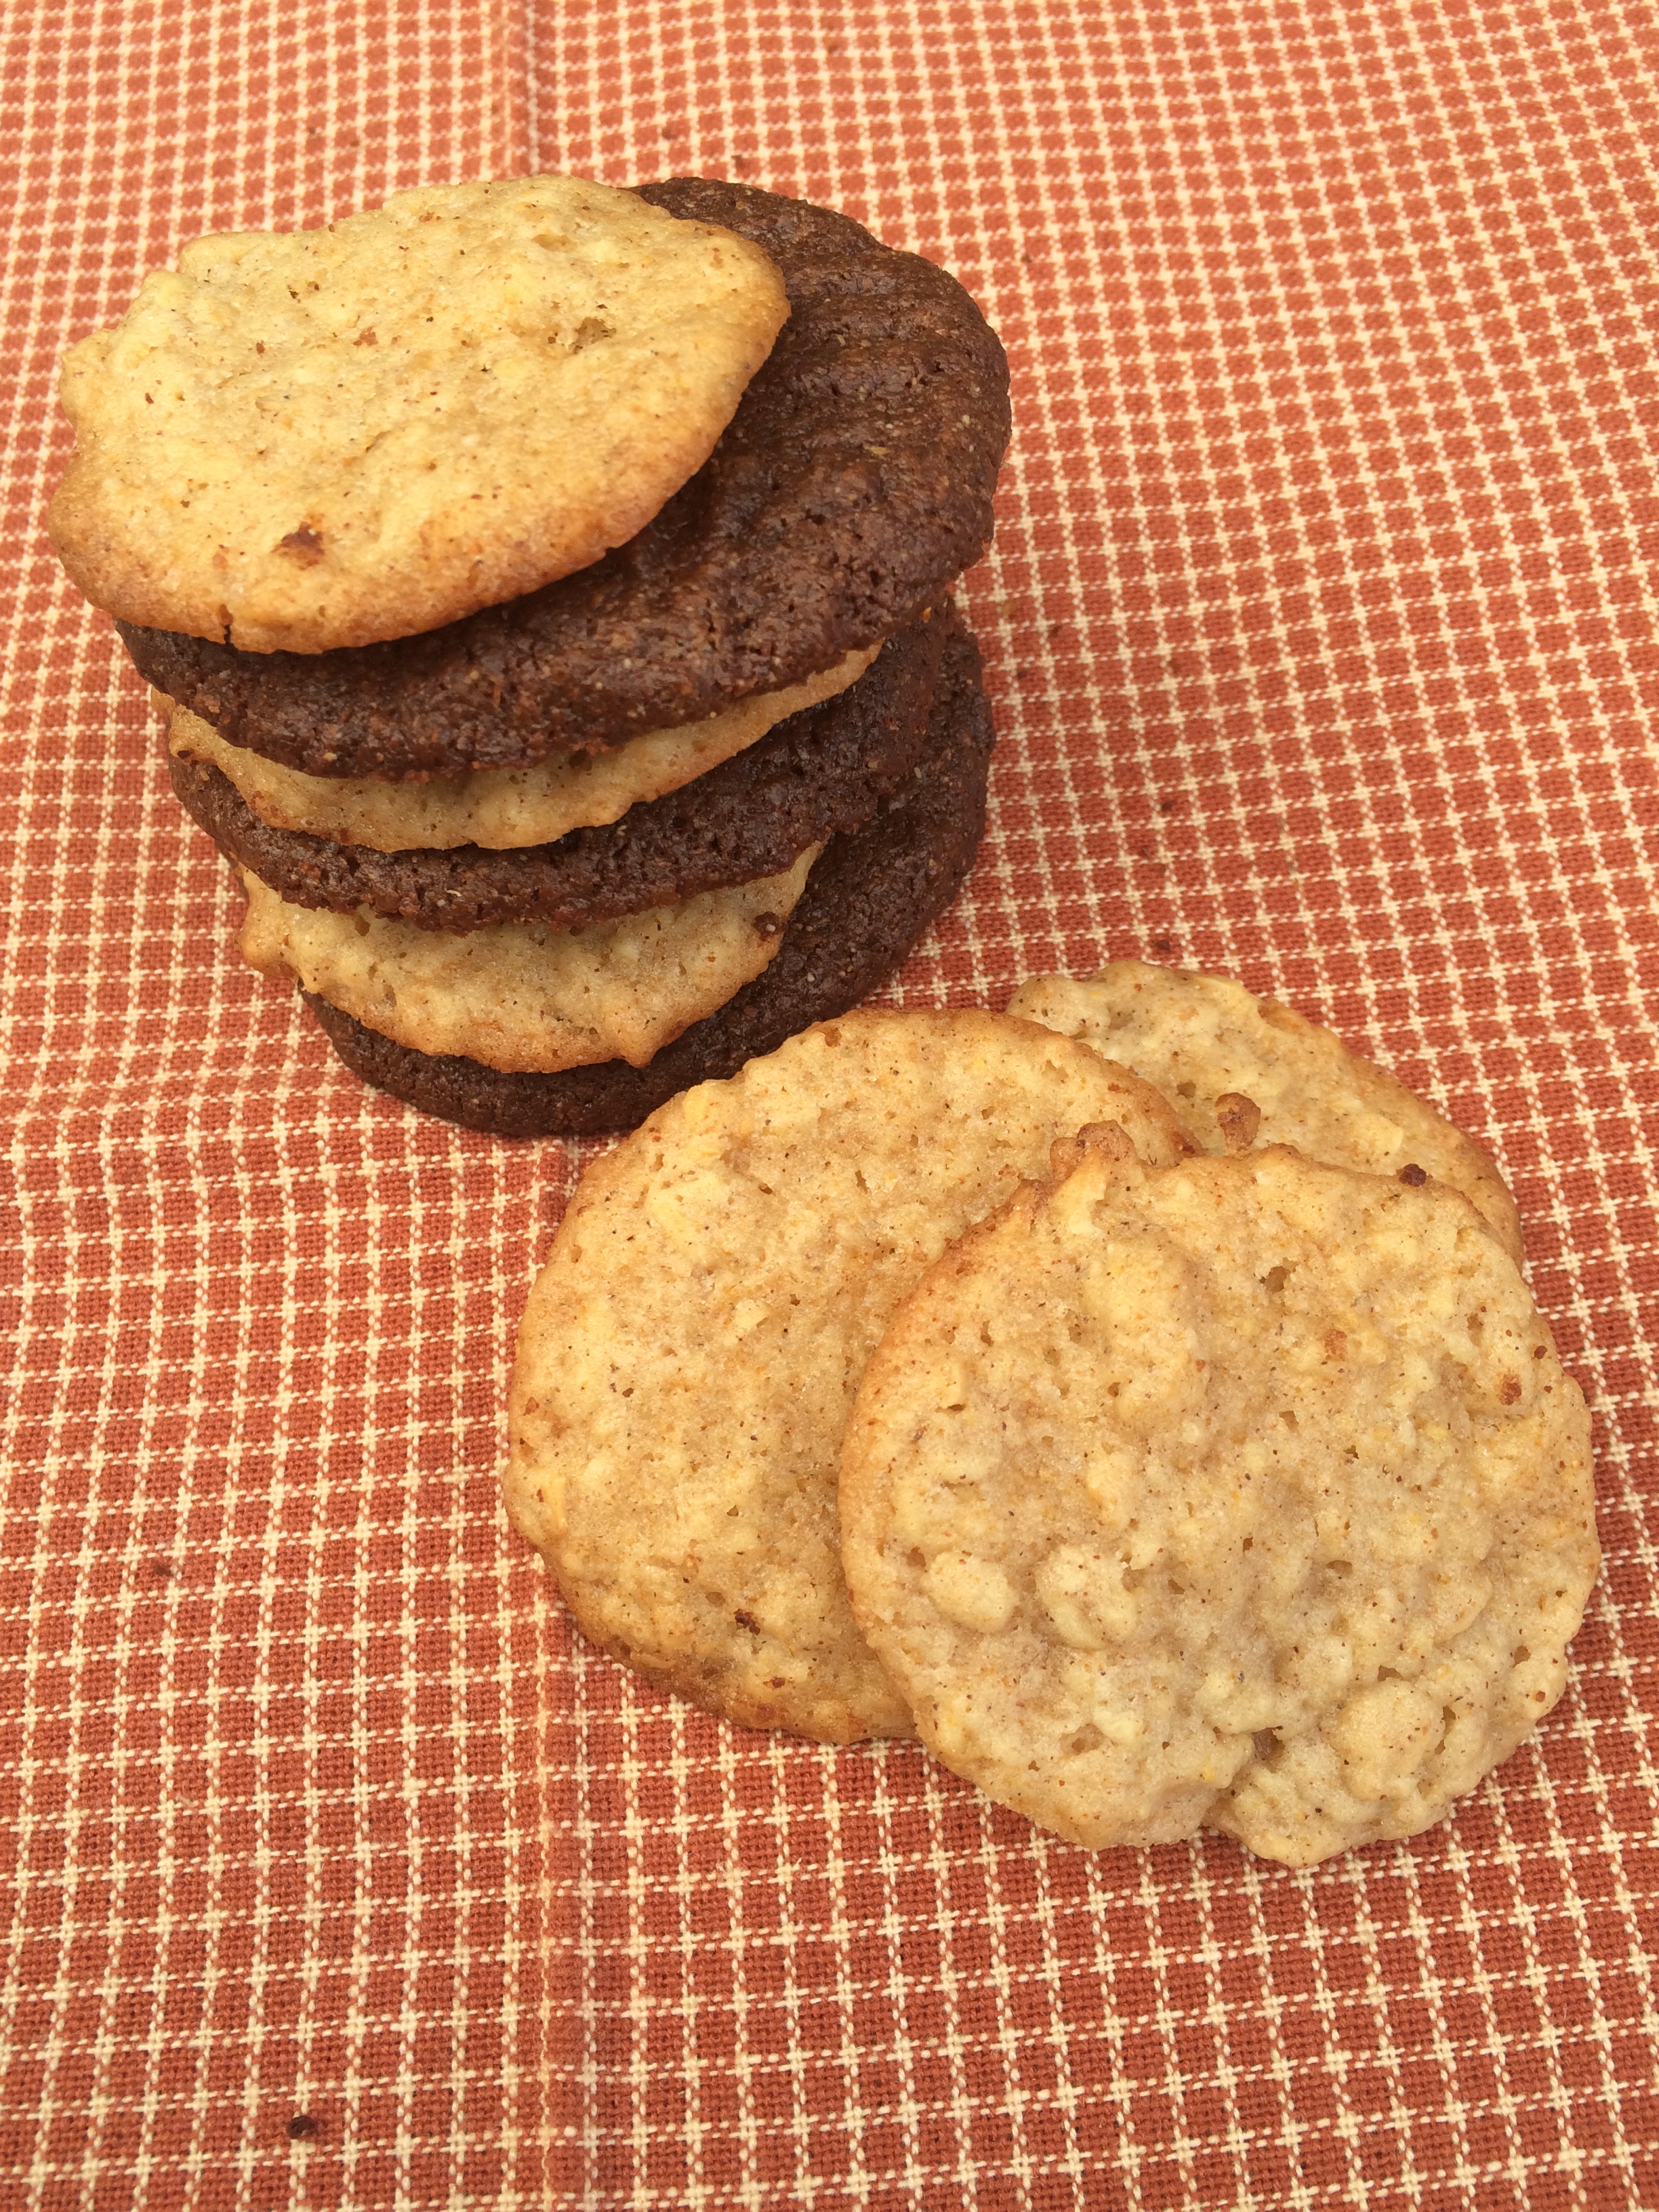
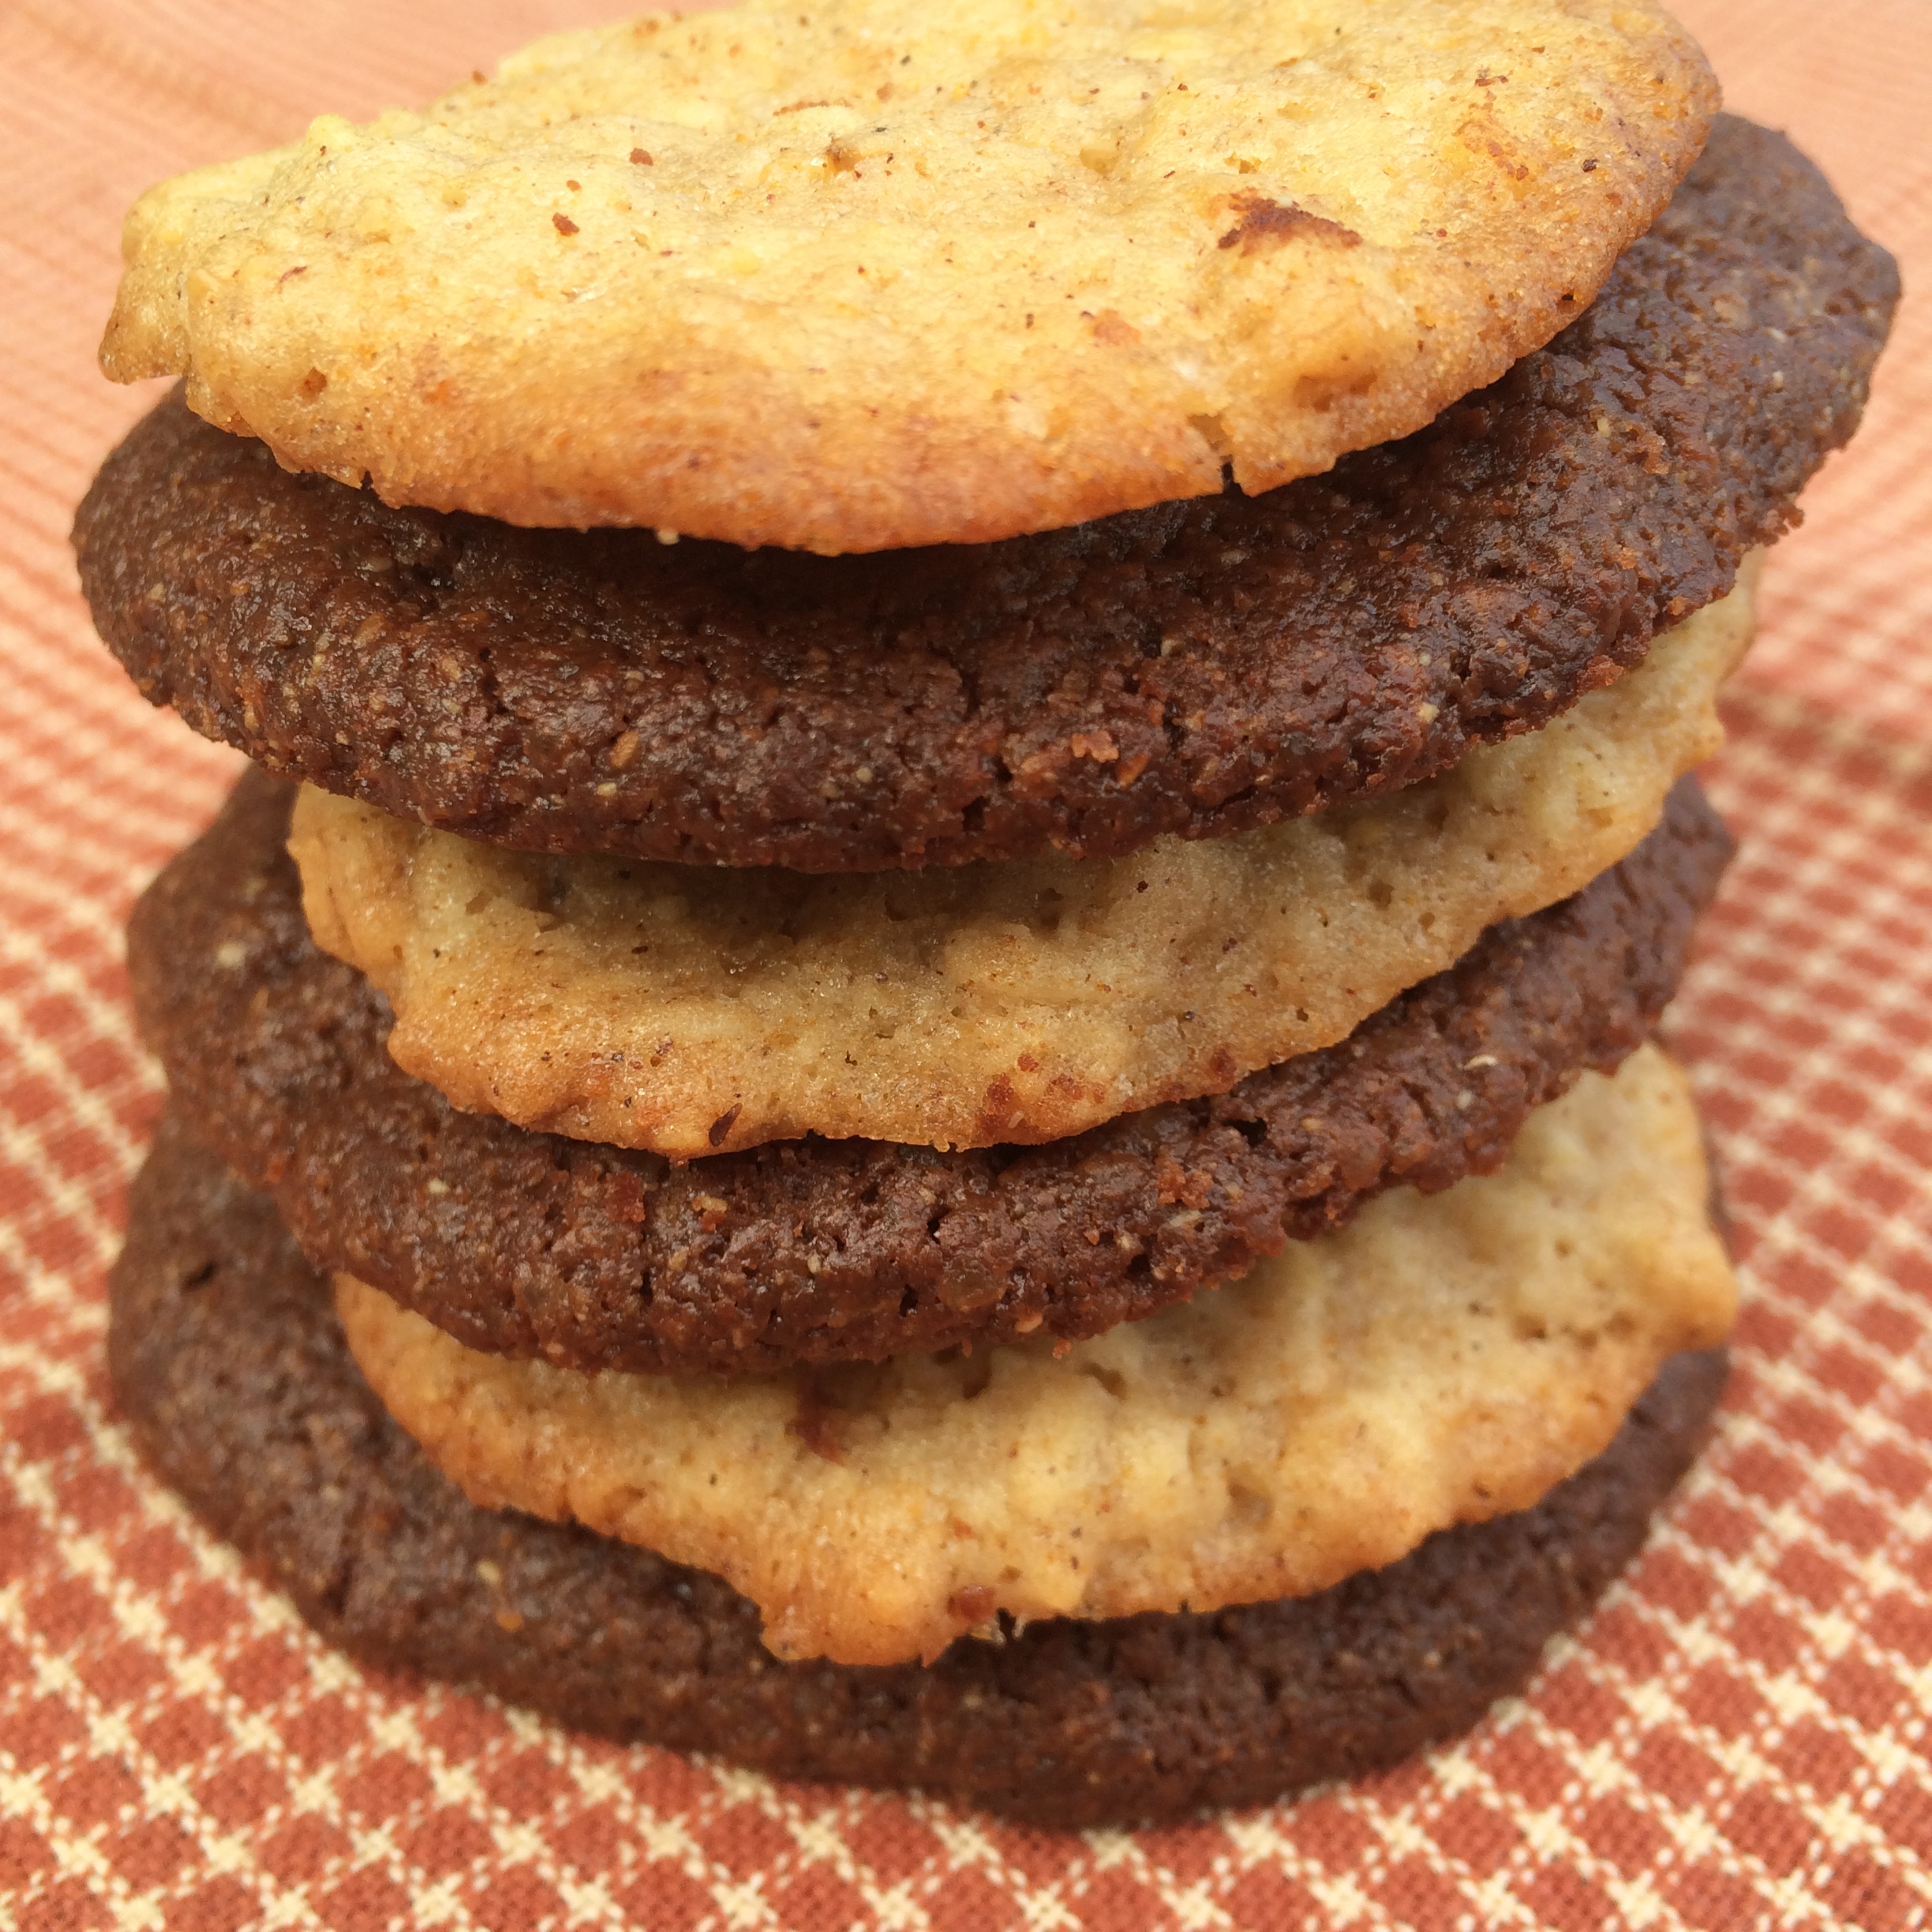
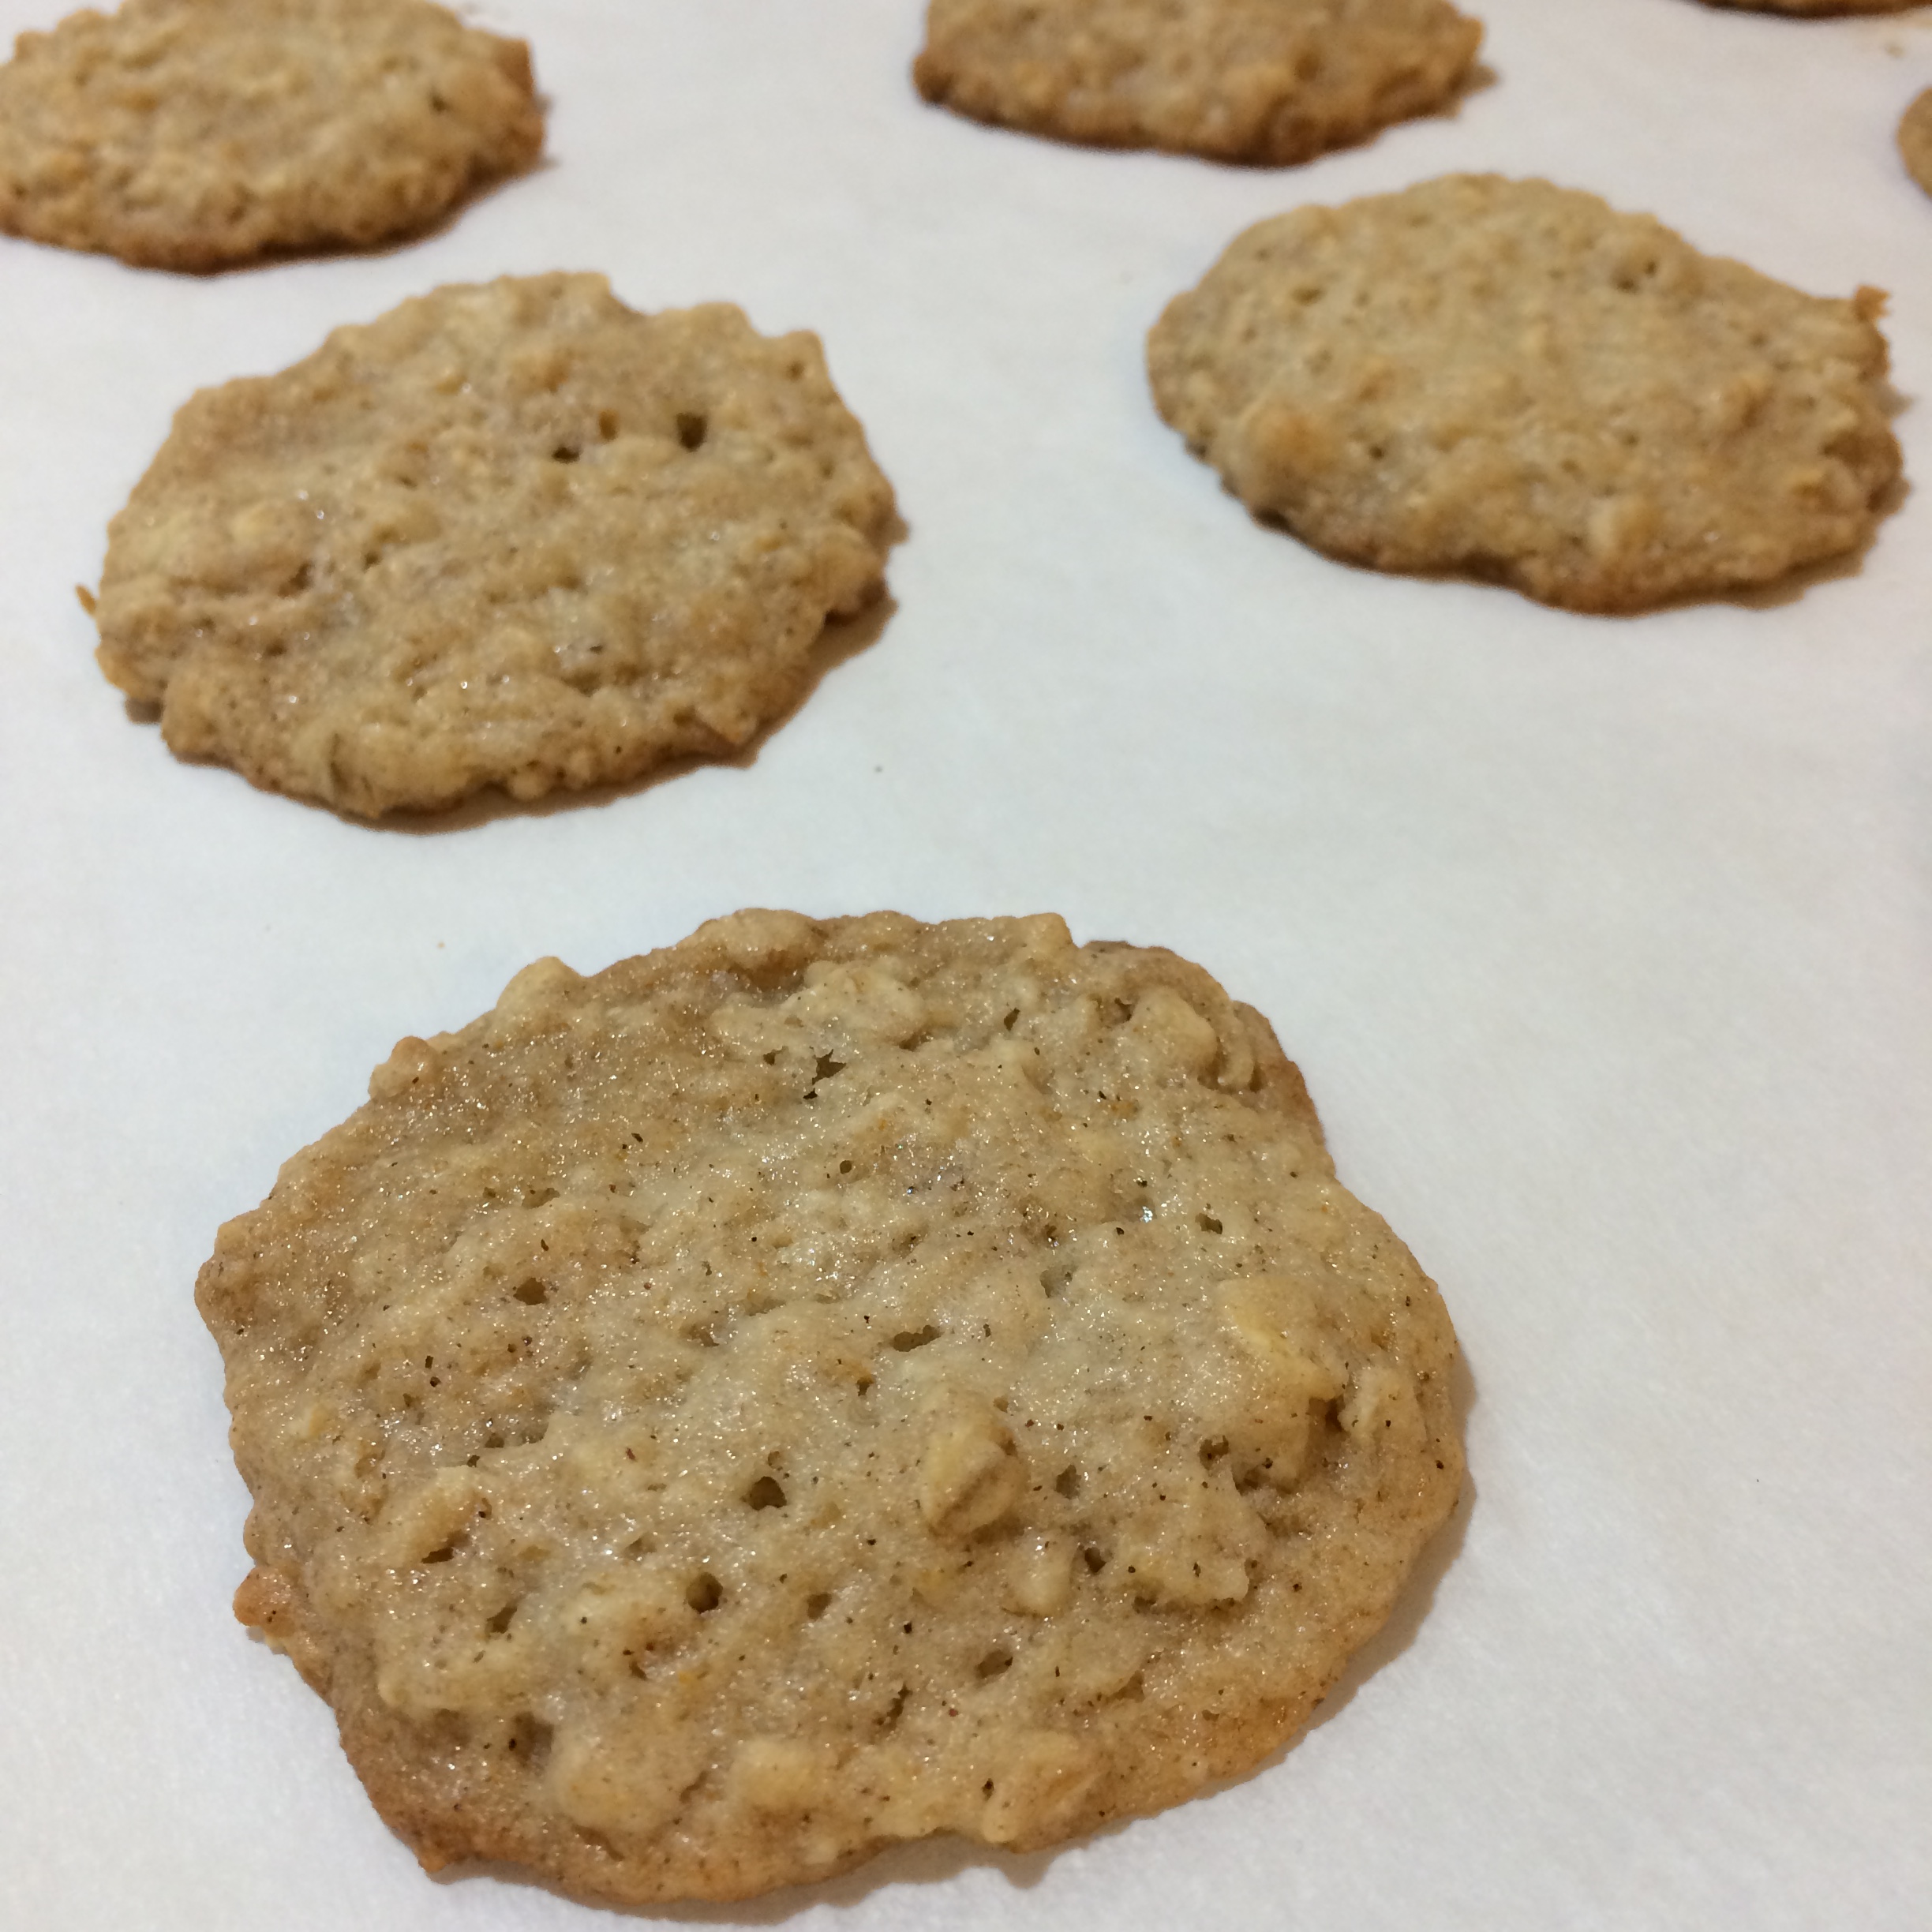
Oatmeal Lace Cookies:

  • 1/2 cup all-purpose flour (or gluten free flour)
  • 1/2 cup white sugar
  • 1/2 tsp cinnamon
  • 1/4 tsp baking powder
  • 1/2 cup oatmeal (use gluten free if desired)
  • 1/4 cup unsalted butter, melted
  • 2 tbsp almond milk
  • 2 tbsp honey
  • 1 tsp vanilla

Cookies (3)

Preheat oven to 375F

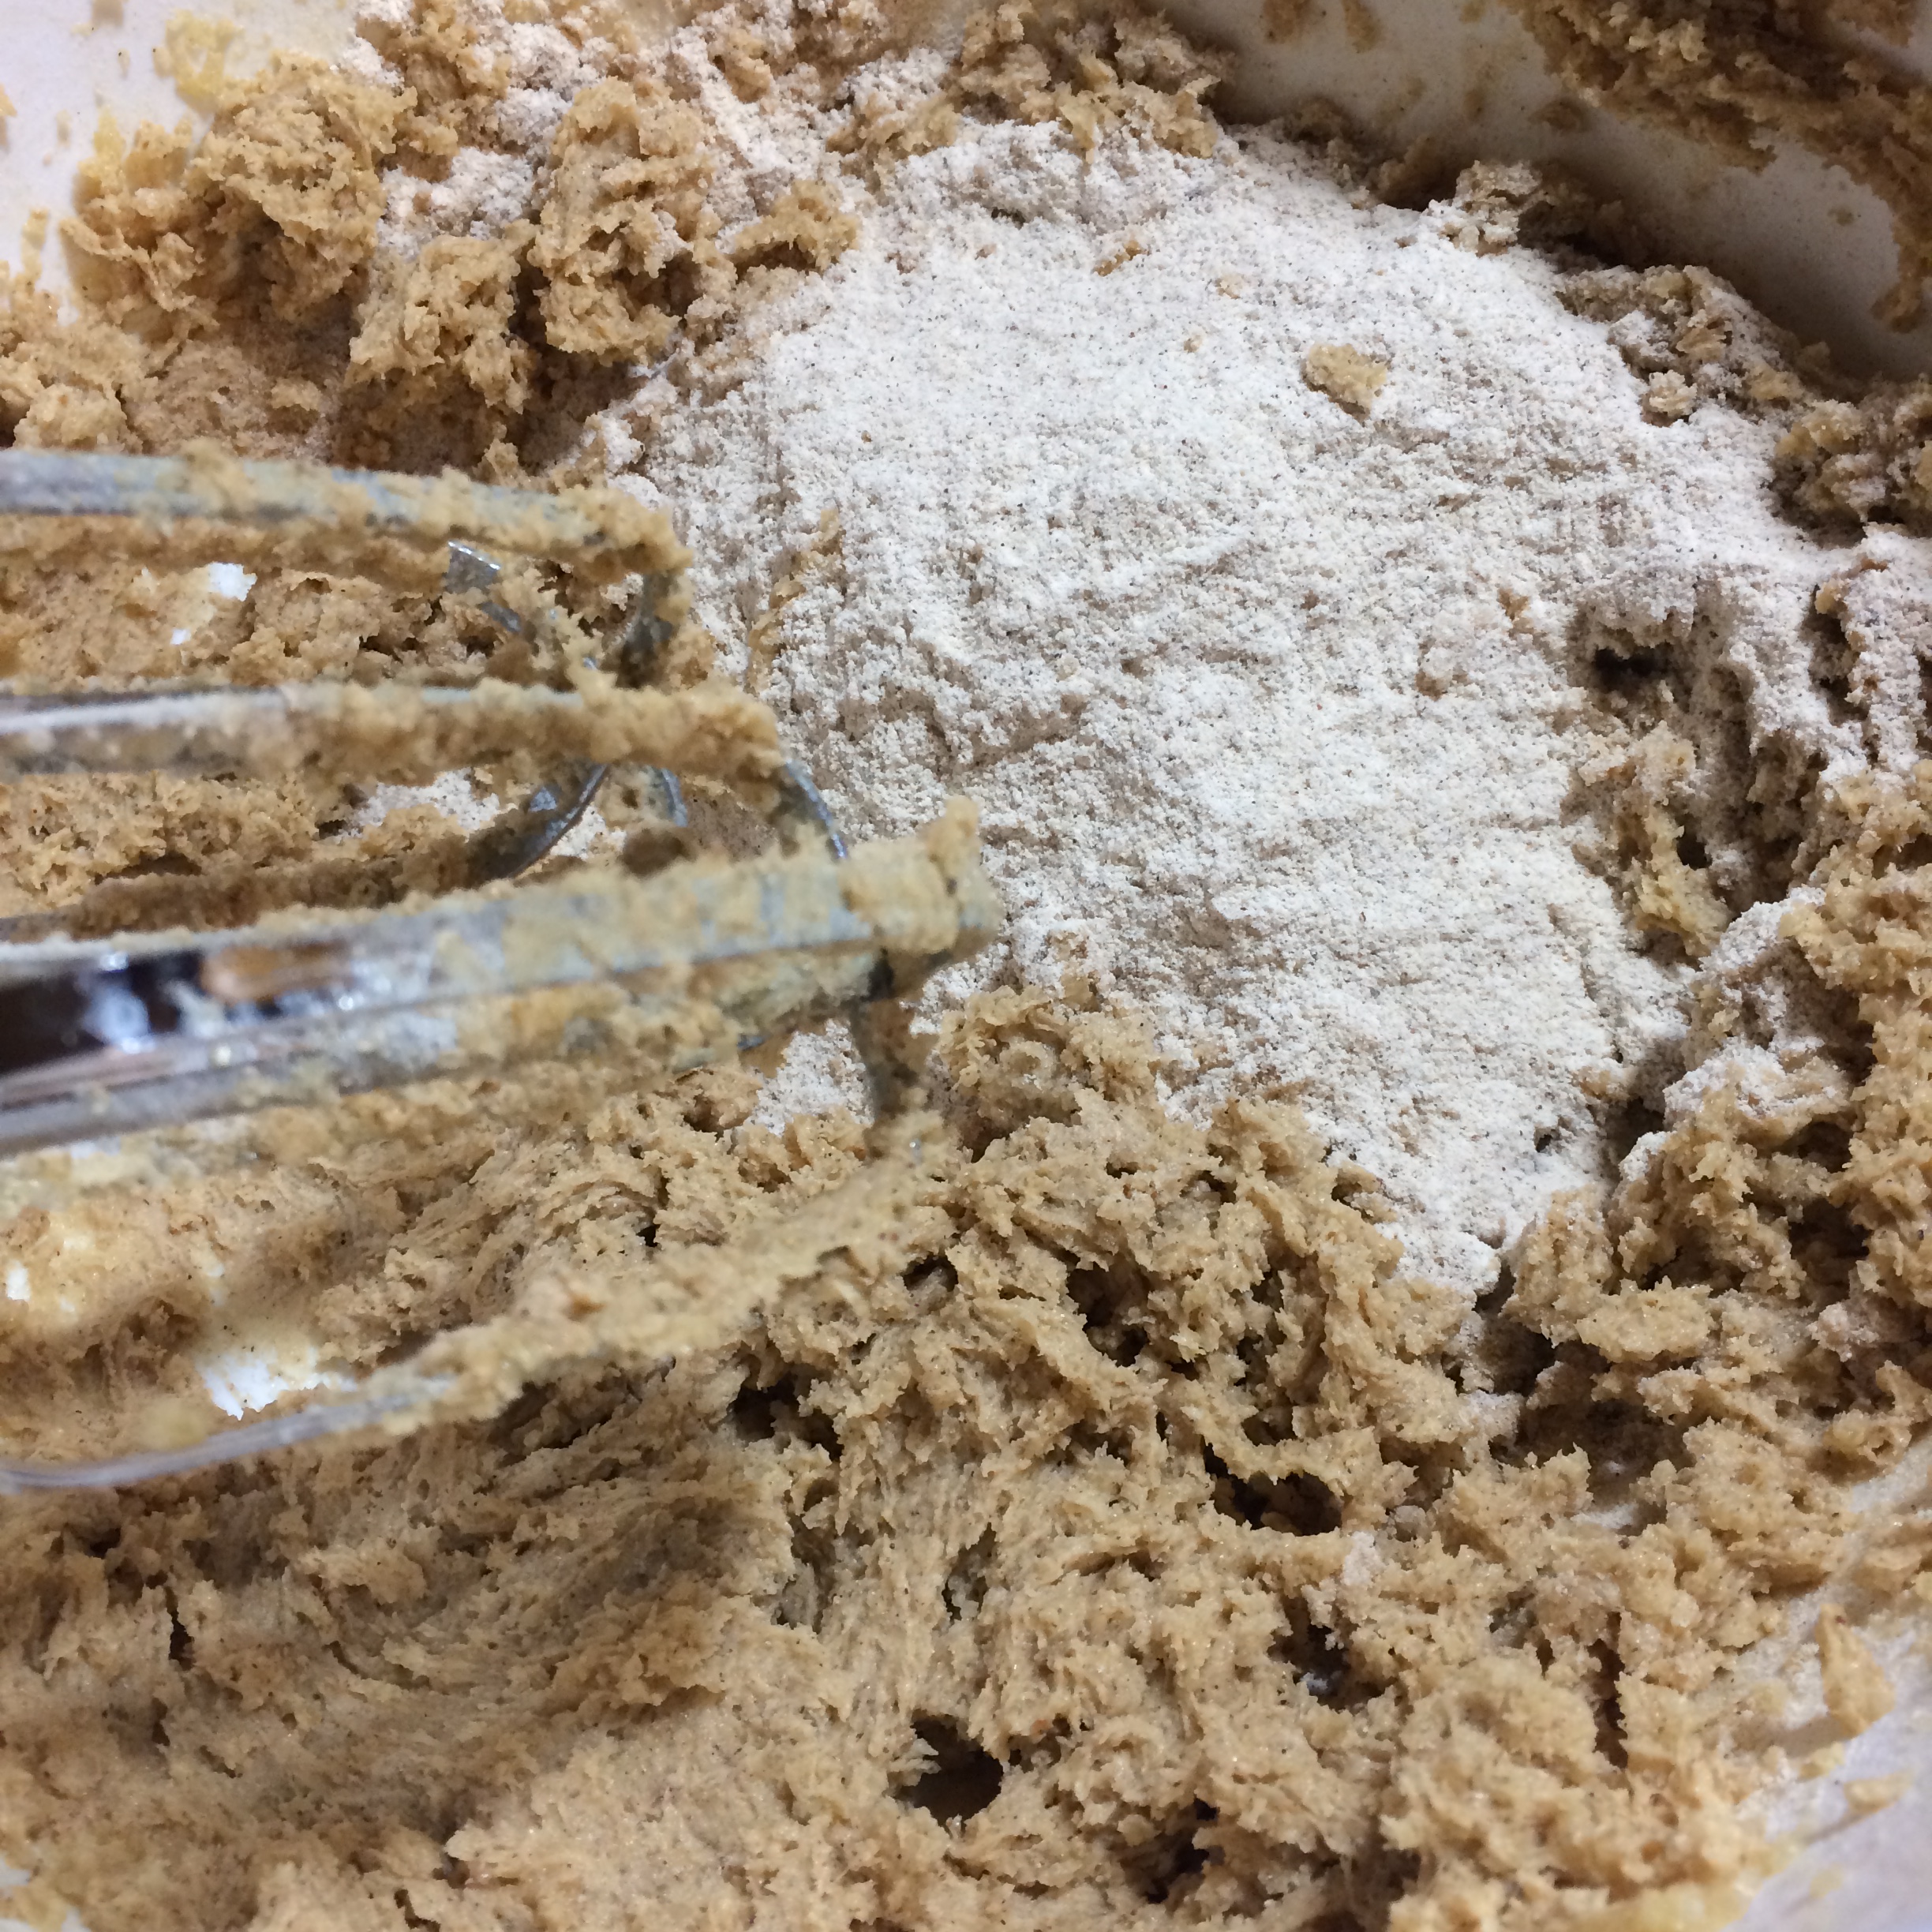
In a medium mixing bowl, combine flour through oatmeal and mix well. Set aside.

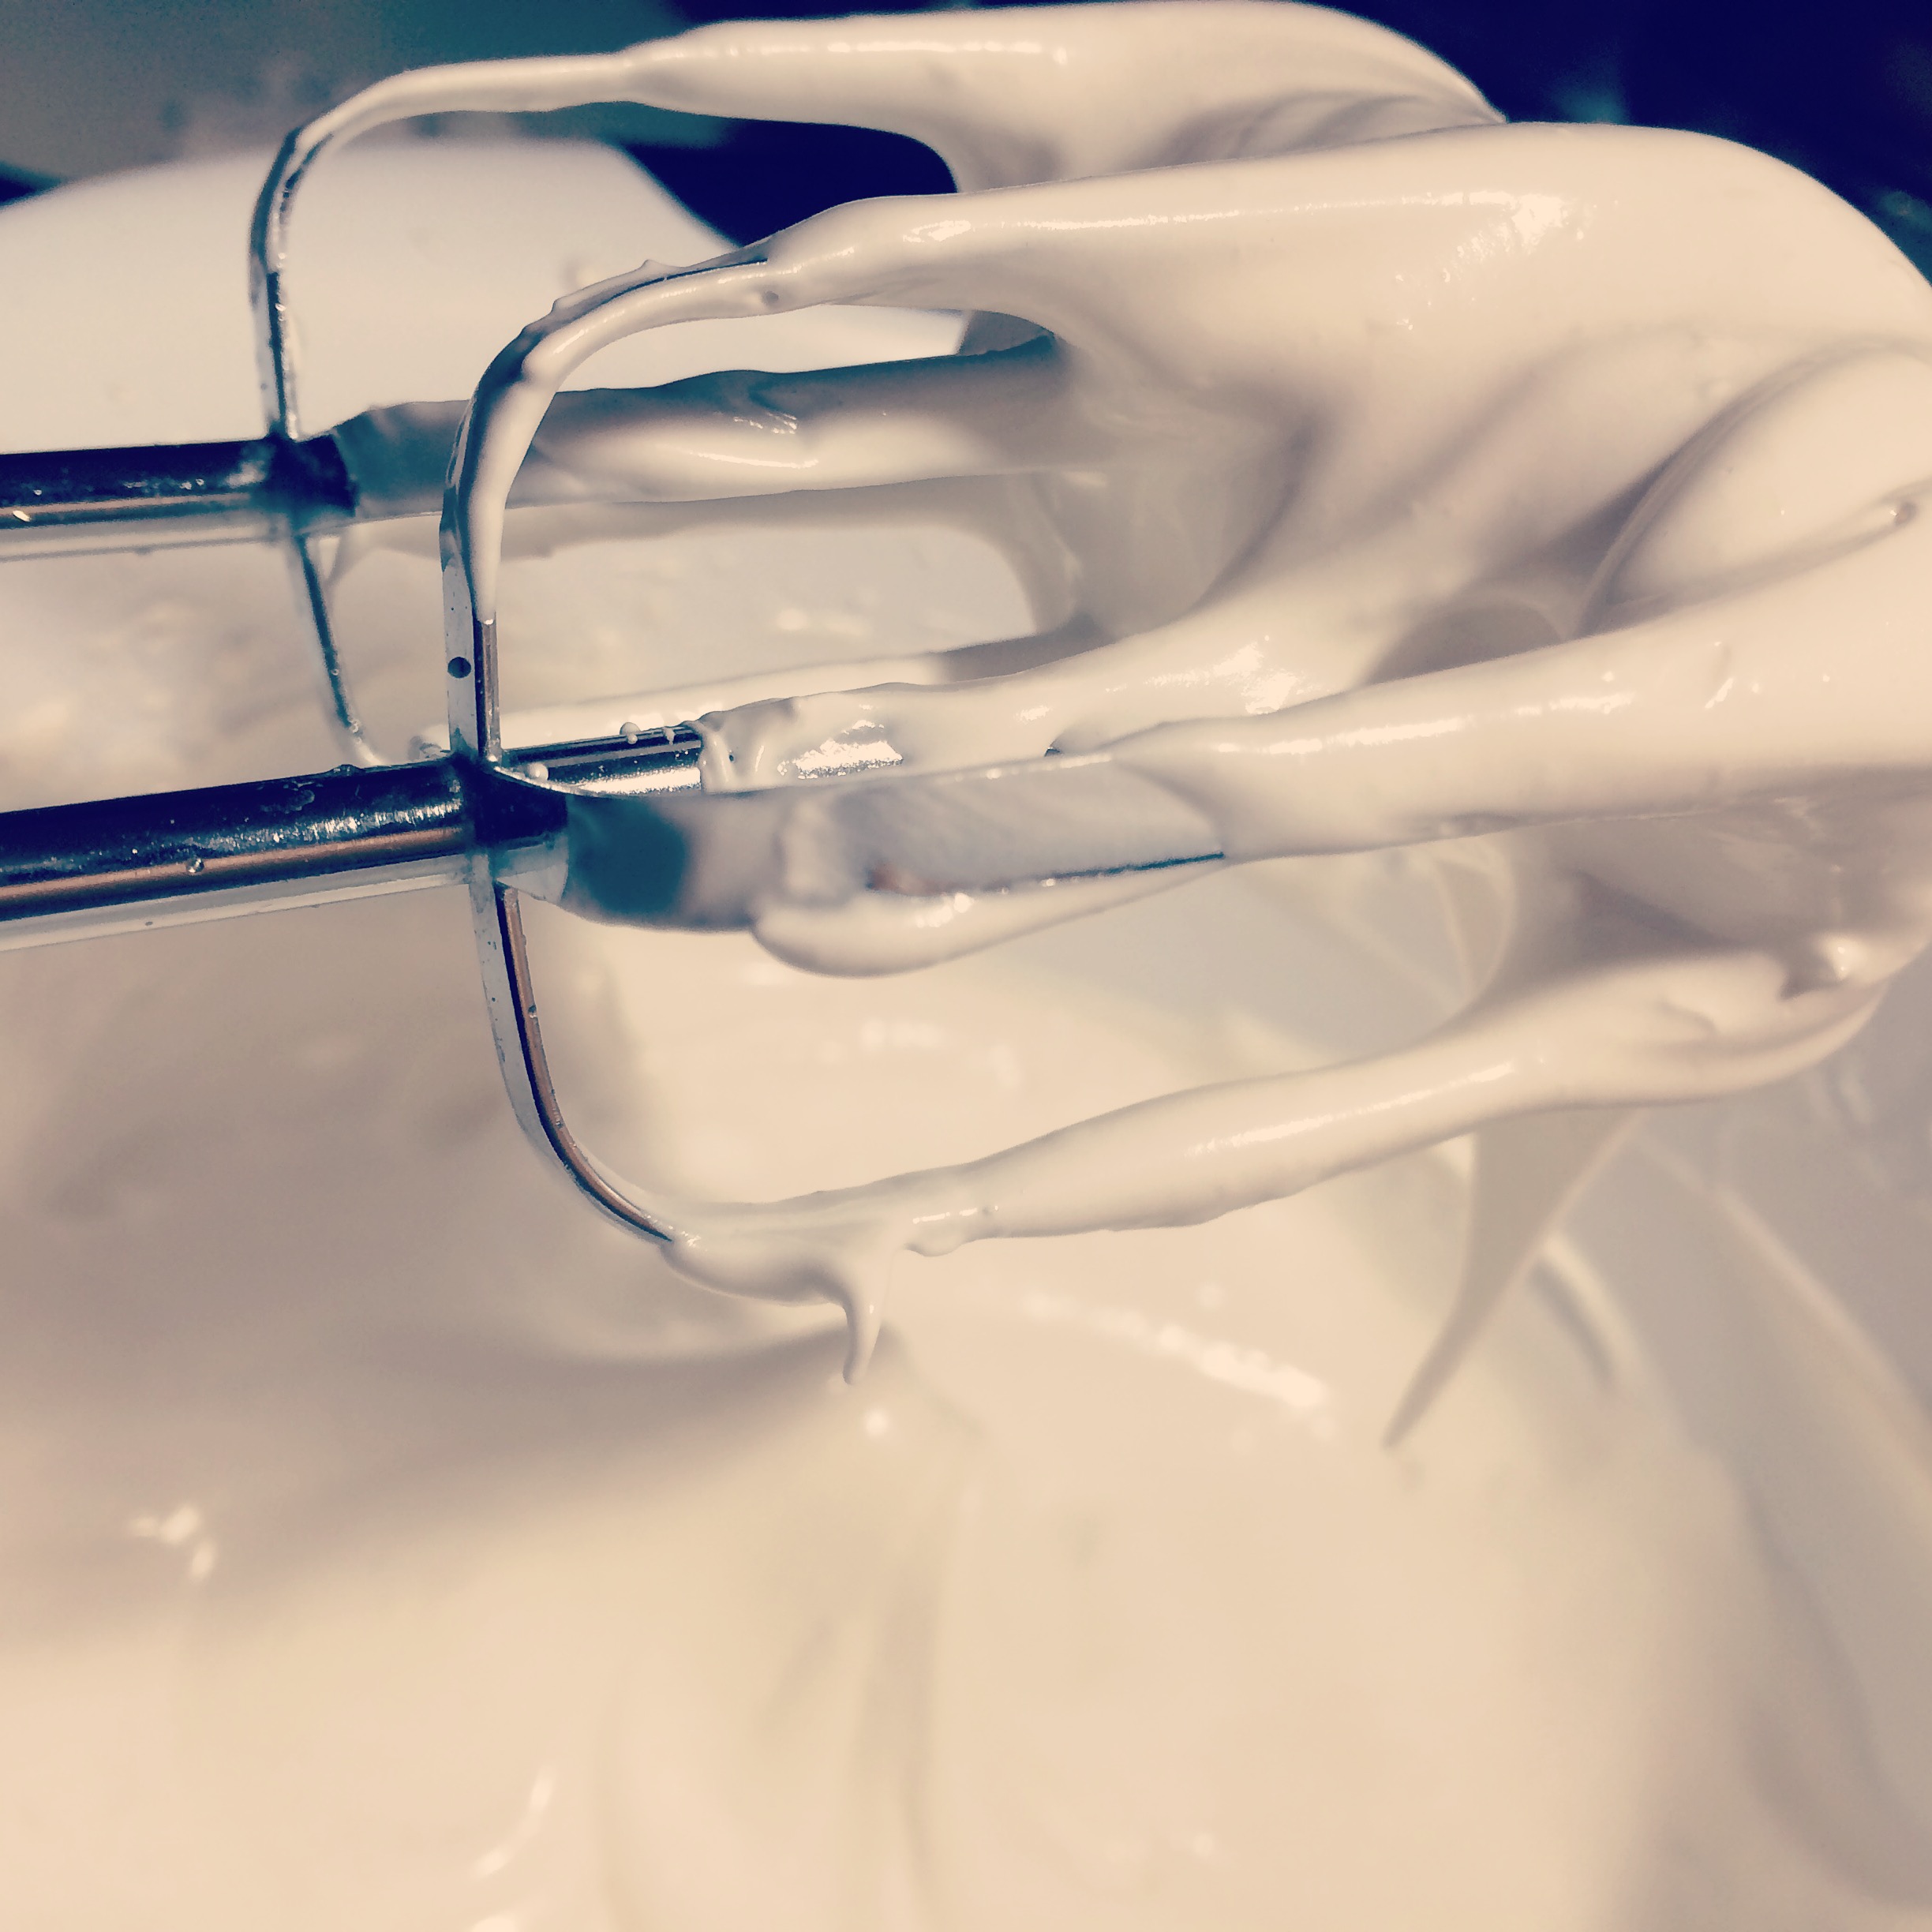
In another bowl, combine remaining ingredients and mix on low with a blender until smooth. Slowly add dry ingredients and continue mixing until well combined.

Drop tablespoon sized balls on a parchment-lined baking sheet, about 2 1/2 apart. These cookies will spread flat in the oven.

Bake for 7-9 minutes, removing when the edge is just golden. Let cool for a few minutes before transferring to a cooling rack or plate.

Cookies (9)

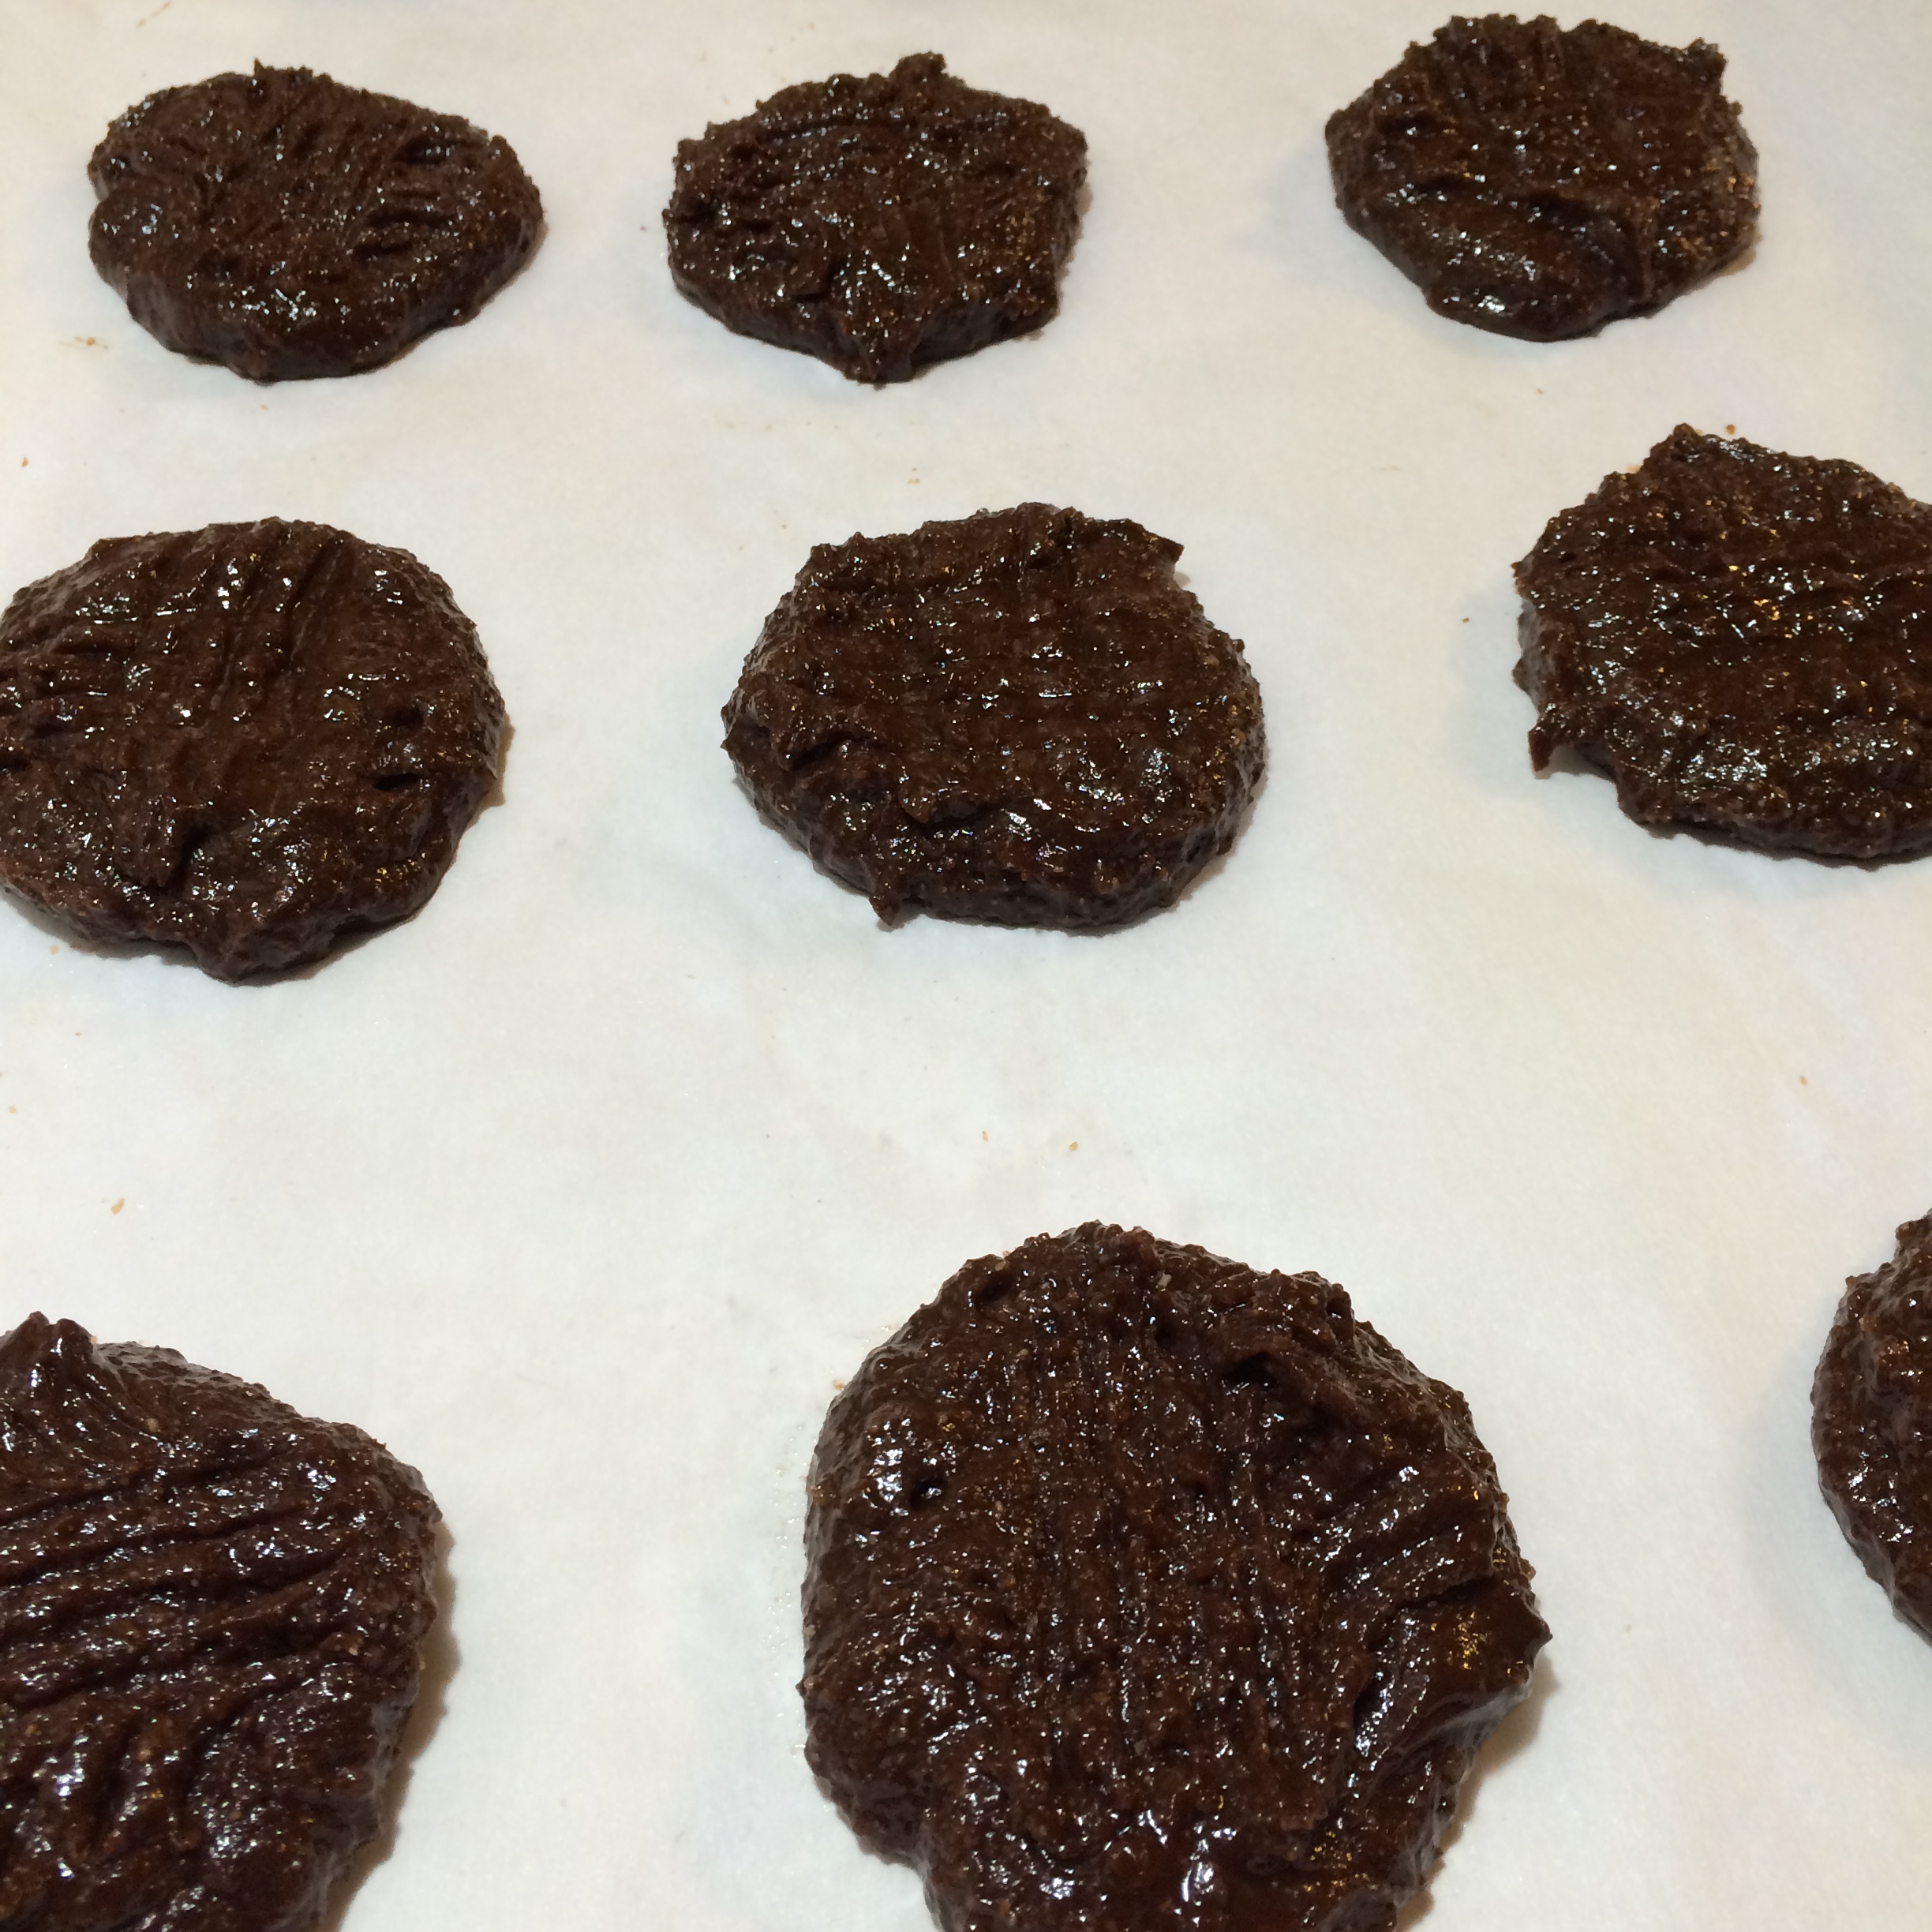
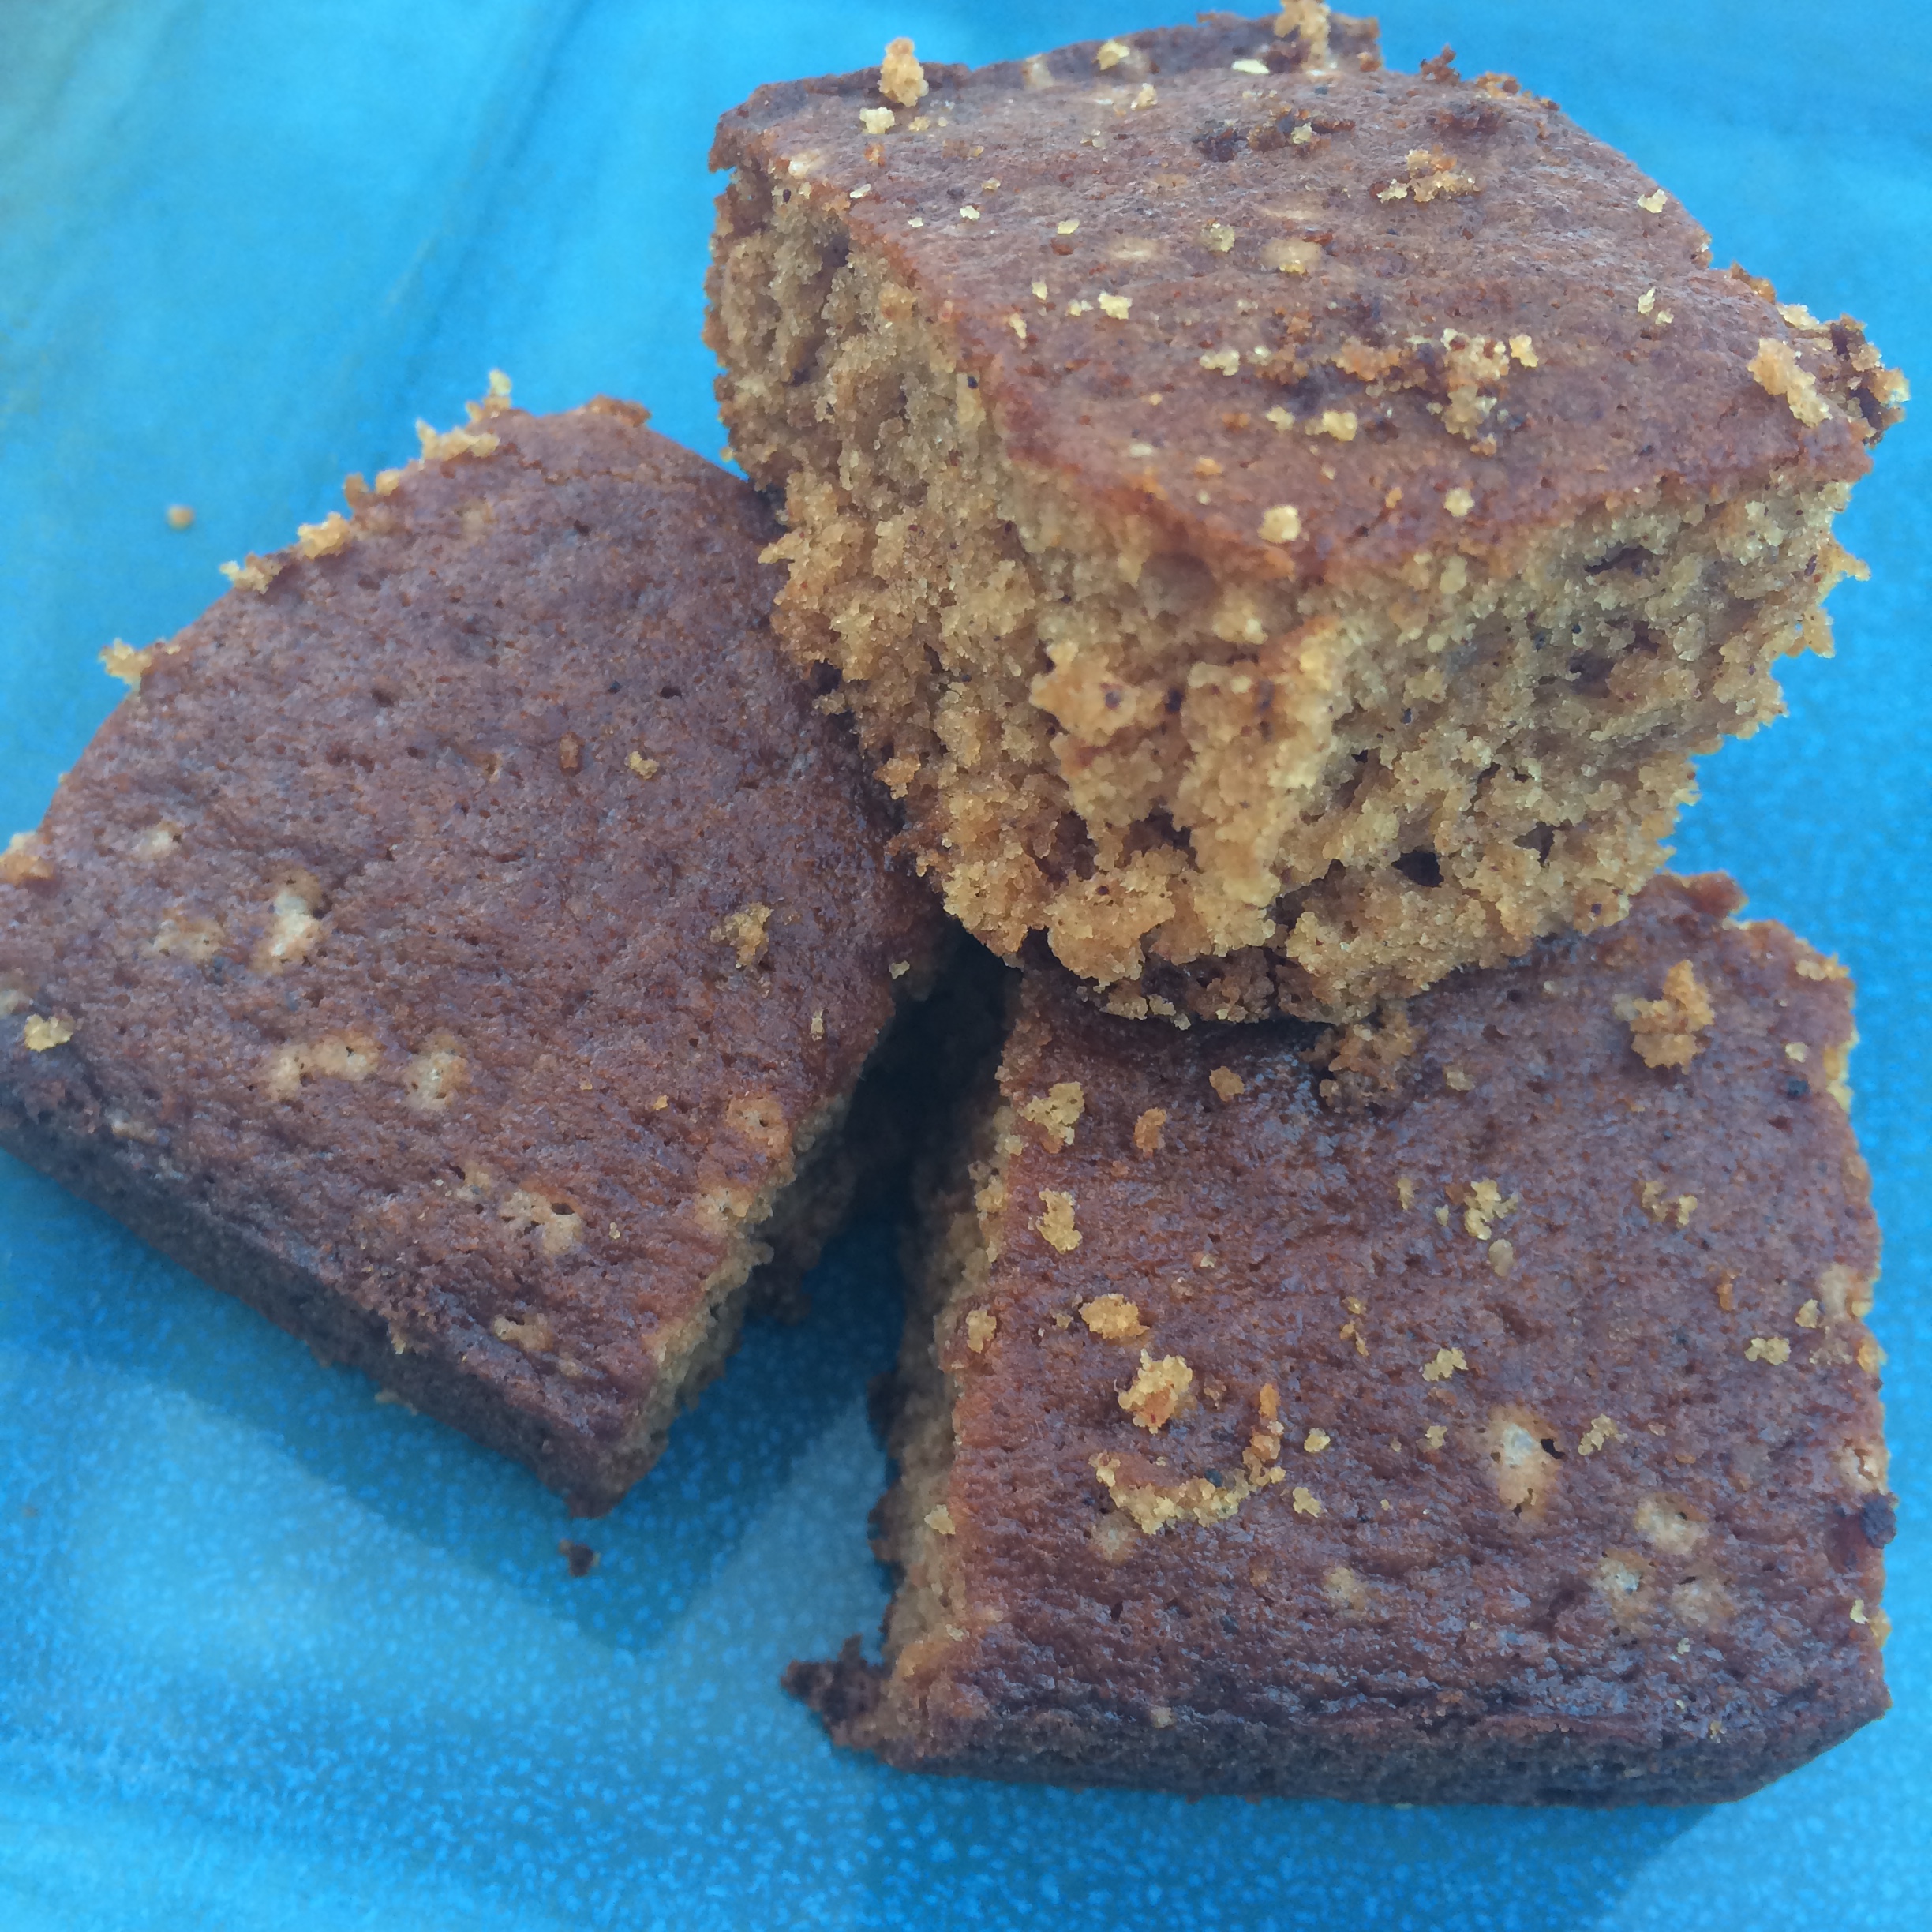
Nutella Almond Butter Cookies:

  • 1/2 cup Nutella
  • 1/2 cup almond butter
  • 1/3 cup turbinado sugar, such as Sugar in the Raw
  • 1 large egg
  • 1 tbsp unsweetened cocoa powder

Preheat oven to 350F

In a mixing bowl, mix together all ingredients with a blender until well combined.

Spoon a tablespoon of the mix onto a parchment-lined baking sheet. Use a fork to gently press diagonal lines across each cookie in an X.

Bake for 8-10 minutes or until edges are just golden. Let cool for a few minutes before transferring to a cooling rack or plate.

Cookies (8)     Cookies (11)     Cookies (7)

Advertisement

Buttermilk Red Pepper Tomato Soup

It’s football season. I’m not super into watching sports on TV. I like playing sports, but there’s a fine glaze that forms over my eyes whenever Mike switches the channel to a game of any kind. I’m still trying to figure out why there is Sunday night football, Monday night football AND Thursday night football. It feels like it’s always on. (Sorry football fans).

IMG_0964

But – BONUS! If I don’t care about what’s on TV, that leaves me plenty of time to cook. And that’s something I’m totally fine with. On a separate note, does the buttermilk face I made in my soup look slightly demonic to anyone else?

IMG_0963

What You Need:

  • 15 plum tomatoes, halved
  • 1 yellow onion, sliced
  • 2 large garlic cloves
  • 2 large red peppers, seeded and sliced into rough strips
  • 1/2 tsp chili powder
  • 1 tsp paprika
  • 1 cup buttermilk
  • 1/4 cup sliced chives
  • 1/4 cup freshly grated cheddar cheese

What You Do:

Preheat oven to 400F.

In a large baking dish, place the halved tomatoes, onions, red peppers and garlic, alternating layers to ensure they’re all combined.

Cover and bake for about 45 minutes or until the tomatoes are puckered with split skin, surrounded by juices.

Use a slotted spoon to remove the solid veggies and place in a food processor.

Blend the roasted veggies until smooth, and pour into a large bowl.

Add the spices and buttermilk and stir well. Reheat if necessary but it should be hot enough to serve.

Pro Tip: Dip a grilled cheese in it. Is this even a pro tip? Tomato soup and grilled cheese go together like chocolate and milk.

My other pro-tip is to save the leftover baked veggie juices, pour into a Tupperware and freeze. It’s vegetable broth for your next recipe. BOOM!

Homemade Marshmallow Fluff

I want to put on the record that this recipe was a complete accident. My friend and I recently traveled to a trail race on probably one of the nicest days we’ve had since summer. After the race, we stuck around with some of the other runners and happened to meet two really nice people who were leaving shortly to have dinner with their family.

IMG_0315

Before they left, they told us about something called boiled frosting. I was pretty intrigued – I’d never made my own frosting before (because I do not often bake) so it seemed like a good thing to try in preparation for the holidays.

IMG_0307

So, it’s super easy to make this recipe. But the big disclaimer is that it’s not exactly frosting. What it is, is marshmallow fluff. I’m not sure whether this recipe was a success or a failure. What I do know is that it would go absolutely fabulously on top of a peanut butter or chocolate cake.

If you happen to be a fan of fluff, like my husband, you’ll appreciate a recipe that delivers the same exact completely unique, cavity-inducing taste without the weird ingredients in the store-bought kind. And it’s super-simple to make – it literally takes 5 minutes.

What You Need: 

  • 1 cup white sugar
  • 1 unbeaten egg white
  • 1 teaspoon vanilla
  • 1/4 teaspoon cream of tartar
  • 1/2 cup boiling water

IMG_0308

What You Do:

Combine sugar through cream of tartar in a mixing bowl.

Add boiling water.

Using a hand mixer on high speed, blend for about 5 minutes or until the mixture becomes thick and creamy.

Give it a taste. Marshamallow fluff!

Whole Wheat Holiday Rum Spice Cake

Adapted from the Applesauce Spice Cake recipe on Epicurious

Every time the holidays roll around, I kind of assume I’m going to be amazing at life and have my gifts bought, wrapped and under the tree by December 15. Needless to say, that absolutely never, ever happens.

IMG_0330

And I was really scrambling this year when my equally lofty dreams of baking and cooking in preparation for our visits to various family over Thanksgiving took a backseat to other life events (normal things like work and sleeping – where do the days go?!?). That’s why I was thrilled to come across this fabulous recipe for a Thanksgiving dessert that is not a pie and didn’t require me to quit my job in order to prepare it. Mike and I were even able to go on an impromptu date at our favorite restaurant the night I baked this and I still got to bed at a reasonable hour (before midnight, just to clarify what constitutes “reasonable”).

IMG_0314

This recipe will be great to offer up for the Christmas holiday too, and I plan on making it again.

What was your favorite dessert for the Thanksgiving holiday? I’d love to hear some different treats you baked up for the celebration. Baking isn’t really my forte but I like doing it every once in awhile, especially when I get a really good idea that will taste great without traumatizing my body with sugar.

IMG_0328

What You Need: 

  • 1 1/4 cup plus 1 tablespoon whole wheat flour
  • 1 teaspoon baking soda
  • 2 teaspoons ground cinnamon
  • 1 teaspoon freshly grated nutmeg
  • 1/4 teaspoon ground cloves
  • 1/2 teaspoon ground ginger
  • 1/4 teaspoon salt
  • 1 cup turbinado sugar such as Sugar in the Raw
  • 1/2 cup unsalted butter, softened
  • 2 teaspoons light rum
  • 1 egg
  • 1 cup plus 1 tablespoon unsweetened applesauce

What You Do:

Preheat oven to 350F

In a small bowl, combine the flour, baking soda, spices, and salt.

IMG_0301

In a separate, larger bowl, combine the sugar, butter and rum. Beat with an electric mixer at medium-high speed until a nice batter has formed.

Add the egg and beat again at a medium-high speed until light and fluffy in texture. Reduce blender speed to low and slowly add the dry ingredients, continuing to blend until combined well.

Fold in applesauce and blend on low until combined.

In an 8-inch square non-stick baking dish, spread the batter evenly.

Bake for about 30 minutes or until lightly browned and a toothpick in the middle comes out clean.

Pro Tip: Make ahead by wrapping the cooled cake in plastic wrap and freezing until ready to use. It will thaw really quickly and can be warmed in the oven on low before serving. This is a great strategy if you’re traveling.

IMG_0329

No-Rise Whole Wheat Stout Bread

What’s better than bread? Bread made with beer, that’s what! AND bread that needs no rises!

Squash (4)

I love baking bread, don’t get me wrong. Spending an entire day carefully kneading and rising, all the while the house filling with the irresistible aromas of what can only be produced by the marriage of yeast, water and flour – it’s amazing. It’s the quintessential winter-in-New-England activity (I know, surprising that it’s not skiing or snowshoeing right?!? 🙂 )

But in a pinch, like when you decide to make soup for dinner at 4:30pm and have no bread to go along with it (and you MUST have bread with soup), there is just no time for kneading and rising.

I always thought rise-free bread was restricted to dessert breads like banana bread or lemon poppy-seed. But, thanks to my extremely talented friend and fellow blogger Leslie, those days are over.

WE WILL HAVE BREAD WITH OUR SOUP!

Ok. Anyways, Leslie made this bread with Smuttynose Porter beer – I made it with Sam Smith’s Oatmeal Stout – either way it’s delicious and so easy.

Squash (24)

What You Need:

  • 1 1/2 cups all-purpose flour
  • 1 1/2 cups whole wheat flour
  • 4 1/2 teaspoons baking powder
  • 1 1/2 teaspoons salt
  • 1/3 cup packed brown sugar, light or dark
  • 1 (12 fluid ounce) bottle of stout beer (like I said, porter is the original recipe ingredient so choose your poison)

What You Do:

Preheat oven to 350F

Combine all dry ingredients in a large mixing bowl.

Squash (26)

Slowly add the beer while stirring. A thick batter should form – this is more batter-like than bread dough-like so don’t be alarmed or feel like you need to add extra flour.

I used both hands to knead this around inside the mixing bowl, but it really just caused a huge mess. If you feel like sticking to a spoon, just do that.

Scrape the mixture into a well-greased loaf pan, and bake for about an hour. At around 45 minutes, insert a toothpick to see if it comes out clean. If not, give it another 10 minutes, checking to ensure it’s not burning at the top.

Pro Tip: If served with a full-bodied soup like squash soup or a creamy soup like clam chowder or cream of mushroom, dunk this sucker right in there. You won’t regret it.


Healthy and Easy Crustless Summer Vegetable Quiche

Quiche (2)

I have never been so determined to make a dinner from scratch as I was when I forged ahead and baked this quiche, even though I didn’t start it until 8pm on a work night, knowing full well it wouldn’t be ready to eat until at least 9:30pm; and that’s if everything went smoothly. (It did).

Perhaps a saner person would have looked at the clock and resigned themselves to leftover Annie’s Mac and Cheese, or even a fresh salad, but I would not give up the dream of quiche. It came out of the oven so late that Mike didn’t even eat it (he had already eaten the mac and cheese and a fresh salad with toast on the side, like a smart thinker).

Quiche (5)

But I made sure to ooo and ahhh over this quiche as I helped myself to not one but THREE (small) servings, trying to savor it as the clocked ticked rapidly toward 10pm and my bedtime loomed near. I try not to eat close to going to bed, but quiche night was an exception.

It’s good. Good enough to wait well into the night for, and good enough to risk going to bed with a quiche hangover. I also need to note that the reason it didn’t maintain it’s pie-slice shape in the photos was because I insisted on eating it within a few seconds of taking it out of the oven. Let this thing cool – it’s worth it!

What You Need:

Quiche (6)

  • 1/2 of a large yellow onion, roughly chopped
  • 2 small garlic cloves, finely chopped
  • 1/2 of a green bell pepper, chopped
  • 1/2 jalapeno or habenero pepper, chopped
  • 1/4 cup chives, chopped
  • 1 1/2 cup broccoli florets
  • 1/2 cup very finely chopped kale (spinach would work well too!)
  • 3 eggs, lightly beaten
  • 1 cup almond milk (or any other milk of your choosing)
  • 1 cup shredded muenster cheese
  • 1 cup shredded cheddar cheese
  • 2 tsp dijon mustard
  • 2 tsp fresh black pepper
  • 1 tsp salt
  • 6-8 very thin slices of zucchini
  • 6-8 very thin slices of tomato

Quiche (4)What You Do:

Preheat your oven to 375F.

In a lightly oiled medium skillet, heat the garlic and onion on medium heat until the onion becomes soft and translucent.

Add the jalapeno or habenero, and bell pepper, and chives, and stir.

Add the broccoli florets and stir well to combine with the onion mixture. Add a tablespoon of water if necessary to keep the pan moist, and cover, cooking on low-medium until the broccoli has reduced, about 7 minutes.

Quiche (3)

While the broccoli mixture is cooking up, grab a small mixing bowl and combine the eggs, milk, cheeses, mustard, black pepper and salt, stirring well.

Set aside.

Before taking the broccoli mixture off the heat, add the kale and stir well.

Pack the broccoli mixture into a well-greased pie dish.

Pour the egg mixture over the broccoli filling, using a fork to gently nudge the broccoli around to let the egg mixture seep through to the sides and bottom of the pie dish. (There should still be a healthy amount of egg mixture over the top of the dish.)

In any pattern you like, place the zucchini and tomato slices around the top of the quiche. Make a happy face if you want!

Place the pie dish in the oven for about 40 minutes (check after 20-30 though – you want the egg cooked through and the top to be slightly browned and crispy but not burned, obviously).

Let cool for a few minutes before delving in, if for no other reason than to keep it in pie-slice shape 🙂

Enjoy!

Pro Tip: Have it for breakfast! Experiment with different cheeses too – I think Parmesan or feta would be absolutely delish.

Quiche (1)

Healthy Black Bean Power Brownies

I have an obsession, along with 103,000 other people (and that’s just on Facebook!) with Chocolate Covered Katie and her healthy dessert blog. This obsession is borne from a life-long addiction to desserts and internal struggle between cravings and being healthy. Sure, I exercise multiple times a week. I run long distances and get up early to squeeze in a workout before heading to the office.

But when I delve into a pint of Ben and Jerry’s at night following a heaping plate of dinner food, I hear that nagging voice in my head letting me know I’m probably undoing all the good I had done earlier.

The solution to this battle between desserts and being healthy is to combine the two. Healthy desserts. And that is exactly what Chocolate Covered Katie does on her blog. My latest indulgence is brought to you today in the form of chocolately, ooey-gooey brownies made with – wait for it – black beans.

Brownie 2

They’re only slightly tweaked from this recipe on Chocolate Covered Katie – she’s basically a genius so I can’t really improve upon what she’s done here. I omitted some sugar and added flax seeds and a couple options for the flour mix. No biggie.

Enjoy!

Preheat oven to 350 F

What You Need:

  • One 15-oz can black beans, drained and rinsed
  • 2 tbsp cocoa powder
  • 1/2 cup quick oats OR whole wheat flour OR gluten-free flour OR cooked quinoa
  • 1/4 tsp salt
  • 1/3 cup pure maple syrup or honey
  • 1/4 cup coconut oil
  • 2 tbsp whole flax seeds (chia seeds or hemp seeds or any other seeds you like work here too)
  • 2 tsp pure vanilla extract
  • 1/2 tsp baking powder
  • 3/4 cup chocolate chips

Brownie


What You Do:

Put everything into a food processor EXCEPT the chocolate chips and flax seeds. Blend well, stir in the chips and seeds, and then pour the batter out into an 8X8 brownie pan.

Bake for about 18-20 minutes. Let cool well for about 10-15 minutes before serving.


Pro Tip: Substitute the oil for applesauce maybe? I didn’t try it this way but it’s worked for brownies and cookies I’ve made in the past. If you do this, let me know how it goes!

Brownie 3

HEALTHY Chocolate Chip Cookie Pie with Quinoa!

I know, yes. If you’re anything like me you just went through about four stages of emotion in order to cope with the news of a healthy chocolate chip cookie pie:

Thrill, followed by Immediate Doubt, then Guarded Hopefulness, and finally a decision to say screw it and eat it regardless of whether it’s actually healthy (it is) because it looks super tasty and involves chocolate.

photo (2)

Well, don’t worry. Thrill was the right reaction (always trust your instincts!). This cookie pie not only is healthy, but it’s gluten free AND one of the ingredients is quinoa – and I always feel like I’m doing the right thing in life whenever I eat quinoa.

One small disclaimer is that it will resemble cookie slop if you try to eat it before it has a chance to spend a few hours in the fridge. But I say slop in the nicest way possible and with a little *nudge nudge* *wink wink* to let you know it’s perfectly fine to eat it that way. It improves the taste too, I think, if you’re hunched over the dish shoveling it into your mouth with your bare hands.

…Not that I would know.

Adapted from Chocolate Covered Katie’s Healthy Deep Dish Cookie Pie.

Preheat Oven to 350F

What You Need:

  • 2 cans garbanzo beans (chickpeas) drained and rinsed
  • 1 cup cooked quinoa
  • 1/4 cup unsweetened applesauce
  • 3 tbsp canola oil
  • 2 tsp pure vanilla extract
  • 1/2 tsp baking soda
  • 2 tsp baking powder
  • 1/2 tsp salt
  • 3/4 cup brown sugar
  • 3/4 cup white sugar (This pie is fairly sweet so this can be adjusted down to 1/2 cup for less sweetness)
  • 1 cup chocolate chips

Directions:

Blend all ingredients except for chocolate chips in a food processor until smooth and cookie dough-like. Mix in chocolate chips. Pour batter into a well-greased pie dish or brownie pan for a square shaped pie.

Bake at 350F for 35-40 minutes or until crust begins to brown. Let cool for 10-15 minutes before eating. Refrigerate to really firm up the cookie pie.